
I have been preoccupied with loom design in the past couple of days. There are things about a traditional inkle loom that just bug me. Remember, I am fine thread weaver by nature! To me regular tapestry looks like burlap. My problem has been that inkle looms are so much overkill (too much wood, too bulky) if you want to weave pretty little hair ribbons. I also hated the fact that you had to thread everything on the loom before you got started (one thread out of place and you had to start all over) and the fact that so much of the design was warp dependent (too much commitment.)
I have been playing what if: I want to weave lengths of ribbon that could be longer than a traditional inkle loom permits (enough to trim a dress), what if I wanted to change colors midstream? Can I handle supplemental warp(s) in such a way that I do not have tension problems over time. What if I wanted to handle 100 threads not 36? What are the cheapest materials I can find that do not require the services of a woodworker. (I don’t have my own private carpenter).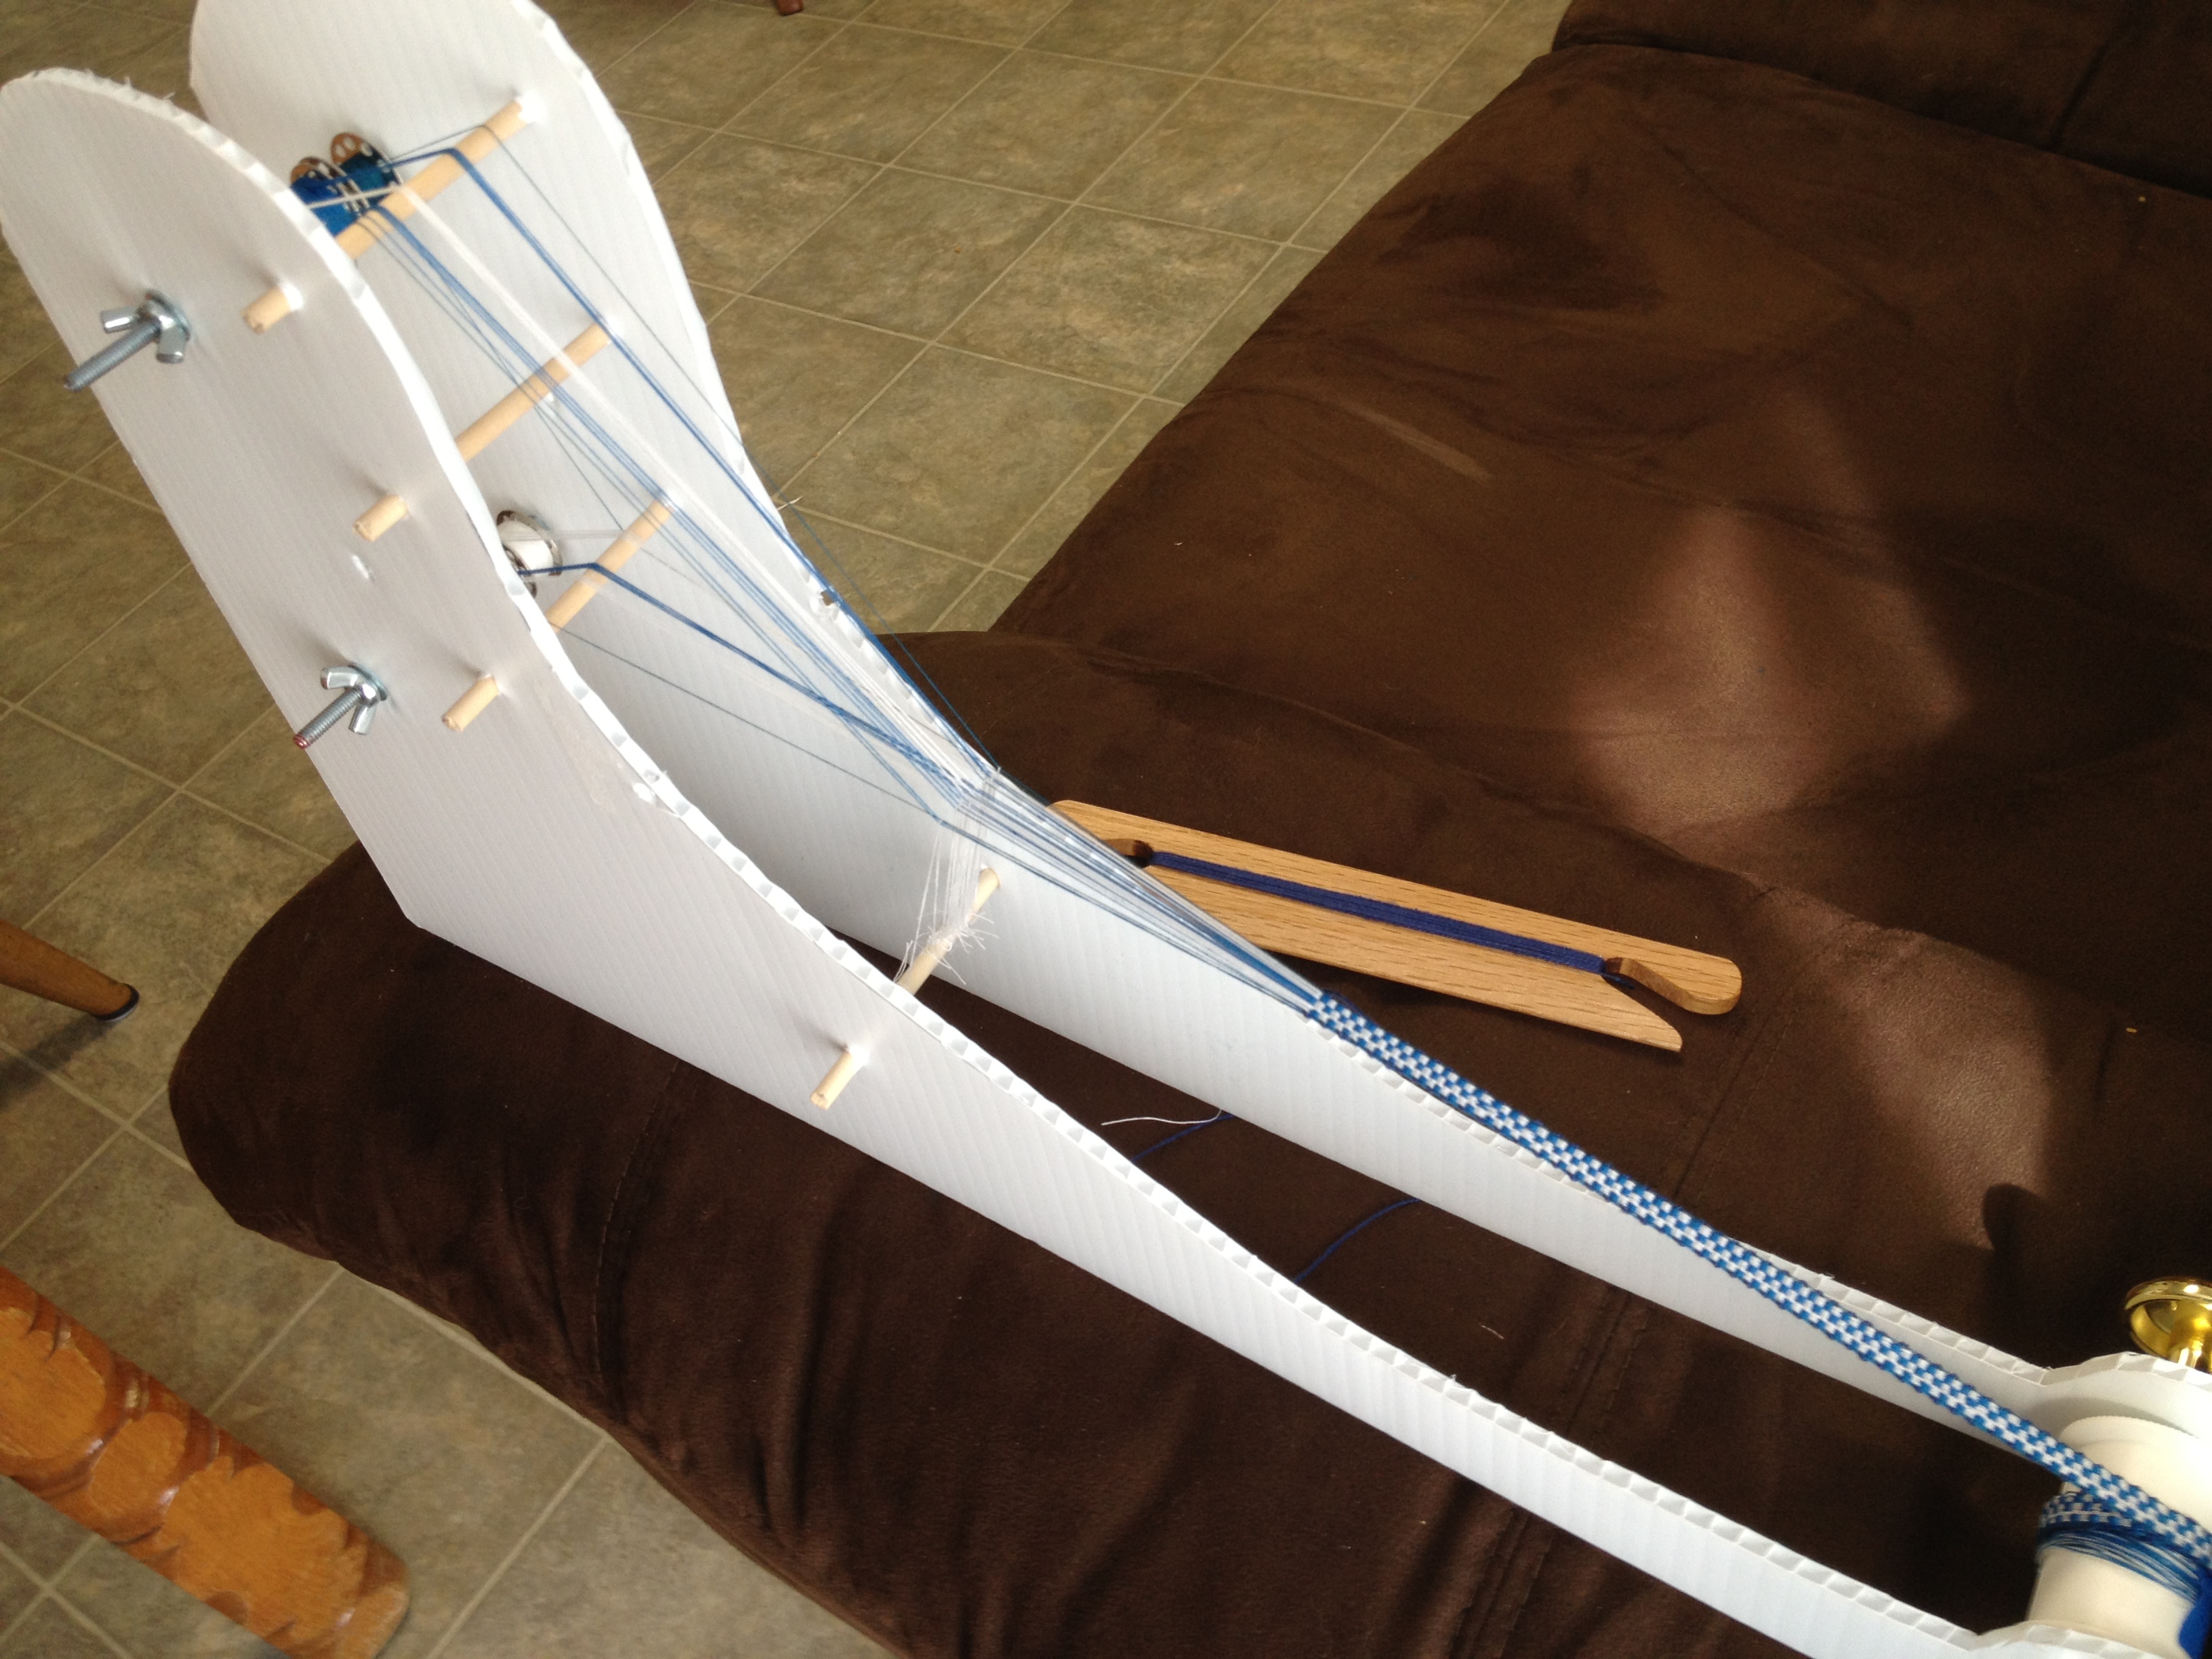 Can I use recycled materials? Will this loom be portable? Can the loom be taken apart for shipping or storage?
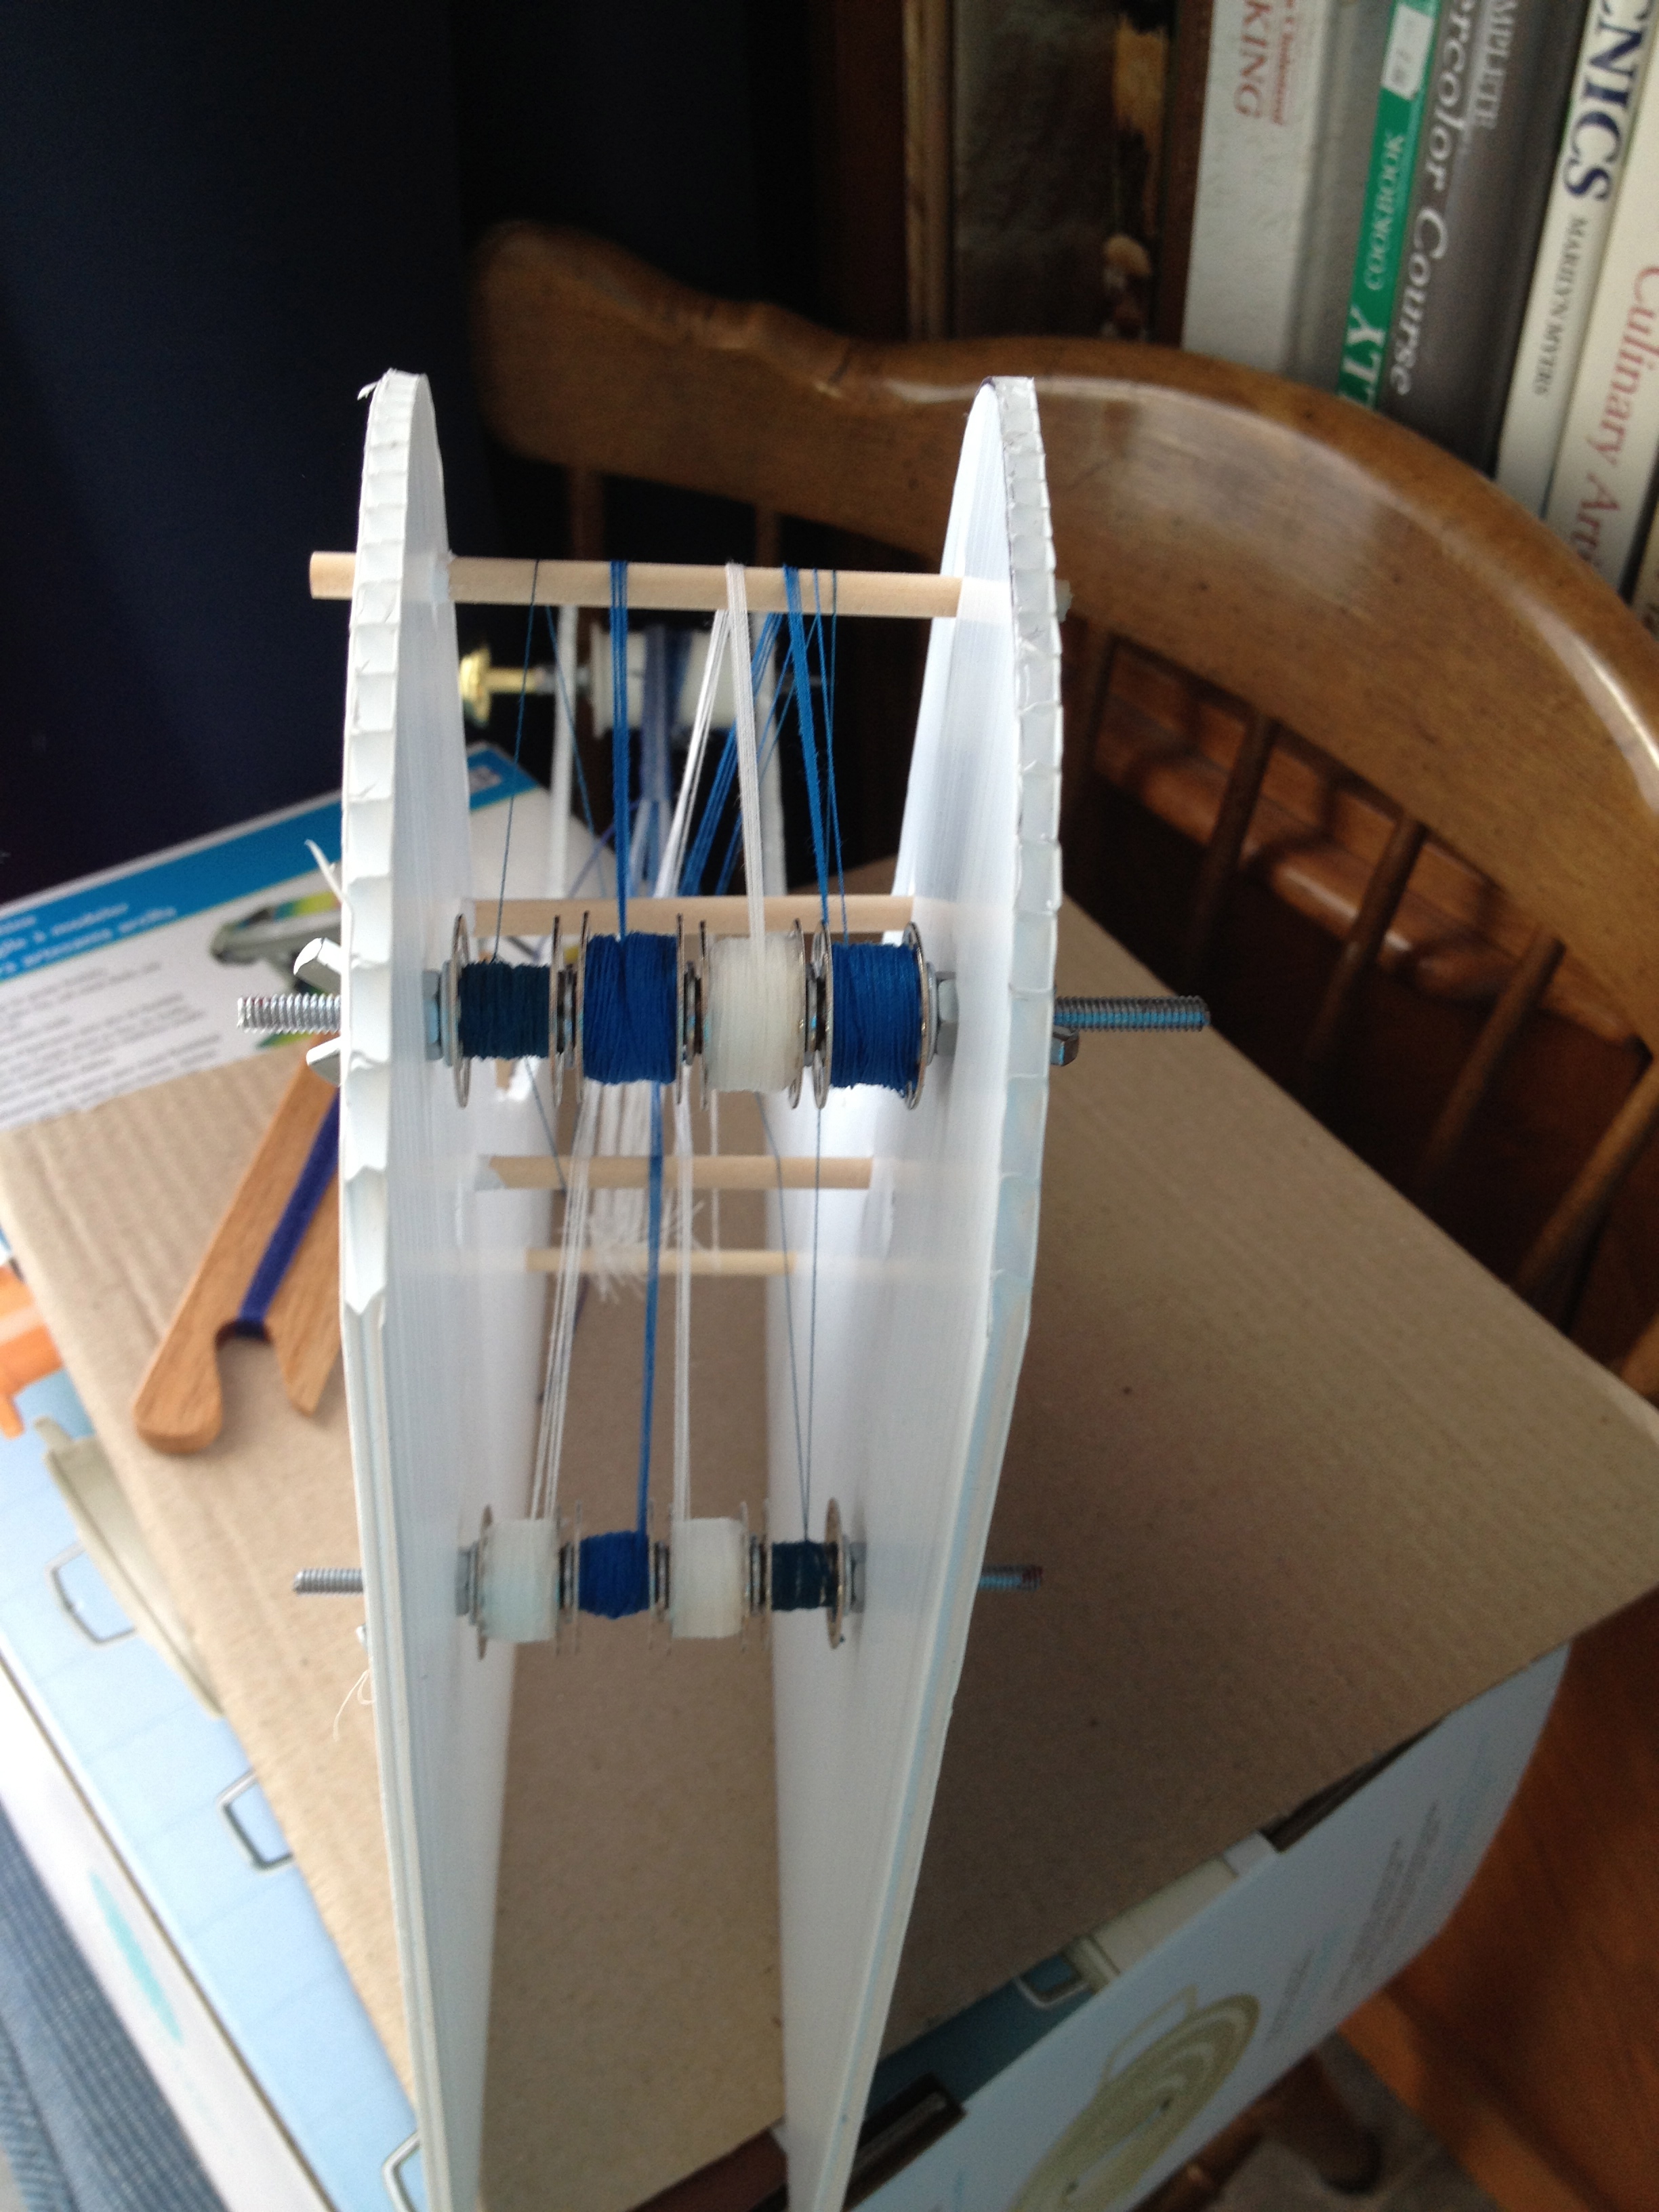
I have found that I can create a creditable ribbon loom that meets my needs out of some pretty humble stuff I found at my local HOME DEPOT.
- A Blank Coroplast Sign
- #8-32 Threaded Rod 12″
- #8-32 Wing nuts
- #8-32 Nuts
- #8-32 Washers
- 3/16″ Wooden Dowels – 12″ long
- drawer knobs – that fit the #8-32 threaded rod.
Other things I had at home:
- sewing machine bobbins – old straight ones are fine I used some of the metal ones.
- Empty sewing thread spools.
 Tools I used:
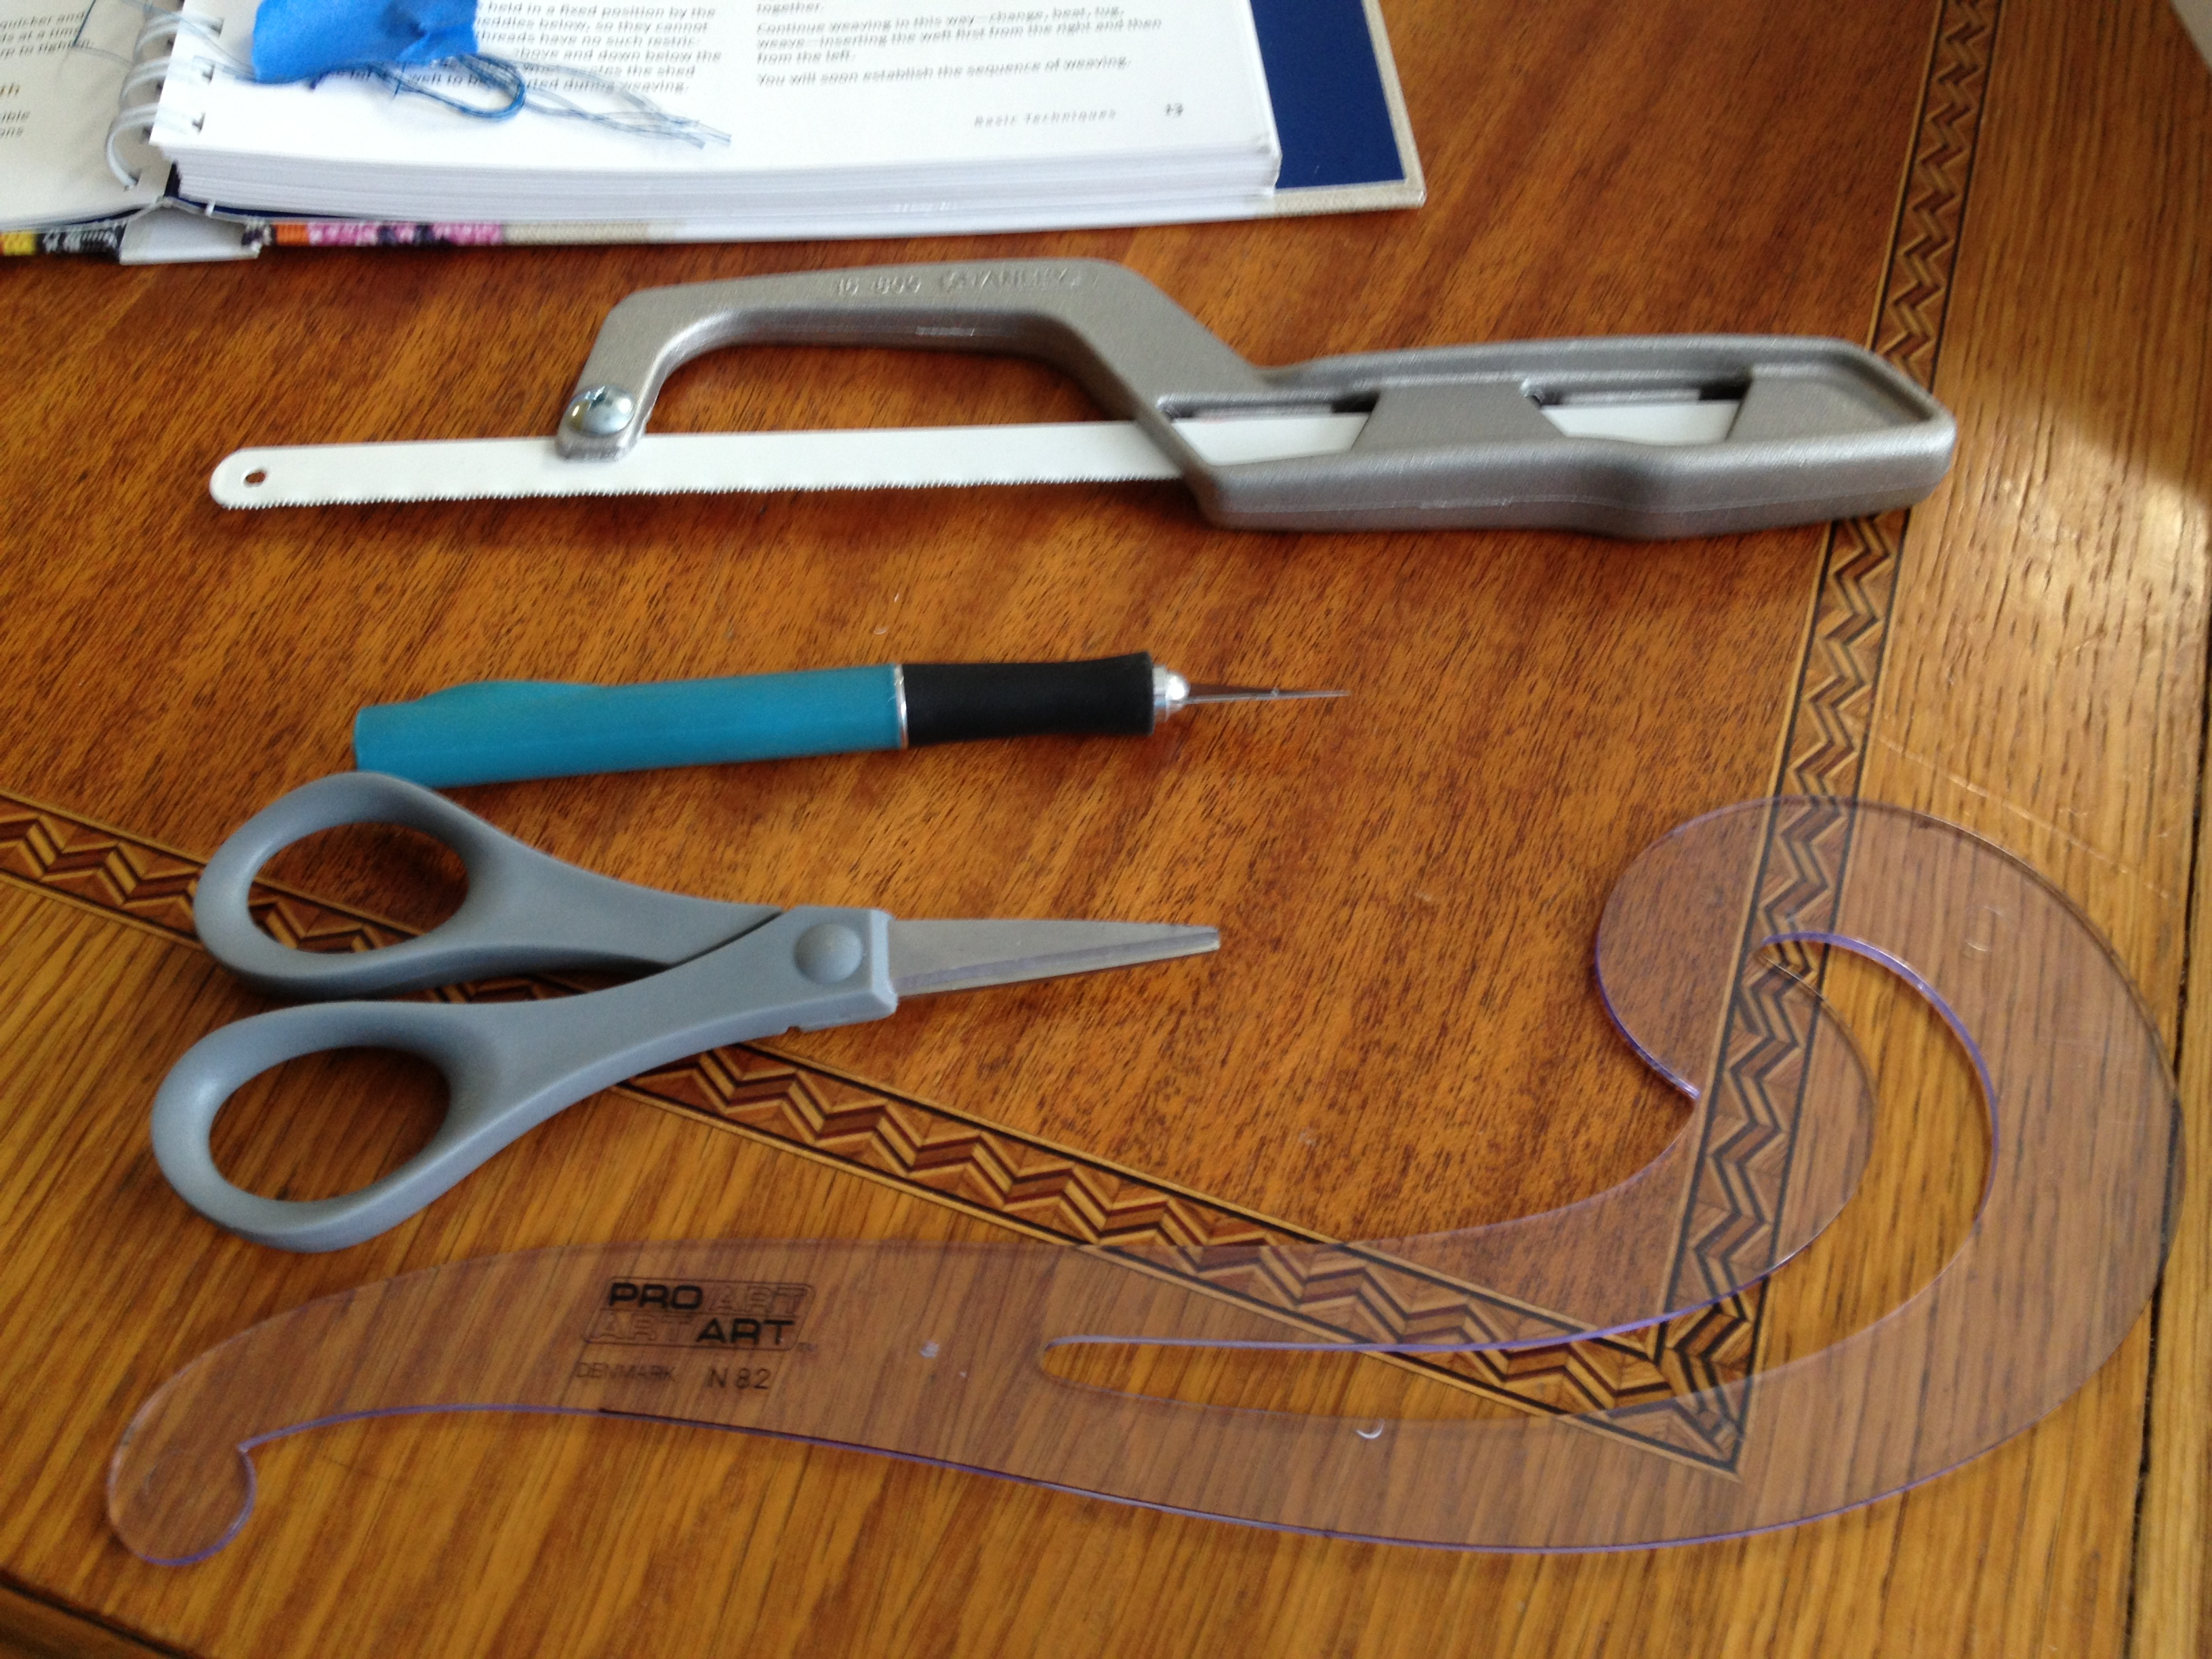
- Scissors (the little Fiskars type) to enlarge holes in coroplast
- Exacto knife and blade (to cut coroplast)
- An inexpensive small hacksaw (to cut threaded rod and dowel) I picked up the $8 one in the store. It had a handle and a blade – no fancy stuff.
- A sharpie – to mark cutting lines
- A 3″ wood screw — used as an awl to start the holes in the coroplast. Requires little hand pressure. Finished heavy work with the scissor.
- A French Curve to get pleasing curves on the sides of the loom.

 I’m still tinkering with the design so I am not quite ready for print out final measurements. It is my intention to share this from this post when I am sure that it will work for most people.
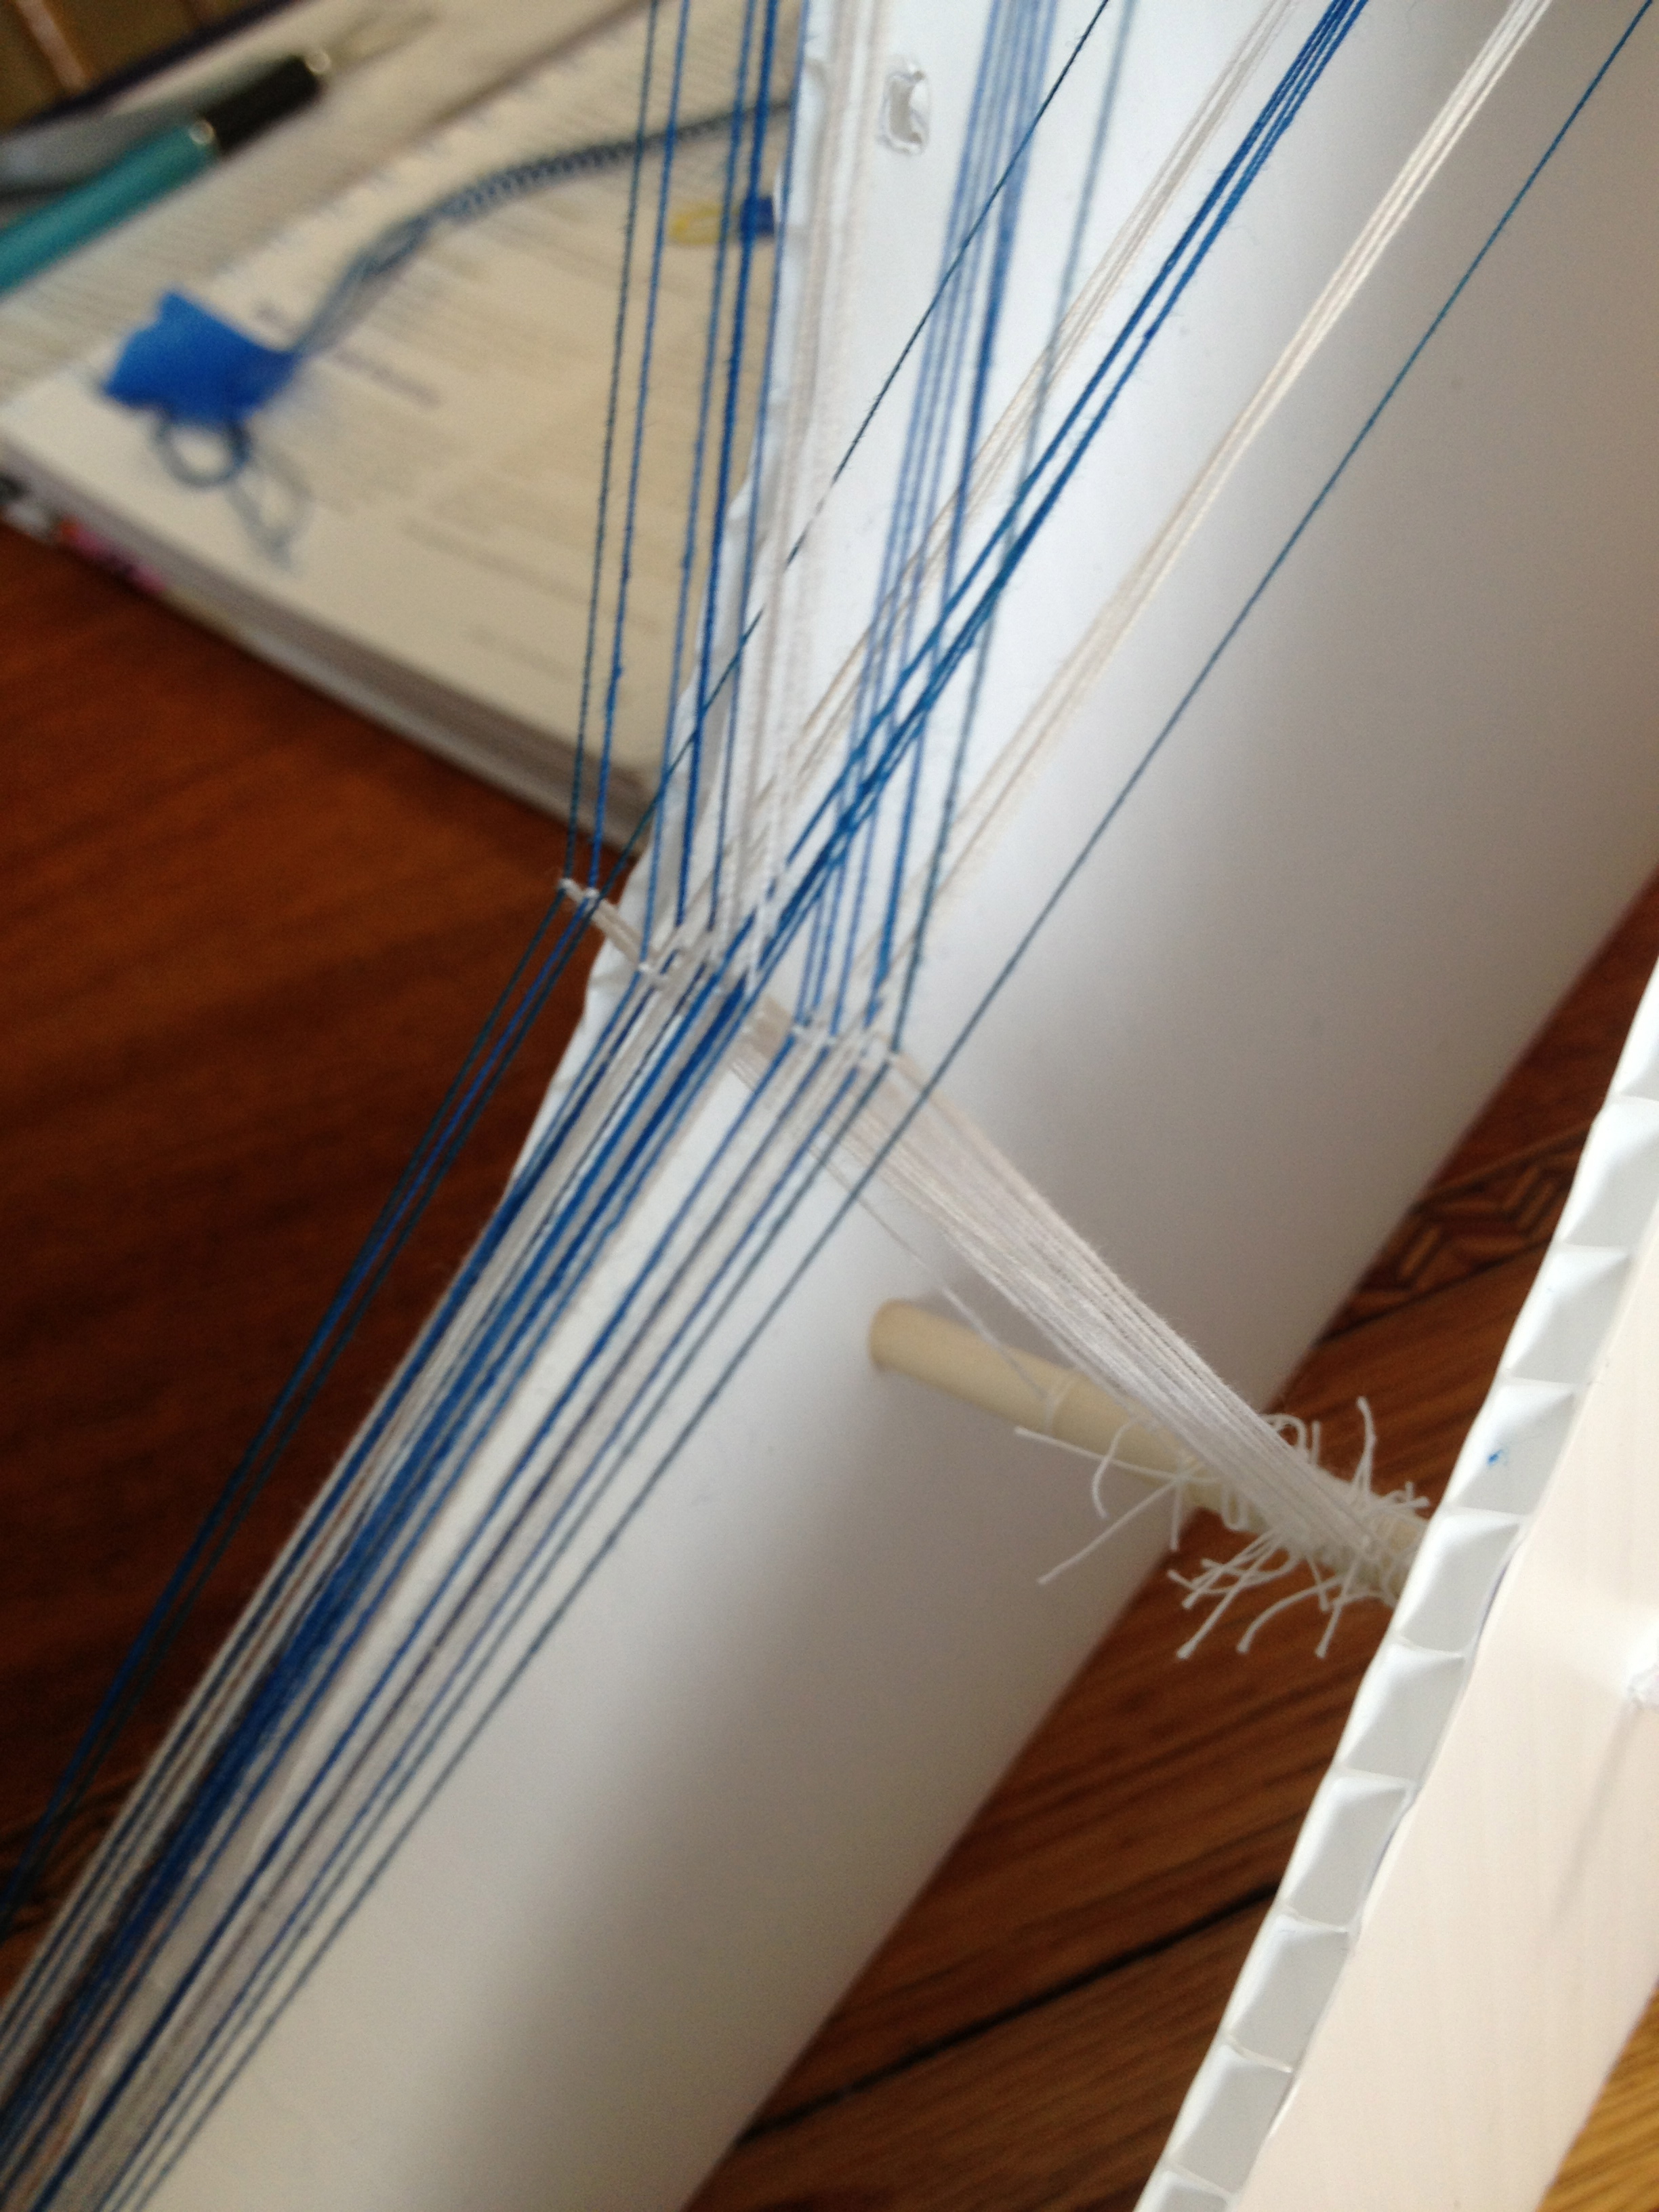
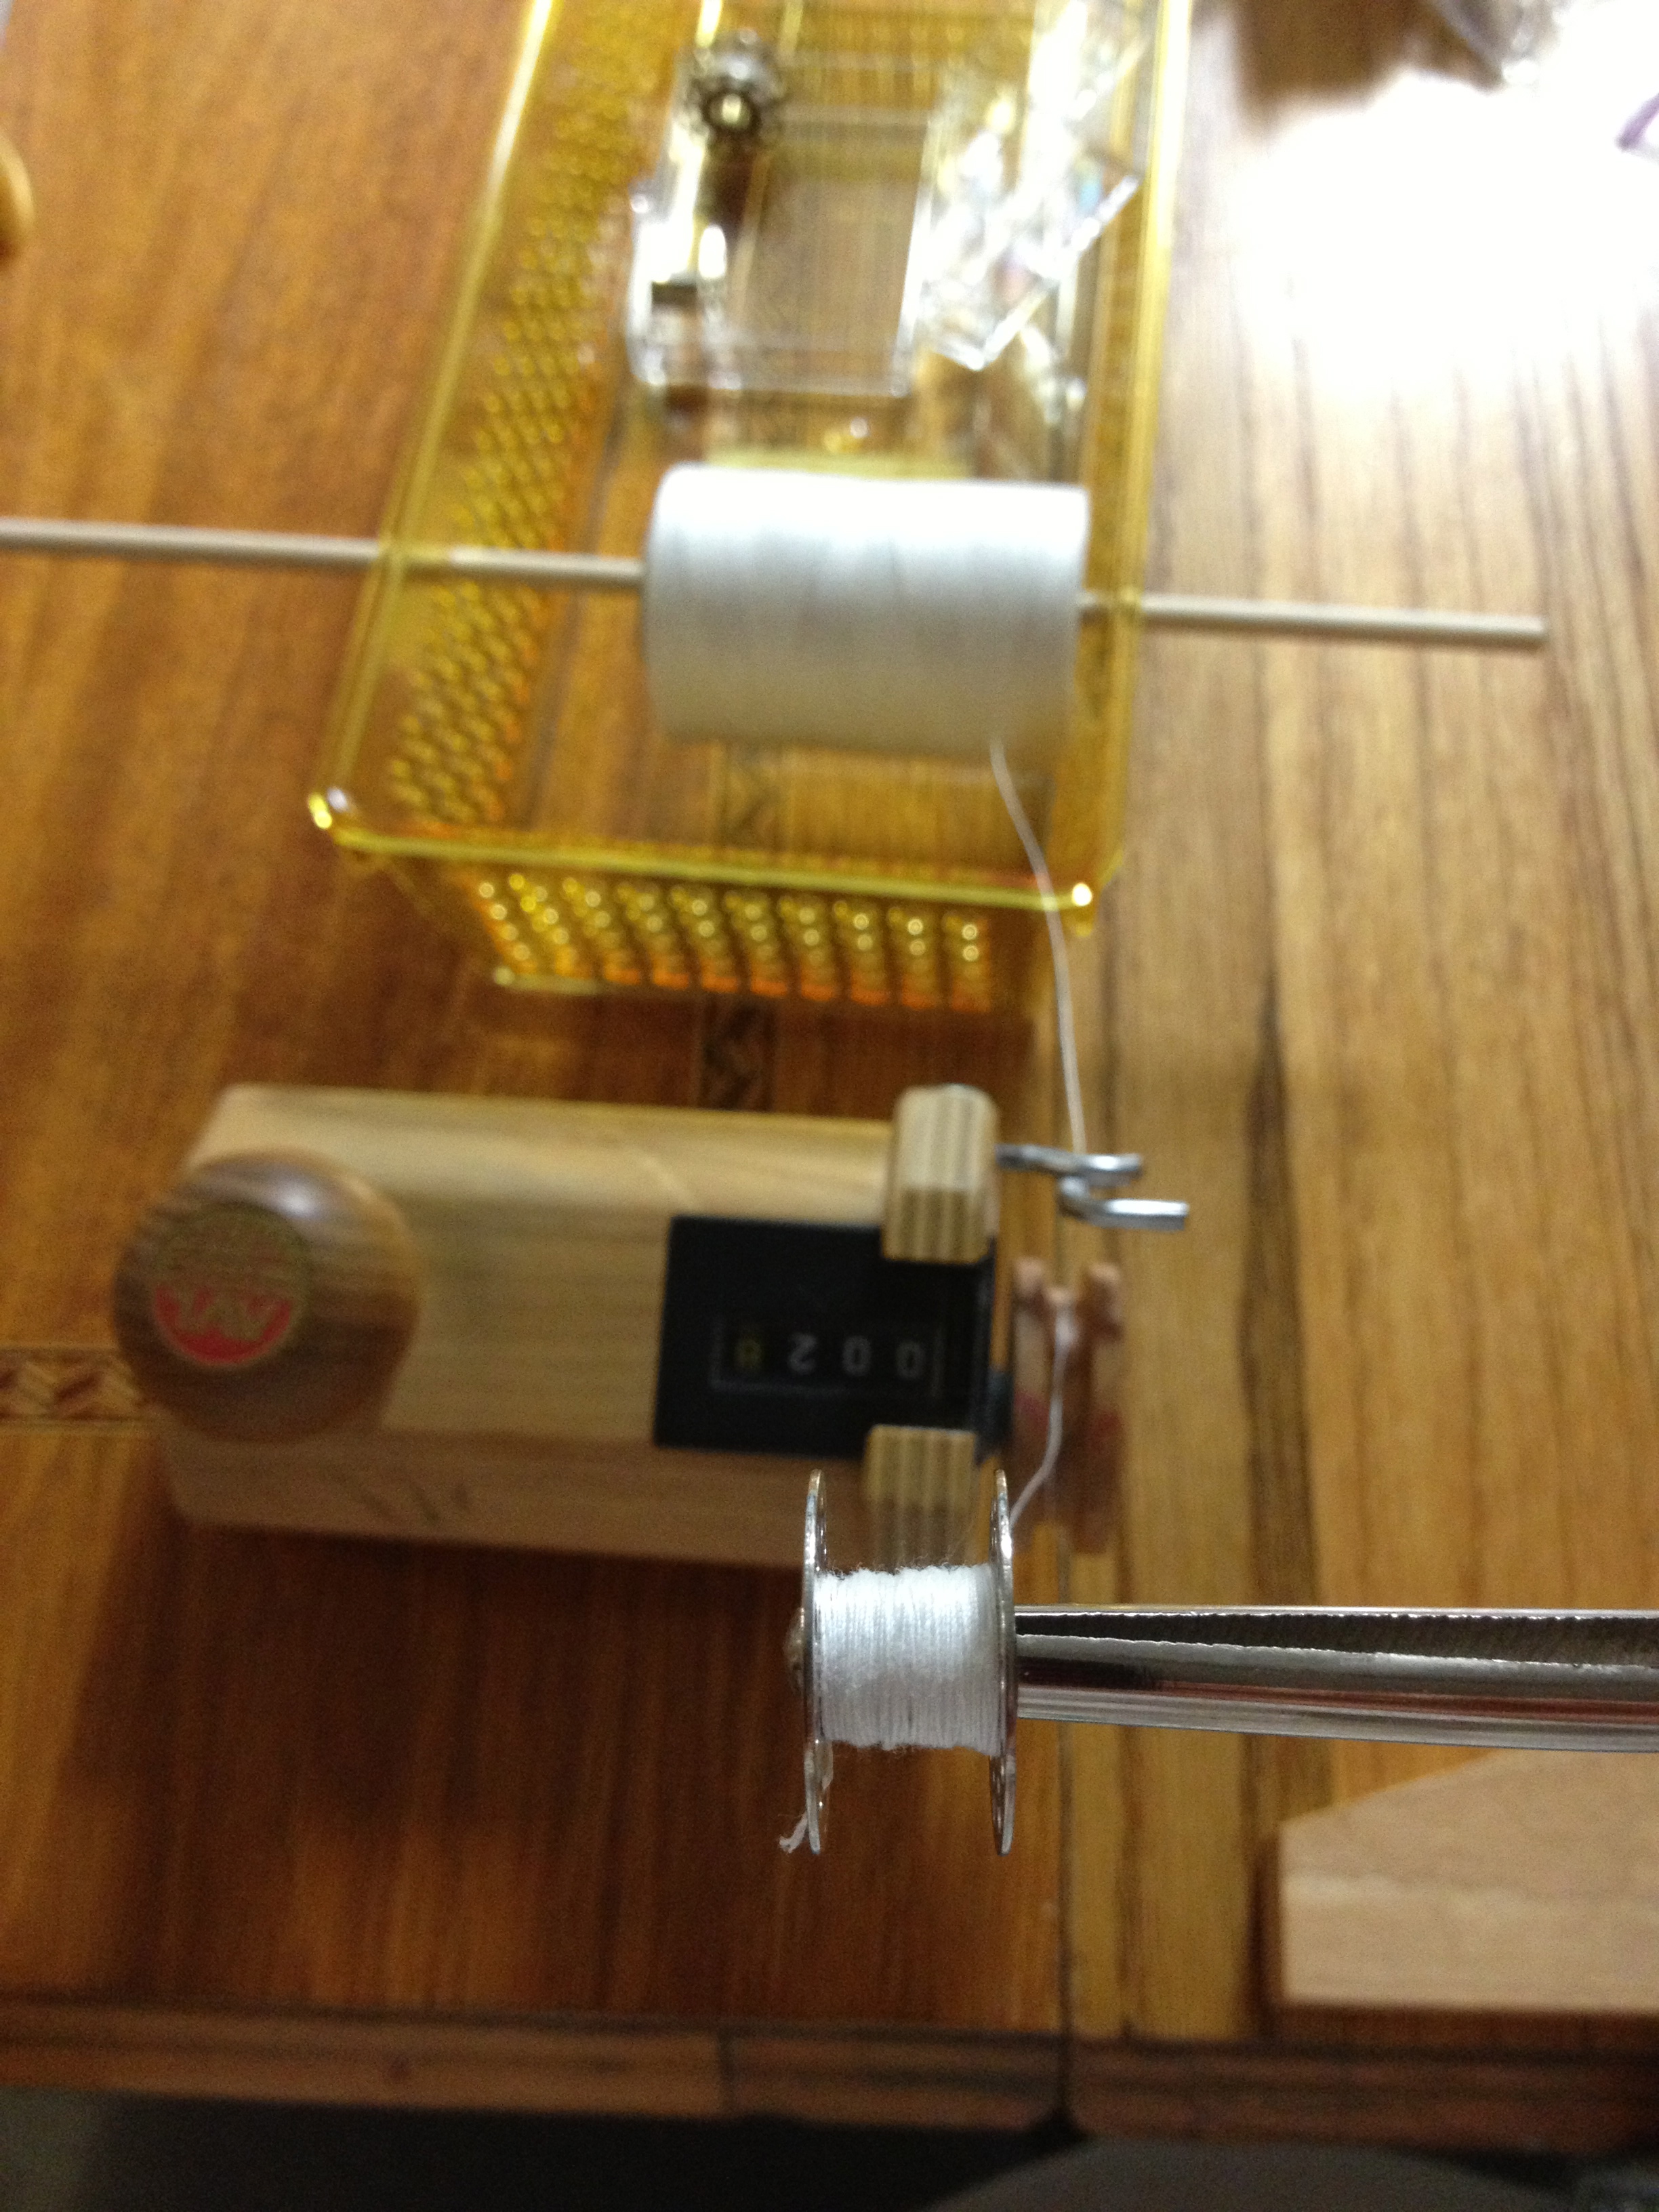
The yardage counter was used when I wound thread from spools to bobbins. It does work nicely. My bobbins also fit on this dowel nicely for transfer to the “sectional” bobbin on the loom. It would be great to have a baby tension box someday for winding these packages.
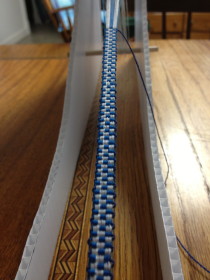
 So far, I am pleased with the weight, size, and the fact I can adjust the tension individually on each bobbin. The weaving area is about 8″ long. I have a great shed. It took only a few minutes to thread and get started.
I am modifying the design to make it easier to change the bobbins on the fly. I have found you can use existing inkle patterns or make use of standard weaving drafts. I will be exploring more pick-up work and additional shaft control options shortly. My goal is to be able to make beautiful silk ribbon by hand.