Weave with me.

Our weaving together is important for many reasons. I get to learn about you and encourage you on your life journey and your weaving with me provides me with joy and a sense of community.

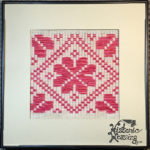
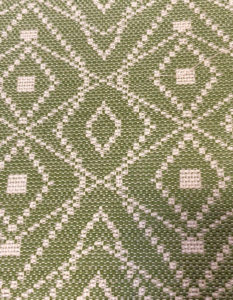
Weaving is my happy place. When the world does not work as expected, I can pick up some thread, wind a warp and create a loom-bound universe of my very own to spend some quality time in. The reality is that my output may not be perfect, but I always feel better for having spent the time on the loom. I always learn something, and get new ideas on how to improve my work the next time.

Weaving teaches me several things, as much as I would like order and control, the universe has other plans. I must be careful as I reasonably can in planning, warping, and the weaving to ensure good results. I have to be willing to own my mistakes/missteps and determine for myself what must change in order to improve. Progress may be slow at times but it is not a race to the finish line to say “done, and done”. I have my lifetime to enjoy this, there really is no hurry or timeline to meet except one I create for myself.

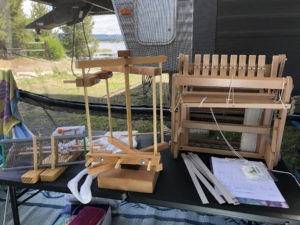
My call to action is “Weave with me.” It is an invitation to come alongside and share the joy of just “being” and sharing a common love of fiber art. I have no expectation that you will want to weave what I weave, your life and your weaving needs are not mine. There will be days that you want more information and knowledge, and there will be days when you just want companionable company for the journey. Whether you bring a loom and a project with you for our session or you make use of the looms and projects in my rolling studio, rest assured we will pass our time together pleasantly.

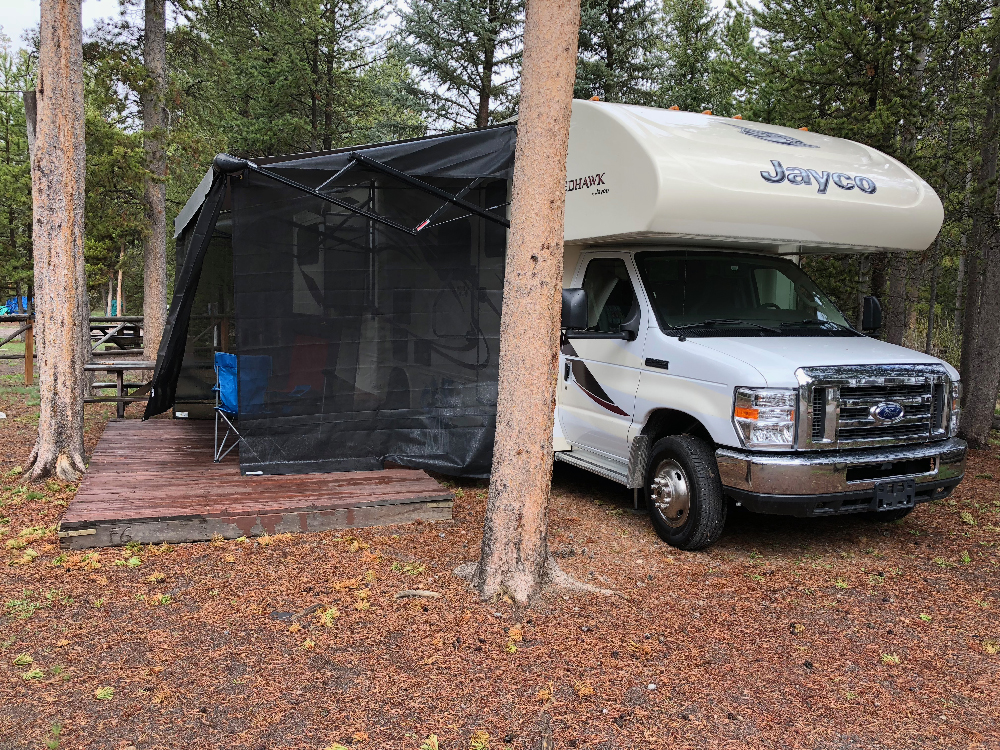
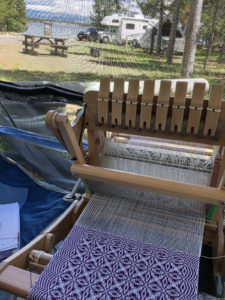
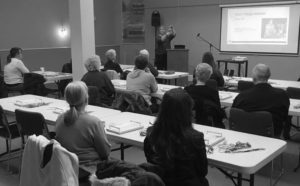
I purchased a motorhome in order to make it easier to meet you. My plan is to be able to travel to you, I love seeing new places and new people. I also no longer feel the need to move at the speed of sound. On the road, I can slow down a little and spend more time with people. The usual teaching experience for a weaving teacher is a morning workshop or a long weekend pouring out knowledge and technique as fast as one can speak. I know that weaving takes time, and so does learning a new skill. My preference would be for spending a week or two in an area before moving on, time to see where and how you live, make new friends and finish a project of my own. If this sounds good to you or your guild, I invite you to: “Weave with me.” Drop me an email via the contact page and let me know how I can come alongside and enrich you and your guild’s weaving experience.

Let’s spend some quality time weaving together.


Click here to view standard rates for 2018


Two Tie Unit Weave – Variation 3

The latest work on the loom. Variation 3 of my two tie unit weave.  I am working with a “olive/avacado” green cotton thread for the pattern weft. The design deign is a new one I have recently completed. I was looking for a contemporary feel and I believe that I have achieved that. The weaving is pleasant and easy to follow.

This is just one of the 10 items in my production run on the AVL loom this Spring. Look for it to appear for sale online – on this website sometime this summer.

Using Perler beads to design a tie-up

I have been working on a warp that will include 10 different designs on my AVL loom. This warp has been set up to be a two tie unit weave. The warp will handle 16 shaft patterns in a point twill layout. Because I have a standard threading and a standard treadling, all I need to change will be by tie-ups and the color of my pattern threads.  Pretty simple weaving.

I made the designing easier by using Perler beads to lay out the tie ups and tested the symmetry using a pair of quilting mirrors.  I have labeled this tie-up variation 6.  There are four more designs in the series to go.

Group Programs

Entertain your group with both the magic and fascinating history of weaving.

Relax with a 30 minute historical presentation of the weaving topic of your choice, followed by a 1 hour weaving experience sure to be a team builder.

Perfect for groups who need to try something new and different for growth. Program can be customized for length and hands on activity.

Click here to see available presentations and how to book yours today


The six dollar loom – Introduction to Weaving Project

Six Dollar Loom

Have you wondered how you could construct enough DIY looms that were affordable for a group students to use?

I have the answer for you, try my six dollar loom. It can be constructed out of parts found at a local hardware store and does not require fancy tools to assemble. It is adjustable, transportable and able to be disassembled flat for storage.

I designed this loom this year for a weaving class at the local library, I was able to produce 20 units for $120 in parts. The hardware parts are also available in bulk from McMaster-Carr allowing you to save even more money if you happen to need even more.

It is as sturdy as a Hockett loom, it is also flexible in that you can easily modify the sett for weaving. My instructions include suggestions for the threads to be used for your very first project.

I will be using this loom design to develop more weaving lessons to be used in the classroom.

The first project is a bookmark, that is expected to take 30-60 minutes to weave in a classroom of new weavers.


To purchase your plans click on this link:

https://historicweaving.com/wordpress/products-page/looms/the-six-dollar-loom-introduction-to-weaving-project


Your purchase helps to fund the cost of hosting these plans and helps to keep weaving accessible to the next generation of weavers.


Shuttle Craft Book of American Hand-Weaving – Research Project

Product Details
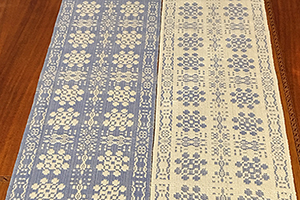
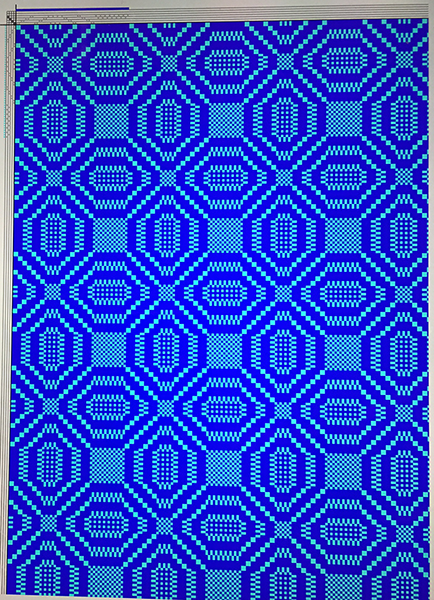
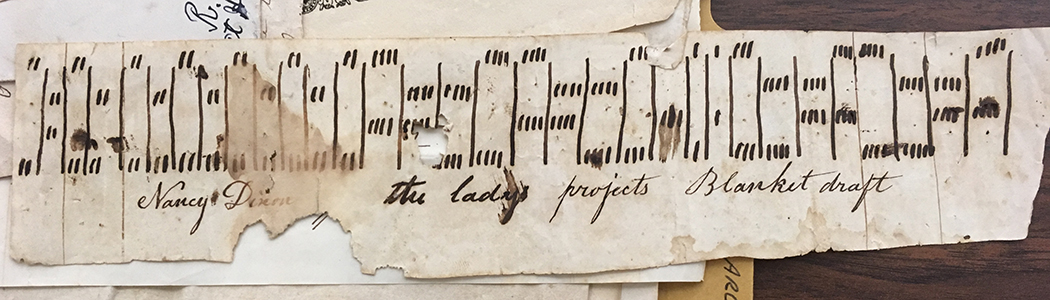
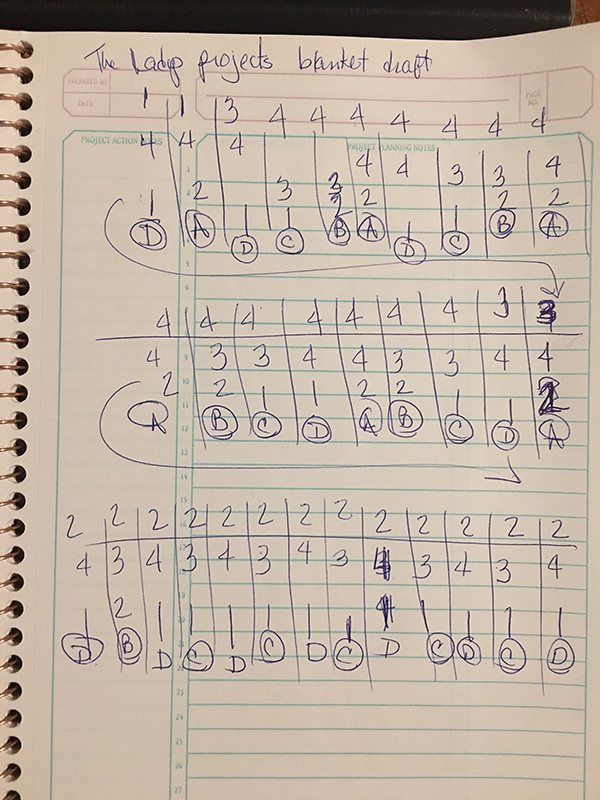
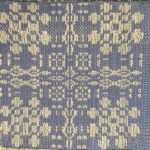
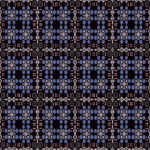
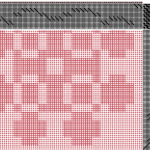
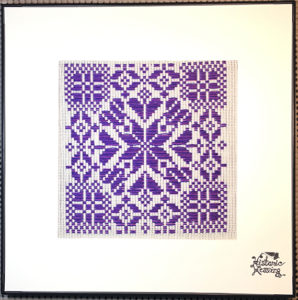
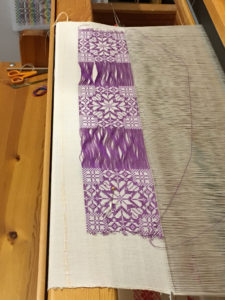
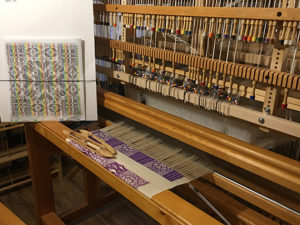
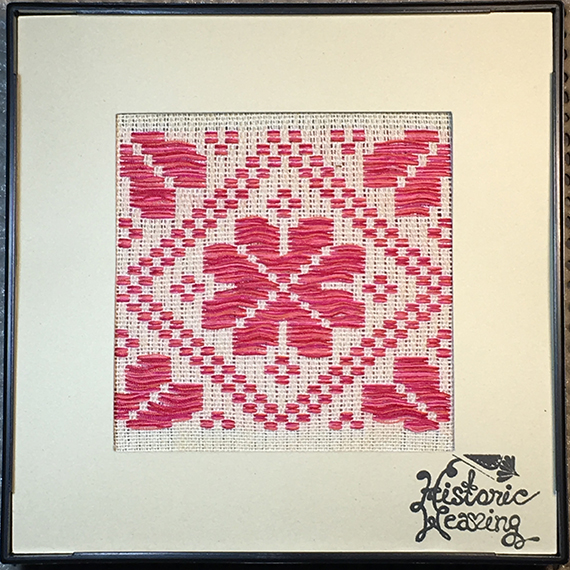
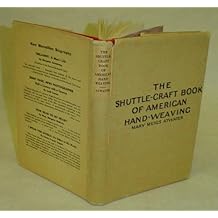
As a research project – decided that I would like to look at one of our core books for learning about weaving and see if I could add information to bring the text into the digital age. Work completed so far, includes finding digital copies of the images in color, and creating .wif files of some of the draft collections in the book.

In the early editions there is a bibliography that will also prove interesting to research to see who her influencers were.

I have decided to publish my research as I go so that I can share with others and get feedback.

For copyright folks – I believe that my work not a violation of copyright as I am acknowledging my source of reference, and it is in the public domain at this point in time. My intention is that of historic research, to help fill the gaps between when the book was written and today, hoping to keep the information accessible to future generations.

None of the drafts are copyrighted, as they are what Mary would have called them “recipes”. What is copyrighted are the hand drawings and the words in the book. The knowledge a weaver will have to apply to using the drafts is; do they fit my idea for a project and the capability of my loom? I have simply bundled them into groups to match the layout in the book for ease of reference

Fees collected for downloads fund research and hosting of these files.

American Handweaving – Updated Photo Links

American Handweaving Series 1 Group B .wif files

American Handweaving Series I group B 8-13 .wif files

Jennifer’s Draft Number #2

Jennifer wrote to me and asked me about this draft she had found in a file. She was not familiar with this particular draft and wanted to learn more about it. My first step was to look at the blocks – the areas separated by the long lines. Most of the sections have 4 lines in them in two rows. It appears that this draft is on four shafts. Likely it is an overshot draft.

I looked at the sequence of the blocks, reading from the right to the left,  A block has lines on shaft 2 and shaft 4, B block has lines on shaft 2 and 3, C block has lines on shaft 1 and 3, D block has lines on shaft 1 and shaft 4. Looking through the rest of the draft the are no other combinations of lines. Our Draft has 4 blocks. I then could label the blocks on a piece of paper

I then wrote the draft out in my notebook, matching the lines and the threads by the block I identified.

I then translated this into a profile draft by substituting  the A Block for shaft 1, the B Block for shaft 2, the C Block for Shaft 3 and the D Block for shaft 4. Because some of the blocks had 4 threads and some only 2. I decided to use two threads to represent the four thread blocks, and one thread for the half block. I treated the 3 thread block as a two thread block for the profile.

I set the tie up to ABCD, to match the blocks.

I then selected tromp as writ, and colored the warp a contrasting color to make the design appear.

While I was entering the draft into the iWeaveit program, I noticed that some of the draft was not even (balanced) I adjusted the draft to make it even.

I had found one place where the draft did not move sequentially through the blocks. Usually overshot moves in a circular fashion through the blocks, jumping blocks can cause long floats to appear. You can see the area on the on the bottom line towards the left edge the block moved from D to B and back to D again. This is in one of the short blocks. This is not the way the other side of the block is, and so I adjusted it to match the beginning of the block sequence.

At this point you can not weave the pattern, but you have a fairly good idea of what the design will look like when woven.

The blocks in the threading move gracefully from left to right and the designed when woven will have that characteristic of a 45 degree diagonal line from bottom right to top left.

When this design is woven it will need to have a border and a number of repeats to match the size of the fabric desired. To repeat the design you would start from the top right of the threading and enter that sequence after the last thread on shaft 4 in the draft.

At this point, you are missing the threads for the ground cloth. The tabby weave.

To weave this pattern I will need to decide what structure it is, and then change the draft to have that threading arrangement.  I will show you how I do this in the next blog update.


This is a quick look at the profile draft as it is repeated.

There are tables (the big blocks) and smaller blocks in the middle. The pattern will look like the checkerboard you see, to prevent long floats.

I am sure this pattern can have variations. This is a sample of what it would look like if it remained symmetrical.


Studio Weekend for August

Still working with the 6 block sample idea. I have an existing sample of a special treadling that I used with the diversified format. In my last sample shown here, I am still not satisfied with the look of the whites treads. I have worked through the draft again and now am ready to wind another sample warp to test out my theory on the loom. Stay tuned for further updates through the weekend.

I have spent my morning working on the historicweaving.com website and I believe that I have the resources page looking and working much better than before. It was a bit of work, but I feel ready to move forward now.

Afternoon update: Any good warp even a sample, requires planning and mine is no exception.
I decided to get a bit more formal in the arrangement of the blocks so that it looks more finished when I am done weaving. Now to wind the warp and get started.

Save

Vision Board for Angstadt 164

Today was a fun sick day. I woke up not feeling well (cough,cough) and knew that going out was not going to happen. My next stop was the computer where I decided to play with the design that I shared with you last week.

My goal, to turn the draft into a welsh tapestry design. I think I did pretty well. My best news of the day, it is possible for you to order this design as a throw in a few weeks. I have made contact with a company that allows me to create a design and they will weave it on their Jacquard loom. I am in wonderment!

It has taken me a couple of tries to get the hang of how to set up the files so their system will run them.  I can’t wait to order my first samples and see how they turn out.

The website is WOVNS.  Brand new — only six months old.

I completed a whole vision board today. You might want to take a look — it is a pdf file. Vision Board – Angstadt 164 Should you be interested in these designs for some of your projects please let me know by email.


Save

Angstadt 6 Block Double Weave

This is a scarf that I wove in double weave on my 24 shaft AVL loom 11 years ago. It was woven in burgundy and white cotton.

I hand knotted the fringes and beaded it. I believe that I gifted this it was not sold. If you have it please send me a photo of you with it.

Here is the image of the draft I used.  I was using WeavePoint at the time, and I can now no longer open the draft file.

I will post it here for someone who has WeavePoint, perhaps you can turn it into a .WIF file for me.

The source of my profile was the Jacob Angstadt Designs – Figure 164

My current weaving software is WeaveMaker. I am using a MAC system.

Save

Save

Save

Save

Save

Save

Purple Star Square I for 2016

What makes this piece special is that I used many ancient motifs to create a  modern miniature coverlet looking image.

I borrowed an overshot window pane for the borders edge, placed a star  in the center.  I then encircled it with hearts. I also used a twill structure to add interest to the hearts.

All in a 6 inch space. It took several attempts to achieve a “square” look to the piece and here you see the end result.

The time to weave this piece was over 8 hours. I had to work slowly and carefully to ensure that I did not make a mistake when pulling the pattern shafts. This is one of the most complex designs in the Opphamta series of images.


I am very happy with the historic feel of this new design.

Click Here to Purchase


Save

Save

Save

Save

Save

Save

Save

Save

Save

Red Heart I – 2016

Red Heart I for 2016

A petite sweet gift that will fit anywhere and let that special someone know they are loved whenever they look at it.

This is the first in a planned series of red heart images. Hearts are special to me, for love, and because they are part of my name.

This piece took more than 4 hours to weave, it needed to be repeated a second time with a different weft thread combination to get it to weave squarely. The heathered look is caused by the fact that it was woven with four threads of different colors.

It was woven on a drawloom, threaded with 30/2 cotton with a sett of 48 ends per inch.


Click Here to Purchase:https://historicweaving.com/wordpress/products-page/handwoven-art/red-heart-i-2016/


Save