Polychrome Tile Project

Polychrome Tile Pattern

At the beginning of the Pandemic, I found myself spending more time researching digital archives of some of the best Internet sites. I came across pictures of buildings that lead me to believe the architects where inspired by weaving drafts. I set about figuring out what type of draft the designers were looking at and developed a project to recreate it.

The project is for a table runner. The project can be woven on an 8 shaft table or floor loom. The project includes both WIF files and PDF copies of the draft for those that are not using weaving software.

Included in the package is a basic warp calculation for the materials needed to complete the project if you set it up as I did.

Click Here to purchase the downloadable package for The Polychrome Tile Project

Polychrome Tile Project

100 Horizontal Stripes Project – using stripes to create handwoven Christmas ornaments

100 Horizontal Sripes Cover Shot

Need to make something unique for your weaving friends and family this year? I have new project plan just for you. Using horizontal stripe patterns you can create a beautiful Christmas tree decorated with one of a kind handwoven ornaments that you design and personalize.

Over 100 patterns and drafts to launch your imagination, with no upper limit to the designs you can create on your own. There are no loom size or shaft restrictions to to hold you back, every pattern can be woven on every loom, by any weaver regardless of skill and experience.

Package includes instructions, 100 drafts in .WIF format, and a new painless pickup format that uses Microsoft Excel. No worry about having drafts that are too small to read, with Excel you can enlarge them easily without a loss of resolution.

With more than 100 drafts you will also get a digital catalogue PDF of the draft files and photos of each draft as it was woven to use as an index to the draft collection.

Tree Project ExampleMoose ExampleClick to purchase your copy of 100 Horizontal Stripes Project:

Weaving a Ribbon Heart

Weaving a Ribbon Heart Project - By Historic Weaving

Weaving a Ribbon HeartHistory shows that complex images can be woven on simple looms.

Follow the Historic Weaver on her journey through time to create a striking heart image on a table loom that rivals any produced on a drawloom.

  • Discover early pattern books for needlework that contain weaving drafts
  • Learn how to set up a table loom for complex block unit weaving
  • Explore techniques for successfully positioning an image in the warp
  • Combine loom control structure techniques and pick up block weaving

The Weaving a Ribbon Heart project can be woven by an experienced weaver using a simple table loom (4 or 8 shafts), or a drawloom that has 20 or more draw shafts.

There is no fancy equipment to buy, this project made use of knitting needles, and E-Z Bob embroidery floss holders.

There are step by step instructions (27 page book) with detailed pictures to guide you through all the techniques used in the project. The package includes 11 pattern drafts, and a template for creating custom pickup drafts.

Click here to purchase the downloadable project instructions.  Weaving a Ribbon Heart

I have been busy since Covid hit, while I have not been on the road teaching, I have been hard at work in the studio, researching, weaving and developing new tools to make your weaving experience easier. Weaving a Ribbon heart is a project that I completed for Valentine’s Day this year, and I thought it would serve as an excellent way for you to learn about what I have been up to while being isolated at home waiting for the vaccine to come.

This design is suitable for a card, a picture frame, or a table cloth.


Website Shop Upgrades – New products and Current Research Projects

Sample page from Radiating Patterns

A feature of the new shopping cart are improvements for the home page and the ability to show more images in the ads.  I have decided to make use of a single cart  to keep things simple, this shopping cart will allow me to carry both handwoven, and downloadable products at the same time. I also like to print and do illustration work, and likely you will begin to see a greater diversity in my product line. Hopefully, you will see something that catches your eye and think; Here is a way to support this artist.

I am beginning my 30th year of handweaving, and find I am not a true “hard core” academic (I may not have that laser focus).  I love to teach and love working with people in general. I excel at small groups and one on one, solving problems as we weave together. I love to research and curate information about weaving especially in the 1700s to early 1900s. I want to be part of the solution to identify and keep handweaving history and technical information in the accessible in public domain as much as possible. But, at the same time software is not free, and web servers cost money to run. Keeping something alive will require a business model that generates supportable income in to the future after I am gone.  I know that I do not have the physical strength/endurance or the time to be a production weaver, I am a designer at heart. I love to solve problems, and then I move on to the next problem.

With COVID-19 I lost my opportunity to demonstrate handweaving to the public by letting the new weavers try the looms for themselves, and have retreated into my studio. While being in the studio, I decided that I could once again concentrate on historic research and drafting of contemporary versions of old patterns. I discovered that many of the designs I had created earlier in my career were no longer accessible because of the software going out of production, or becoming so expensive you needed to be a production weaver to be able to afford it. I have been dedicating my free time to capturing what data I could from these drafts and I will be transferring them into a more usable format for future generations to enjoy. As I complete the task I will post them to the website. I can not list them for free, because I need to cover sample production and web hosting hosting costs.

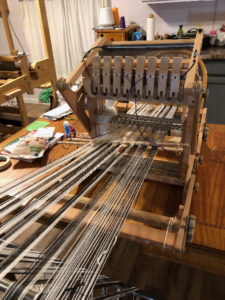
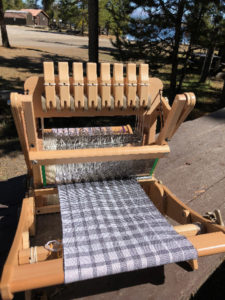
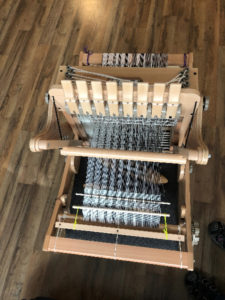
I have both 8 shaft looms, a computer-dobby  24 shaft loom, and a very large drawloom. I design for all three types of looms. In the shop I have decided to mark the number of shafts needed for a draft at the top of the description so as not to disappoint a weaver. You will know what you purchasing before you hit the download button. I also also elected to include weaving software files and manual draft files in the same draft archive packages so that people no longer have to choose one or the other.

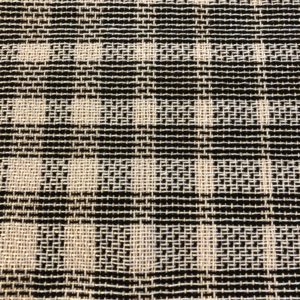
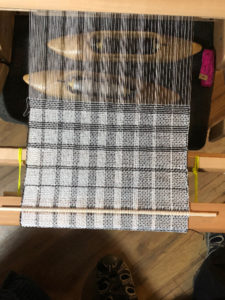
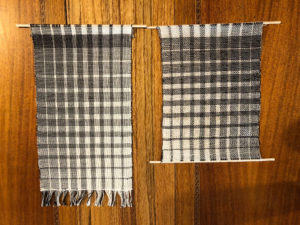
A few more words about the work I believe I can deliver to the public. I like to design drafts and weave it before I post it to ensure accuracy, but at this point some days I do more designing than weaving. I think I would like to work out a system with a fellow weaver(s), I would like to see I if can afford to pay a weaver to weave samples of these designs that I can post on the website and give credit for the work that was done. I have no worries if you determine that you would like to weave the design for production and sell items. I am aware that drafts can not be copyrighted, and so will not chase you down if you use a my design for sale in your shop. As I have mentioned before, it is not my intent to be a production weaver. If a weaver were interested in this type of arrangement, I would ask that you email me directly with what your financial requirements might be for making samples and what type of loom (mostly number of shafts) you are using for sampling. Sample sizes should be 10″ x 10″  or larger if the draft  requires it for a full repeat. I am interested in high contrast samples so that it is clear to the weaver what is happening between the warp and weft threads.

For weavers downloading designs, please understand you are supporting my ability to create and maintain self sustaining a database of information related to weaving for access by yourself and other weavers. Downloading once and sharing widely with others defeats the business case for website sustainability. The drafts will have less value, and we all lose the resources we need to keep historic weaving documents and drafts available to the public. I also believe that I do not want to require a subscription to access the draft data or the learning that I have gathered. So this website will always have a public front end that is useful and full featured that is free.

I do not feel that I am in competition with sites like some international pattern libraries or handweaving.net. Historicweaving.com as a website predates them. I am not intending to scan books, or digitize a drafts in that way. I want to use the historic drafts to study how and why they were made, what makes them look the way they do, and how they can be modified to make new designs that reflect our time and current tastes. Understand my statement above that I am not a pure academic, who is driven to study the past and document it a completely as possible. I want to see the past, and bring it to back to life in an approachable way for today’s weavers and looms. My site will be different than others as I am different weaver.  I have had this dream for a long time, and have spent that time learning about weaving and weaving software.  I like to use Facebook as my studio blog, because Facebook can moderate comments faster and more safely. I want this expanded website for its database potential, and the ability to generate revenue to keep it self sustaining. I use Pinterest as a visual catalogue of ideas (a designer’s morgue file) to explore in the future. I’m learning how to write and present full digital content, some video, some pictorial, some e-books and stories. I believe we all learn in different ways and I want to explore ways to help other weaver’s pass on their notes/journals/drafts to the future as well. I have taken a few months to reflect on what I really want to do and how I want to spend my time. I want to research and to weave. (Ideally, I would like to travel as well, but that will take time and a vaccine.)

If I offer an handwoven item in my shop for sale it is most likely to be a one of kind – if it is not, the size of the edition will be stated. I have no desire to weave long warps of the same pattern. It slows me down once I have solved the design problem, I like to move on to the next. I like efficiency, but I am far more likely to want to achieve accuracy, especially in complex structures. I have been known to weave,  unweave and rethread multiple times until I get the loom to match the draft. I spend more time finding ways to warp and weave better. I am known to innovate. If someone asks me how long it took to weave this particular item, it is hard to answer directly because I have to determine if should I tell you about all of the samples I made before I achieved success. (Again, note, I am not a production weaver). What will make my hand woven gifts special is you can be certain that you will not find another one just like it anywhere. When I use my looms I use them as close to their full capability as possible. My personal patterns are complex on purpose, I have a special hand loom, a 100 shaft combination drawloom and I like to show what it can do. To purchase a handwoven piece from me, pricing includes the cost of overhead for maintaining full weaver’s studio, time spent learning about weaving, the cost of materials and fact the item is unique. Your purchase dollars support my research efforts directly. I reinvest my profit dollars into the website and new weaving history research opportunities.

Now that you have heard more about my vision and process, let’s get to the good stuff – what did I add to the shop?

I began with creating  an Illustrated Weaving Glossary meant for beginning weavers – https://historicweaving.com/wordpress/product/illustrated-weaving-glossary/ – never get confused about when a word is used and what it is referring to.

I have been researching extensively for the past couple of years Mary Meigs Atwater’s Shuttle Craft Guild – Lessons and her American Handweaving Book. Many of the documents I am working from are now in the public domain because their initial publication was 100 years ago, and are even more significant because they are her attempts to record information that was sent to her from other hand weavers throughout the United States. These items are truly meant to be preserved for the public because they came from the public. Since their initial publication, draft notation standards for these structures and patterns have changed significantly, usually it requires a bit of detailed reading to learn how to read the drafts from the manuscript.

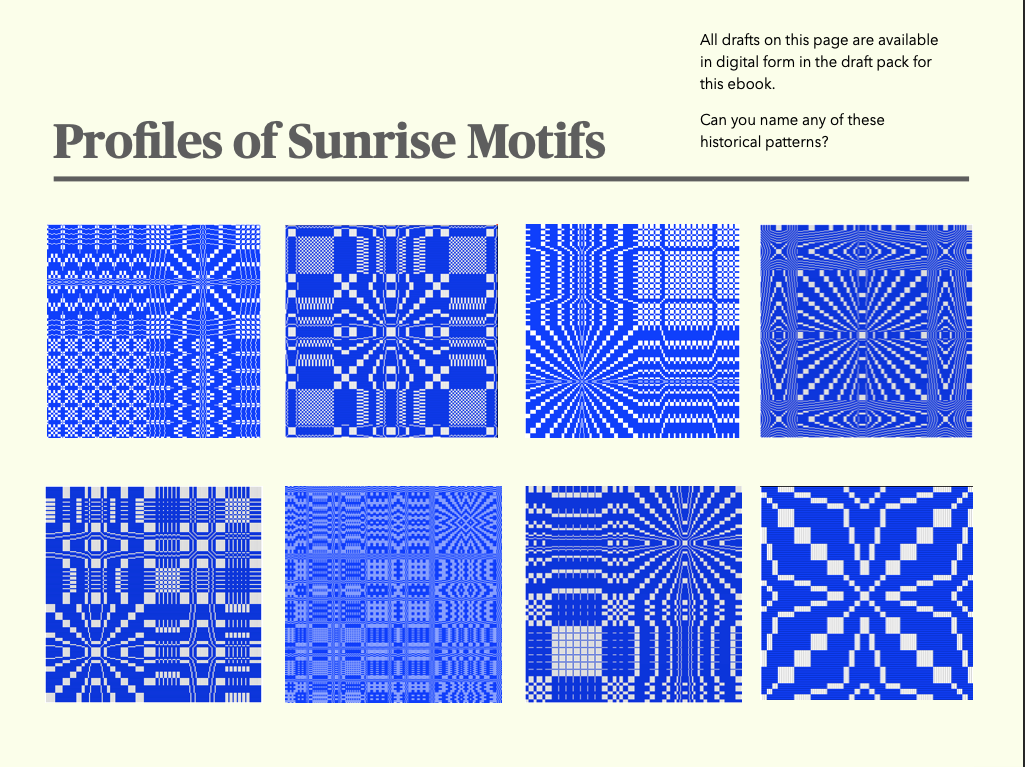
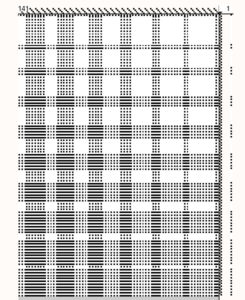
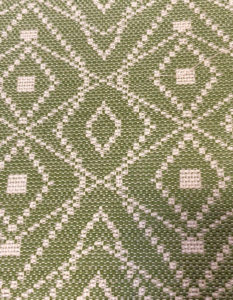
I have taken the time to record some of the larger coverlet radiating overshot pattern drafts in profile draft form making them more accessible to weavers who use drafting software. From the profile you can try different structures, colors and layouts to find a design that is pleasing to you. I have built instructions that show you how the draft is composed and how it can be modified. I would like to think of it as giving you design components more than a formal project plan. If you want the formal project plan approach use the Woven as Drawn in instructions. My goal in my presentation is to increase your understanding so that you can design your own projects and not not to restrict you to copying standardized patterns.

I added an eBook/PDF and draft package for Radiating Overshot Patterns  – Sunrise, Blooming Leaf, Bow Knot and the Double Bow Knot. These designs include full drafts, profile drafts and woven as drawn-in drafts. This is the link to purchase the draft archive and the instruction ebook: https://historicweaving.com/wordpress/product/radiating-patterns-for-historic-overshot/

The Radiating Patterns ebook shows you how the drafts are related, the Draft Archive catalog details all of the profiles for easy reference to file names, and there are more than 68 drafts in the package. Included are the Lee’s Surrender, Sunrise and Blooming Leaf coverlets drafts. These drafts are the Series IV groups a,b,c and d – radiating patterns. From Mary Atwater’s original work combined with any examples I could find in digital museum collections that had no accompanying drafts with them.

Another bonus item from the American Handweaving Book, when published Mary Atwater made use of black and white photographs of historic coverlets she located in musuems. I have tracked the coverlets down and found color digital images from the current holding Museum’s digital collections. Use this link to download a copy of the original book manuscript and the link overlay to view the color images. https://historicweaving.com/wordpress/product/the-shuttle-craft-book-of-american-handweaving-updated-photo-links-in-pdf-format/

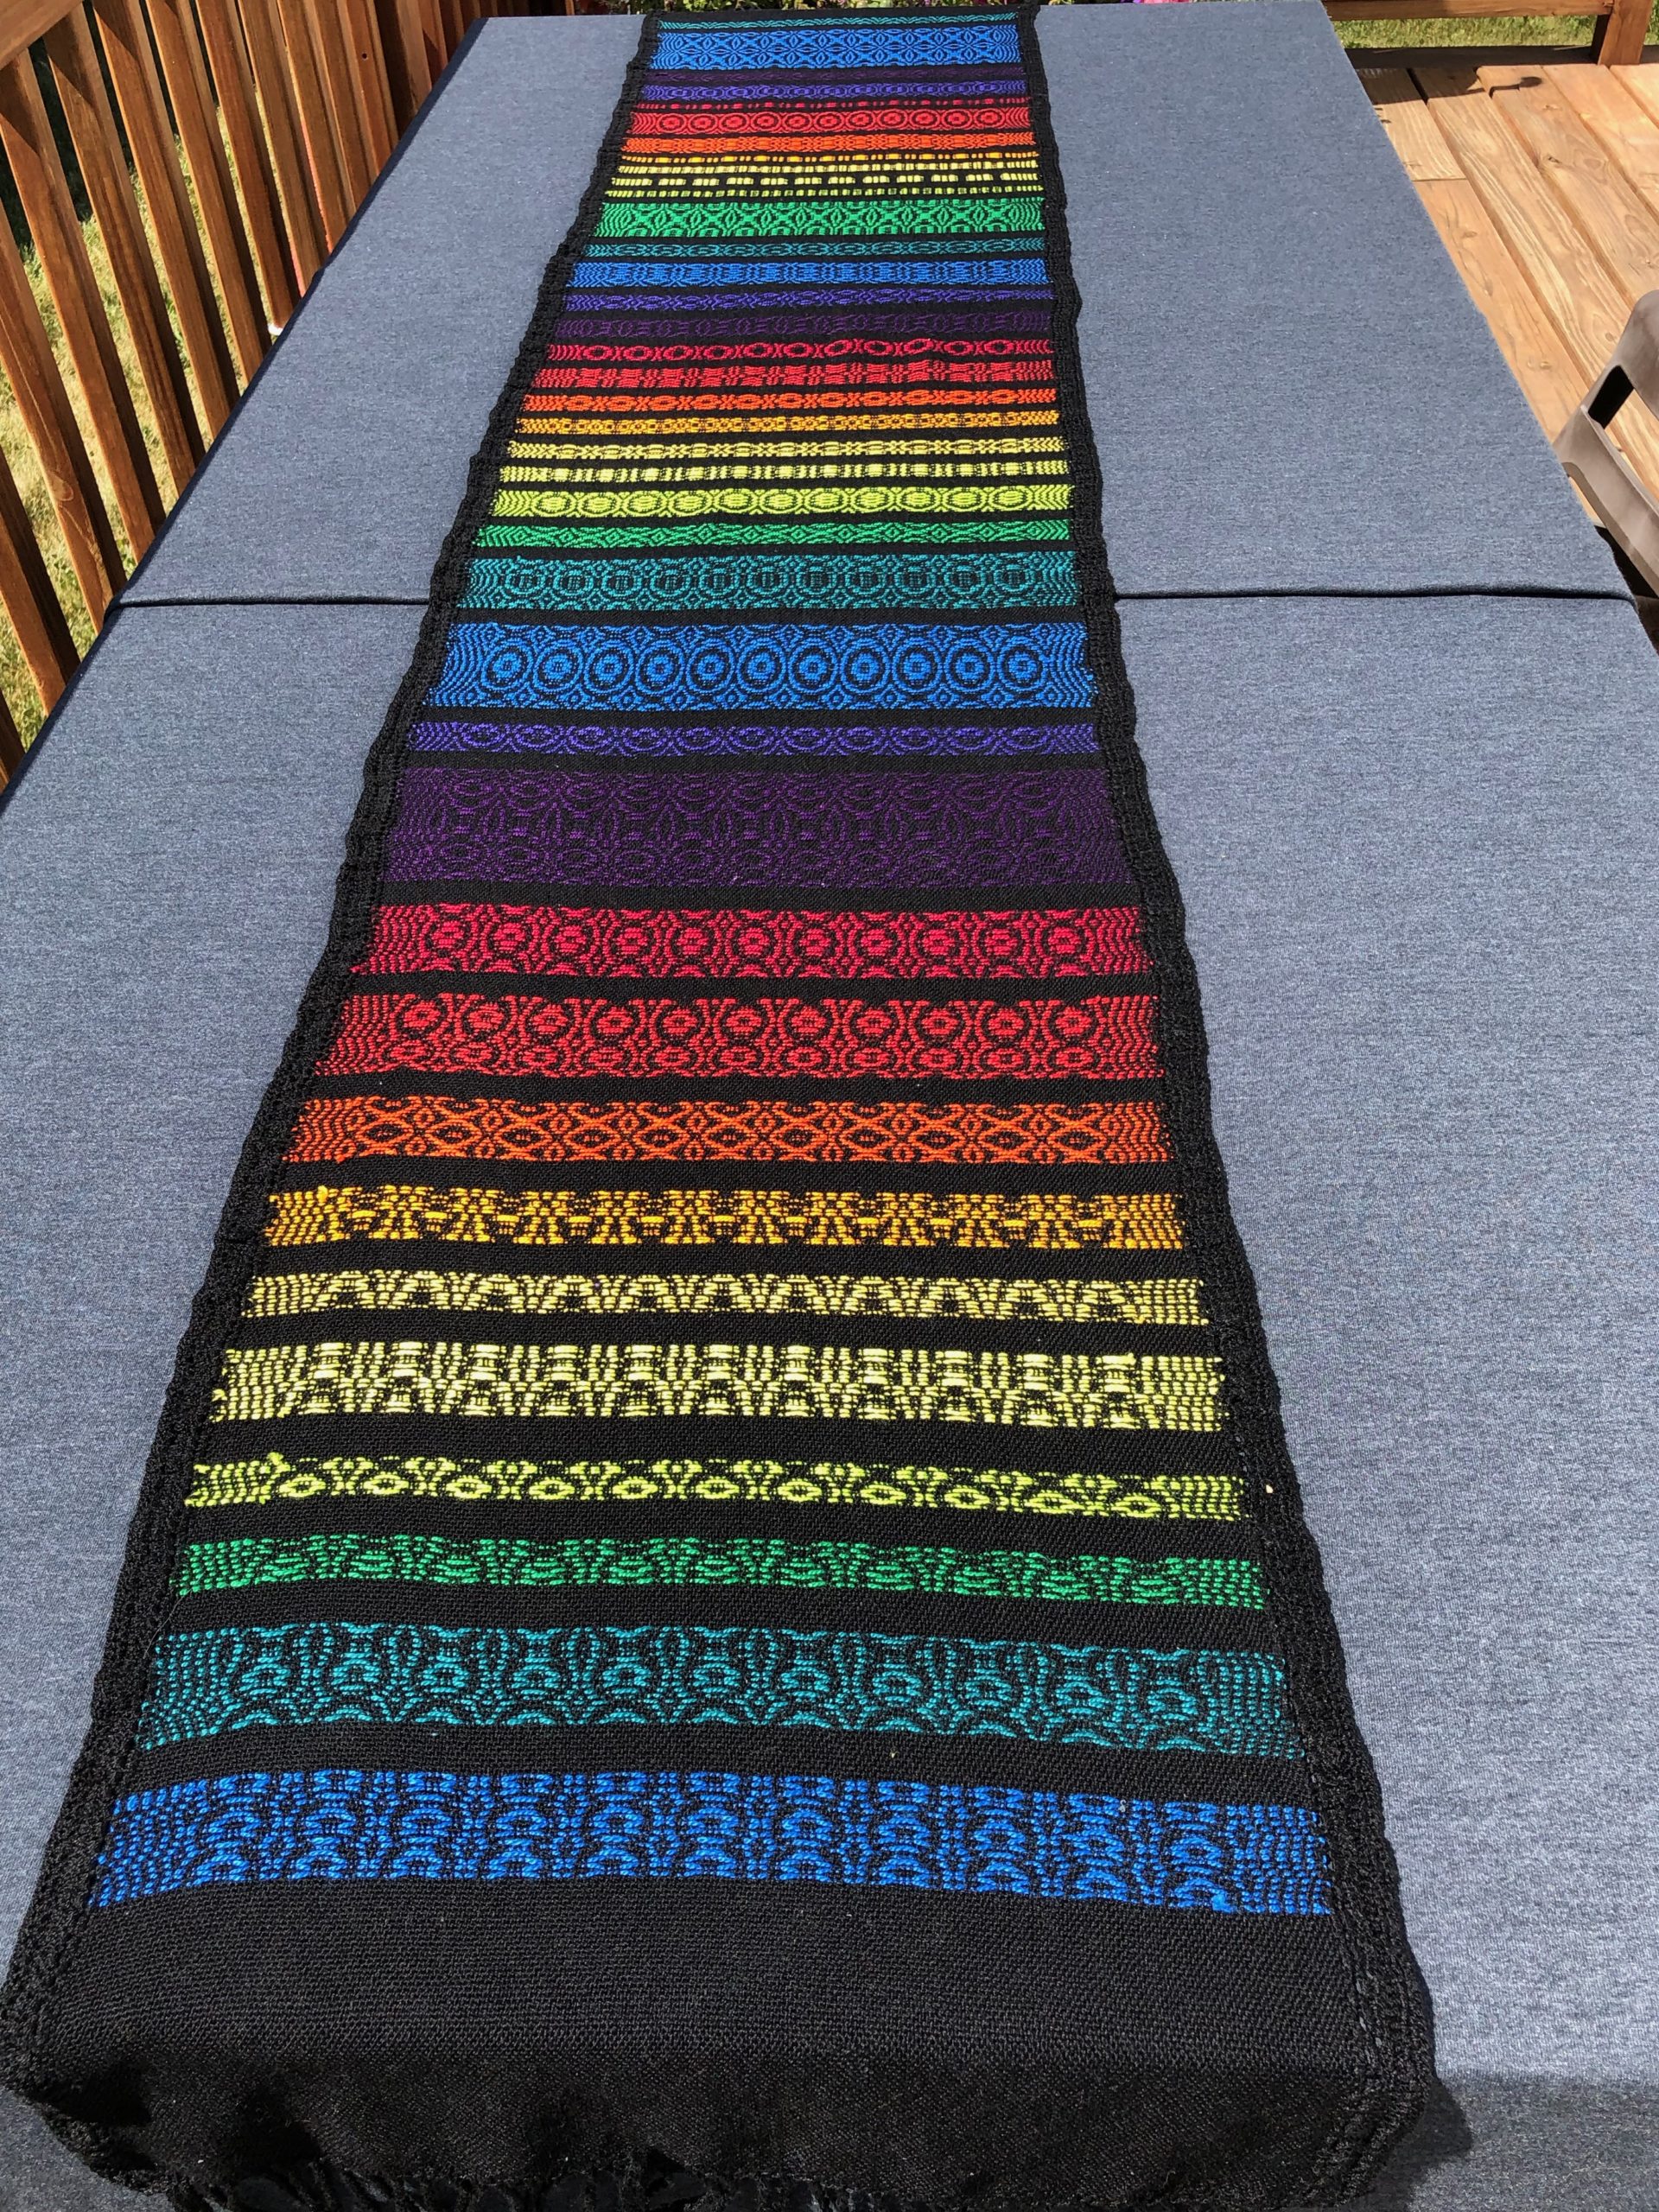
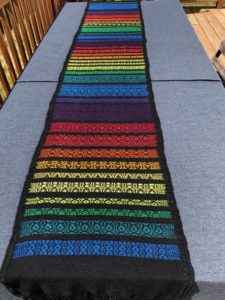
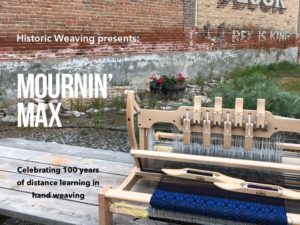
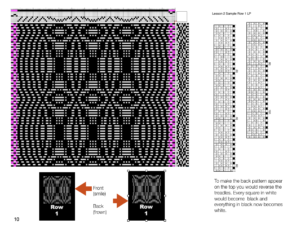
From the Mary Meigs Atwater’s Shuttle Craft Guild – Lessons, lesson 2 which concerns the Honeysuckle draft, I completed a copy of the Sampler Project that she requested as part of the lesson. That lesson encouraged me to create more than 50 unique treadlings to create the sampler assignment from Lesson 2,  I named “Mournin’ Max” to honor the 100th anneversary of death of her husband Maxwell Atwater in 1919, an event that marked the beginning of her full time career in weaving that lasted for the rest of her life. Click on this link for the draft Archive. https://historicweaving.com/wordpress/product/draft-package-for-mournin-max-project/

Current research in the studio

Completion of the documentation of the reticule from the Montana Historical Society Museum. Can be woven on a 4 shaft loom. The structure is Honeysuckle Twill.

A welsh tapestry draft for a 24 shaft loom. Draft is complete, just needs weaving. (“Forget me Not”)

A contemporary version of the Lee’s Surrender draft, using a unit tie weave that can be woven on 6 shafts. In this archive there are colored versions of Lee’s Surrender as found in museum collections.

I am turning my attention to the weaver’s draft books in the United States in the late 1700’s how they got here and the influence they had. I have in my hands access to most of these books and some scholarly research to guide my efforts.

Also I am doing work documenting the drafts for the early Jacquard coverlet designs and determining what designs and motifs can be woven on conventional looms. Those that can not I will be using my drawloom to complete a sample of the designs for posterity.


The Mournin’ Max Weaver’s Challenge toolkit has arrived.

"Mournin Max"

There are four parts of the “Mournin’ Max” Weaver’s Challenge toolkit.

1. The “Mournin’ Max” – Celebrating 100 years of distance learning in hand weaving. An e-book to telling the story of how and why this project came to be. This book also contains my process notes for the design and weaving of the sampler.

2. The “Mournin’ Max” Weaving Challenge Card Deck – A deck of 108 cards that can support up to 6 weavers undertaking the challenge at the same time. The cards are used to determine the colors and patterns that will need to be woven to complete the challenge. The deck has been configured to require weavers to draft the treadling sequences needed to weave the designs. This deck will need to be ordered via this link: https://makeplayingcards.com/sell/historicweaving (link is live)

3. The “Mournin’ Max” – Sample Draft Package. 78 Draft files with nearly 100 drafts in both Treadle and Lift Plan formats. Files are .wif so they will work in most weaving software packages. These file contain the answers for the bonus draft cards in the “Mournin’ Max” Weaving Challenge Card Deck.

4. The “Mournin’ Max” – Draft Solutions e-book. A 36 page row by row solution guide to the drafting of each of the original 23 sampler rows. Each individual weaver participating in the challenge will need access to this book. It can be used as an introduction to the project, and confirmation that the solution the participant provided matches the original design before weaving the rows into the sampler. This book contains the rules and instructions for setup up of the challenge, the materials needed and loom warping instructions, as well as a hyperlinked introductory weavers glossary and a first lesson in draft reading and development.

The “Mournin’ Max” Weaving challenge can be completed by an individual or as a guild study group or full day workshop.

This is a workshop that I can present with my mobile studio for up to four weavers. The looms will arrive dressed for the challenge and all materials will be included in the workshop fee.

“Mournin’ Max” Sneak Preview

"Mournin Max"

“Mournin’ Max” – by Elizabeth Tritthart

Coming shortly to this website’s store:

The story behind the weaving of “Mournin’ Max”, my summer research and my learning while on the road with my loom.

A collection of the “Mournin’ Max” project overshot drafts for both 4 shaft and 8 shaft looms based on the work of Mary Meigs Atwater. Draft package will be available in .wif files for weavers with weaving software, and pdf format for those that do not have weaving software.

A “Mournin’ Max” Weaving Challenge 108 card deck, and a companion Draft Solutions book. Perfect for a full day guild weave-along or workshop. Designed to introduce weavers to the concept of building a draft from looking at a textile.

Who was Max anyway, and why would someone mourn him?

Mourning Max Sneak Preview

“Mournin’ Max” the story behind the weaving

Draft Solutions Book Cover

Draft Solutions Book Cover

Sample Draft Solution Page

Sample Draft Solution Page

Mournin' Max Weaving Challenge Card Deck

“Mournin’ Max” Weaving Challenge Example

Detail of "Mournin' Max"

Detail of “Mournin’ Max”

The backstory on 50 Shades of Gray warp

While trolling around on Pinterest for inspiration, I came across this image. I found it attractive, and classic at the same time. Foolish me, I took note of the image, associated it with other Bauhaus artists that inspire me and got to work thinking about how I could translate this into a woven piece suitable for one of my traveling handlooms. For the next two weeks. I could not make that image come into my feed again.

Little did I know what I had stumbled upon. This was a work of one of the big artists in my era – Sol LeWitt, he was based in New York City , my childhood cultural mecca during the 1960’s and 1970’s. Mom brought us children to the city at least monthly for cultural events, music, art, etc. I grew up thinking everyone went to the Met, MoMA, Carnegie Hall and Radio City Music Hall on a regular basis. It’s what you do when school’s out or on a weekend; take a train, walk the city, come home excited but exhausted.

Turns out Mr. LeWitt and I might have crossed paths as Wikipedia says of him that:

He had an entry-level job as a night receptionist and clerk he took in 1960 at the Museum of Modern Art (MoMA) in New York.

Paragraphs on Conceptual Art LeWitt asserted that Conceptual Art was neither mathematical nor intellectual but intuitive, given that the complexity inherent to transforming an idea into a work of art was fraught with contingencies.[43] LeWitt’s art is not about the singular hand of the artist; it is the idea behind each work that surpass the work itself.

Also come to find out he was also influenced by Josef Albers, a Bauhaus alumni:

Sol LeWitt: Wall Drawing

Seven Basic Colours and all their Combinations in a Square Within a Square

Sol LeWitt dedicated his wall drawing to Josef Albers, whose colour theory and practice was a significant influence on his own development.

Even if LeWitt and Albers are separated by a fundamentally different understanding of their work, what is valid for both artists is their avoidance of any emphatic idea of authorship, their surmounting of any hierarchic model of composition and the way they, in general, objectify the work concept in which a single piece is always part of a long term serial study.

I saw this piece, and instantly set about figuring how a warp like this could be created. I drew a simple draft.

Note, my draft is backwards as the orientation of the work was not most critical in my mind, but the mechanics behind the pattern was. Sol LeWitt increased the black lines by 1 in every block and began his work with a minimum of two blocks. The grid used, was very similar to the one he used for his cubes. Which explains the two black lines around the outside.

From there I decided to build on this pattern principle, I wanted a draft with 200 threads, 10 blocks of 20 threads each and I was home free! Next step was to wind this warp, each set of blocks would require a different number of threads in black and white.

I fashioned my own sectional warping system from a reel that was donated to me by a weaving friend. I used a velvet cantra frame to hold the AVL tension box, and a LeClerc spool rack for the 30 bobbins needed.

Yes, I am an engineer and I think of these types of things often.

I then transferred the warp from the reel to the Ashford Katie loom I was going to weave it on.

I threaded the 8 shafts in a straight threading keeping my options open for structure changes.

The reed in the loom is a 10 dpi read and I sleyed it at two threads per dent. Warp was composed of 10/2 cotton in black and white. One of the first things that I noticed, if the sleying/threading was not correct, all of the black threads would not rise to the top at the same time. This was a clue to go back and double check my work. I found the warp quick to proof in this way.

My first sample was woven in a plain weave with a sett of 20 ends per inch,  half the threads up on each throw of the shuttle. It was easy to start with the white on the left and know which lever to throw with each pass, until you began to add the black. Then I needed to check what the last throw was to determine the next. In my zeal to finish the sample, Ihad abandoned the draft, and resorted to looking and counting. In some ways it was slow going, the piece took about 4 hours to weave only because I made mistakes and had to undo and redo my work. What did I gain from this approach, more of a reliance on what my eyes saw in the cloth versus what the draft said to do. Some of the first steps in design on the loom.

From the photo of the loom you can see I wove this piece outside while camping.

What troubled me about the piece was that it was not square, each block was taller than long, the sett was quite loose for the thread. The loom is only 12 inches wide, lowering the sett was not a practical solution for this loom.

For the second sample I chose to switch to a twill structure which allowed the threads to collapse down on each other a bit more. I measured the block and I was very close to square, I felt it was close enough to continue.

During this weaving I made note that if I was not careful with the levers, and picked a 2&7 combination instead of 2&5, I began to see a log cabin or shadow weave variation appear in the warp. Twice, I needed to unweave large sections of the warp to remove this undesirable optical effect.

Here are the two finished samples side by side:

There was much more I want to weave and try on this warp. But time is short, and I will have to leave it to some of my students to complete.

I am pleased that Sol LeWitt’s work translated so well into weaving. It provides a great study for practicing design principles while on the loom.

I can now see the difference the structure will make in both the range of values, and the size of the pixel.


Click here to purchase draft package of the 50 Shades of Grey Challenge. Package includes computerized draft for weaving software .wif file, and non-computerized draft in PDF format, as well as a PDF with pictures detailing the project.


Testing of the “50 Shades of Grey” warp

I was first inspired by a pen in and ink drawing I saw on Pinterest but in my excitement, I did not capture it and now I can’t get it back in my feed to credit it properly. It was a museum piece from the Bauhaus era, which is why it spoke to me.

I decided to see if I could weave it on a loom, specifically on a 4 or 8 shaft loom.

Turns out it was very possible. I did the sample twice on the warp you see here, once in plain weave and again using a straight twill. The twill I think most closely matches the look I was going for.

There are many more experiments to try. Clasped weft (black and white), color substitution in weft, Solid color in weft. It goes on and on, and no two will be alike.


Two Tie Unit Weave – Variation 3

The latest work on the loom. Variation 3 of my two tie unit weave.  I am working with a “olive/avacado” green cotton thread for the pattern weft. The design deign is a new one I have recently completed. I was looking for a contemporary feel and I believe that I have achieved that. The weaving is pleasant and easy to follow.

This is just one of the 10 items in my production run on the AVL loom this Spring. Look for it to appear for sale online – on this website sometime this summer.

Using Perler beads to design a tie-up

I have been working on a warp that will include 10 different designs on my AVL loom. This warp has been set up to be a two tie unit weave. The warp will handle 16 shaft patterns in a point twill layout. Because I have a standard threading and a standard treadling, all I need to change will be by tie-ups and the color of my pattern threads.  Pretty simple weaving.

I made the designing easier by using Perler beads to lay out the tie ups and tested the symmetry using a pair of quilting mirrors.  I have labeled this tie-up variation 6.  There are four more designs in the series to go.

Jennifer’s Draft Number #2

Jennifer wrote to me and asked me about this draft she had found in a file. She was not familiar with this particular draft and wanted to learn more about it. My first step was to look at the blocks – the areas separated by the long lines. Most of the sections have 4 lines in them in two rows. It appears that this draft is on four shafts. Likely it is an overshot draft.

I looked at the sequence of the blocks, reading from the right to the left,  A block has lines on shaft 2 and shaft 4, B block has lines on shaft 2 and 3, C block has lines on shaft 1 and 3, D block has lines on shaft 1 and shaft 4. Looking through the rest of the draft the are no other combinations of lines. Our Draft has 4 blocks. I then could label the blocks on a piece of paper

I then wrote the draft out in my notebook, matching the lines and the threads by the block I identified.

I then translated this into a profile draft by substituting  the A Block for shaft 1, the B Block for shaft 2, the C Block for Shaft 3 and the D Block for shaft 4. Because some of the blocks had 4 threads and some only 2. I decided to use two threads to represent the four thread blocks, and one thread for the half block. I treated the 3 thread block as a two thread block for the profile.

I set the tie up to ABCD, to match the blocks.

I then selected tromp as writ, and colored the warp a contrasting color to make the design appear.

While I was entering the draft into the iWeaveit program, I noticed that some of the draft was not even (balanced) I adjusted the draft to make it even.

I had found one place where the draft did not move sequentially through the blocks. Usually overshot moves in a circular fashion through the blocks, jumping blocks can cause long floats to appear. You can see the area on the on the bottom line towards the left edge the block moved from D to B and back to D again. This is in one of the short blocks. This is not the way the other side of the block is, and so I adjusted it to match the beginning of the block sequence.

At this point you can not weave the pattern, but you have a fairly good idea of what the design will look like when woven.

The blocks in the threading move gracefully from left to right and the designed when woven will have that characteristic of a 45 degree diagonal line from bottom right to top left.

When this design is woven it will need to have a border and a number of repeats to match the size of the fabric desired. To repeat the design you would start from the top right of the threading and enter that sequence after the last thread on shaft 4 in the draft.

At this point, you are missing the threads for the ground cloth. The tabby weave.

To weave this pattern I will need to decide what structure it is, and then change the draft to have that threading arrangement.  I will show you how I do this in the next blog update.


This is a quick look at the profile draft as it is repeated.

There are tables (the big blocks) and smaller blocks in the middle. The pattern will look like the checkerboard you see, to prevent long floats.

I am sure this pattern can have variations. This is a sample of what it would look like if it remained symmetrical.


Vision Board for Angstadt 164

Today was a fun sick day. I woke up not feeling well (cough,cough) and knew that going out was not going to happen. My next stop was the computer where I decided to play with the design that I shared with you last week.

My goal, to turn the draft into a welsh tapestry design. I think I did pretty well. My best news of the day, it is possible for you to order this design as a throw in a few weeks. I have made contact with a company that allows me to create a design and they will weave it on their Jacquard loom. I am in wonderment!

It has taken me a couple of tries to get the hang of how to set up the files so their system will run them.  I can’t wait to order my first samples and see how they turn out.

The website is WOVNS.  Brand new — only six months old.

I completed a whole vision board today. You might want to take a look — it is a pdf file. Vision Board – Angstadt 164 Should you be interested in these designs for some of your projects please let me know by email.


Save

Update to the Replacement Dish Towel Project

This slideshow requires JavaScript.

After a long time, almost a year. I finally had the time to get to this project. As I did, I discovered that I had set up my loom incorrectly and was not able to weave until I fixed the installation of the friction brake, and the clutch for the cloth advance. Thank you to wonderful people on the Weaver’s Tech list.

During this process I did decide on an initial draft of the first towels. It is based on two different Jacob Angstadt designs, both are 12 shaft pointed twills blocks. I wanted to get a checkerboard effect without needing to use two shuttles. This was made possible by reversing the tie-up blocks.  Now to the real work, weaving!

The Replacement Dish Towel Project

The replacement dish towel project began when I discovered that my old towels had become stained, and a bit dingy as the result of a man being around the house. He seemed to forget they were handwoven and used them to mop stains on the floor, clean up snow mixed with granite gravel and asphalt, and of course, wiping the stove top off after cooking a spaghetti dinner. Like all men, he just wants to be forgiven, and like all women I just want my pretty dish towels back.

My first steps were to look around the kitchen and discover the colors I wanted to use. I happened to have purchased some beautiful denim blue 16/2 cotton, and have some yellow and white cones of thread. My first thoughts were to make the towels mostly blue in an effort to hide future dirt. I  began wrapping thread on to cardboard strips to see what stripes I was most interested in. I found the wrapping task to be a bit tedious. Of course, I made the mistake of letting someone else in on the project, only to discover that they are not so interested in the blue background. They really like the yellow which matches the kitchen walls.

I then scurry around on the internet and search for blue and yellow striped towels to get some ideas. In the process I discovered a few great design tools. A Stripe Generator, a Tartan Designer and a Color Picker. All are awesome diversions – yet none of them output to weaving software and thus none directly suited my needs. Back to the old fashioned way of doing things for now.

I then made some sketches of the stripes that I found  on the Internet for my purposes, I found my stripes by Googling for blue and yellow striped towels and selected the entry that displayed images, it looks a lot like Pinterest and I could just flip through the pictures looking for my favorites. I eventually decided that there were so many I wanted to try to make, that I should make my design using an all white warp so that I can change stripes whenever I like.

Me being me, I can not weave in a plain weave when I have a loom that has 24 shafts! So I selected to use a 16 shaft point twill as a base structure. I learned during my stay in Italy, that I am happiest with twill and damask weaving and it seems to come naturally to me. I will use as my inspiration for the structure, Angstadt 16 shaft twill profiles.

So far I have determined that I will be using white 10/2 perle cotton in the warp, 8/2 unmercerized cotton in the weft, and various colors and widths for the colored stripes.

I have selected a beginning sett of 20 epi based on my previous experiences with this structure. I have chosen to weave this on my AVL loom using the compu-dobby to help me pick the pattern and I will have to concentrate on the weft color changes manually.

I have decided that I will be weaving 18 towels in all and therefore will be winding a warp 15 yards long on the sectional beam.