Book Review – Next steps in weaving

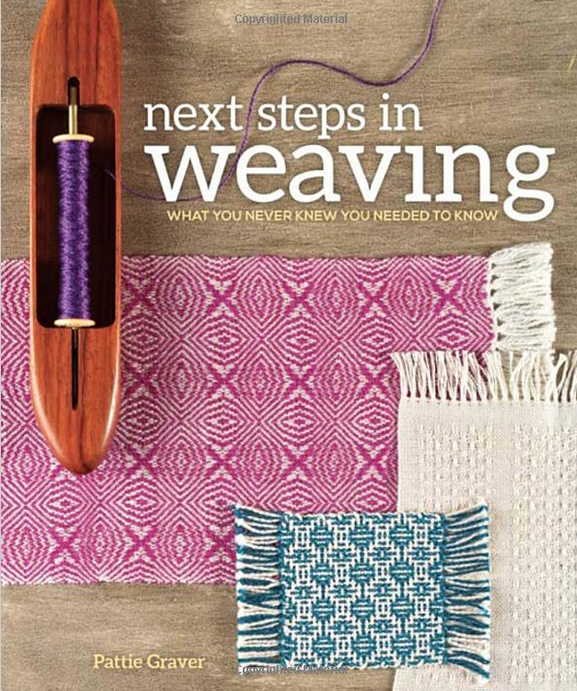
Today, I completed my reading of “Next steps in weaving” by Pattie Graver. I am glad that I picked up this book at my local library because I found it to be filled with a logical step by step process of learning about structures using a 4 shaft table loom.  The Book covers Twill, Color-and-Weave, Overshot including Mok’s Belt, Summer and Winter, Lace – both Atwater Bronson and Huck.

In each chapter Pattie explains the new structure in detail and presents both a sampler project and a functional project for the weaver to complete. The samples are going to weave up in an afternoon or evening, the projects will take a bit longer. The goal of the book is to have the weaver get used to making samples that are completed separate from a project warp, and are used to explore the inner workings of pattern design possibilities using only changes in structure.

Best quotes:

I became a “weaver”; that is, before I was able to progress from “knowing how” to “knowing why”.

My desire to get weaving was far stronger than any longing to understand weave structures.

You’ll gain experience much faster by working on smaller piece and you’ll have fewer surprises when you do move to full projects.


Projects:

Scarf of Lucky Colors

Hydrangea Bouquet Scarf

Contemporary Overshot Towels

Summer and Winter Placemats

An Atwater-Bronson Lace Table Runner


The project that I will be completing from this book are the samplers. I have been weaving on 8 shafts or more for a while I have yet to explore all of these structures on a 4 shaft loom.

My favorite project to try will be the shadow weave. In this book Pattie Graver provide a very thorough explanation  of how Shadow weaves can be created from twill drafts. I have not seen this type of explanation before.

Link to Next steps in weaving on the weaving resources page: https://historicweaving.com/wordpress/weaving_resources/next-steps-in-weaving-what-you-never-knew-you-needed-to-know

Polychrome Tile Project

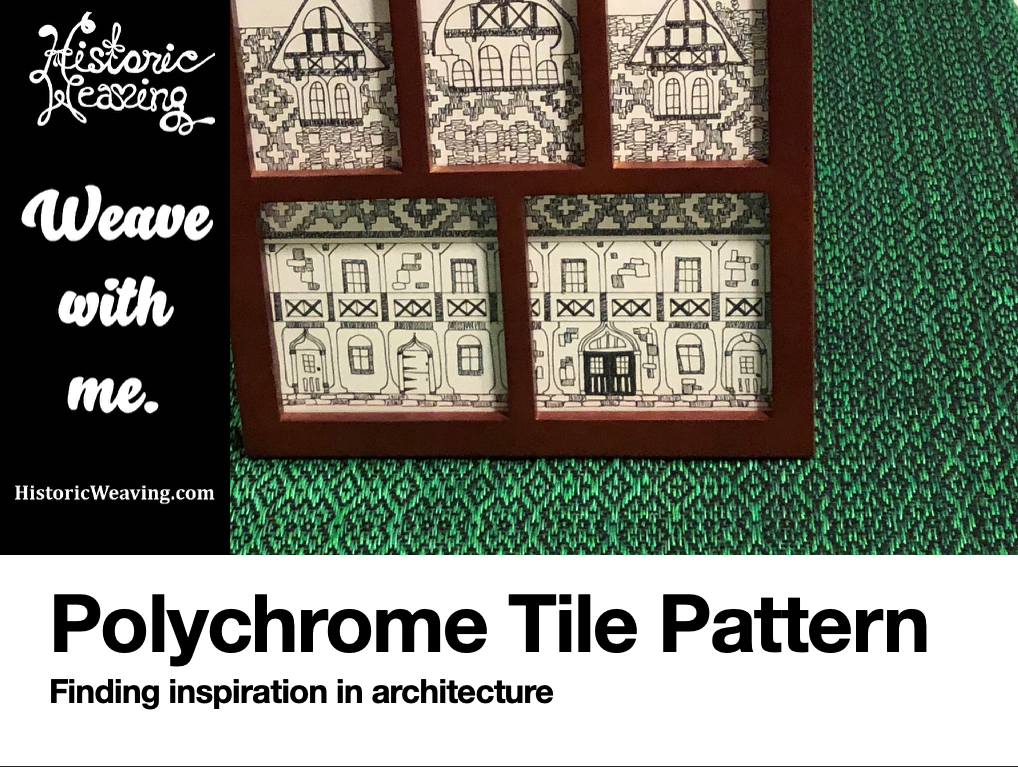
Polychrome Tile Pattern

At the beginning of the Pandemic, I found myself spending more time researching digital archives of some of the best Internet sites. I came across pictures of buildings that lead me to believe the architects where inspired by weaving drafts. I set about figuring out what type of draft the designers were looking at and developed a project to recreate it.

The project is for a table runner. The project can be woven on an 8 shaft table or floor loom. The project includes both WIF files and PDF copies of the draft for those that are not using weaving software.

Included in the package is a basic warp calculation for the materials needed to complete the project if you set it up as I did.

Click Here to purchase the downloadable package for The Polychrome Tile Project

Polychrome Tile Project

100 Horizontal Stripes Project – using stripes to create handwoven Christmas ornaments

100 Horizontal Sripes Cover Shot

Need to make something unique for your weaving friends and family this year? I have new project plan just for you. Using horizontal stripe patterns you can create a beautiful Christmas tree decorated with one of a kind handwoven ornaments that you design and personalize.

Over 100 patterns and drafts to launch your imagination, with no upper limit to the designs you can create on your own. There are no loom size or shaft restrictions to to hold you back, every pattern can be woven on every loom, by any weaver regardless of skill and experience.

Package includes instructions, 100 drafts in .WIF format, and a new painless pickup format that uses Microsoft Excel. No worry about having drafts that are too small to read, with Excel you can enlarge them easily without a loss of resolution.

With more than 100 drafts you will also get a digital catalogue PDF of the draft files and photos of each draft as it was woven to use as an index to the draft collection.

Tree Project ExampleMoose ExampleClick to purchase your copy of 100 Horizontal Stripes Project:

Response to a question about threading – an opportunity for me to present what happens after you master plain weave.

Here is the Question: I took a two hour one on one class from you about 2 1/2 years ago. My wife and I moved from Helena to Oregon. I have a loom Ashford table 24 inch shaft. I have the eight shafts threaded and order one through eight, 1- through eight, 1- through eight etc. I should have according to the instruction book that came with the loom threaded them one through 8, 7-2, 1-8, 7-2 etc. I am using a lifting pattern which produces a 12. What other lifting patterns can I use given I’ve already threaded the way I have and I have three more towels to complete? Thanks. If this is unclear or too much to answer please let me know.

Straight Threading

Straight Threading

Answer: If I have understood your question well, the illustration that you see entitled straight threading is what you have described as your current threading on your loom. This is the most basic of possible threadings for an eight shaft loom. And I am pleased to report there are a lot of designs that will work for you and your desire to make some great towels.  I will share some of those in a moment.

I would also like to demonstrate the threading you described from the first towel project in the Ashford 8 Shaft projects book. Here the threading that is called for is a “point” threading the lines form a sawtooth or triangular shape. Looking at the difference between the two shapes in a draft (which is what these pictures are) the difference in the threading introduces a point of symmetry in the loom. Every time the threading changes direction it is possible to weave a design that is symmetrical about that point.

Point Threading

Point Threading

Fundamentally,  a straight threading can be used for a number of structures and patterns. They will be controlled by changes in the tie-up – the connection between the thread shaft and the lever on a floor-loom. On a table loom this change is easier because all you will change is the lift-plan (the order in which you press levers to lift the shafts).

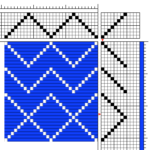
In the first example, I have a 8 shaft twill that will be treadled by lifting each shaft in order to match the threading. It will have long floats and it will be weft faced (the blue thread will be dominant) This may not result in a useable towel depending on the thread in your loom. But it is a good exercise for sampling.

Treadling in the second example on the point threading, I will see the mirror image of the threading in the white line. If I change the direction of the treadling at the point I will make an X, the meeting of two triangles. This displays the impact of the point of reflection. Changing the order in which I lift the shafts, changes the design and makes a point of symmetry.

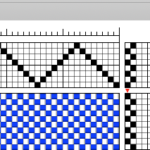
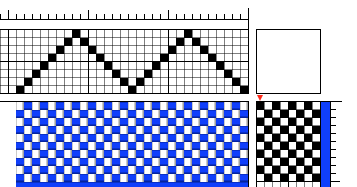
If I wanted a plain weave fabric I would use the following plan: Lift half of the threads on the first weft shot (1,3,5,7), and lift half of the threads on the second shot (2,4,6,8). This is structure 1, and Twill is the second structure. There are a great variety of twills you can generate on a straight threading.  Rather than me list them, I would like to give you the opportunity to experiment.  Here is a draft showing twill blocks that can be alternated with plain weave.


Plain Weave

Plain Weave

Plain weave with lift plan

Plain weave with lift plan

Twill blocks with plain weave

Twill blocks with plain weave

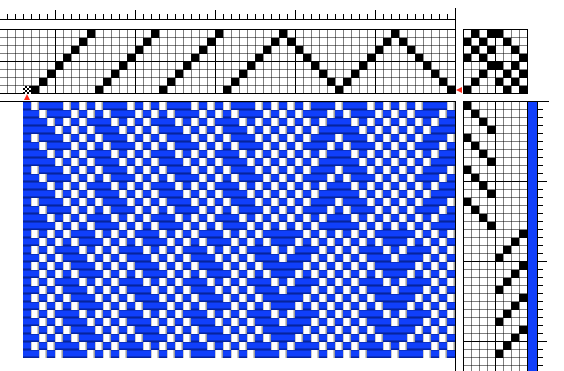
This draft may seem complicated at first but let me explain how it is organized. I have illustrated both types of threading you described. A straight threading and a point threading.

Looking at the draft  you will see that there are no triangles on the left side of the threading (straight threading) that is because there are no points of symmetry.

On the right side there are neat little chevrons in the cloth. These occur at the place when the threading turns (a point of symmetry).

Let me also explain that upper right hand corner of the draft. The tie-up. In my example, I have divided the draft into four sections, (areas or blocks). When I do this I can weave different structures at the same time. Its like having two 4 shaft looms working together. In this case I set up the lower left corner to weave a 3-1 twill (over 3 under 1) on shafts one through 4 and a plain weave with threads that are on shafts 5 through 8. In the upper half of the tie up I set the loom up for a plain weave block on shafts 1-4 and a 3-1 twill (with the twill line in the opposite direction)on shafts 5-8.  In English, at any given time one half of the threads will be weaving plain weave and one half will be weaving twill.

Let’s look at the treadling, I began by weaving the first four treadles in sequence:

Shafts being lifted:

1,5,7

2,6,8

3,5,7

4,6,8

This creates a twill line to the down to the right on straight threading and a chevron on the point threading.

The treadling of treadles 5-8 will weave the inverse (opposite) chevron on a point twill in the space where the plain weave was.

While there are many more pattern opportunities available, I would like to invite you to begin to play with the draft. You can fill in any of the four sets of blocks of this 8 x 8 draft in any way you like. You may get more floating threads than are practical, but you can safely see what is happening on the loom.

To keep track of this I would make use of graph paper, or print this little image.  To determine the shafts you will raise on the table loom, every shaft that is marked in black you will raise, you count the shafts from the bottom to the top like the threads, and the treadles are numbered 1 -8 from left to right. Let me know what you have come up with. It is ok to play with colors, and structure, but I would recommend starting with a high contrast, so you can see the interactions of the threads easily. This process is called sampling.

Blank Tie up in Draft

Blank Tie up in Draft


The backstory on 50 Shades of Gray warp

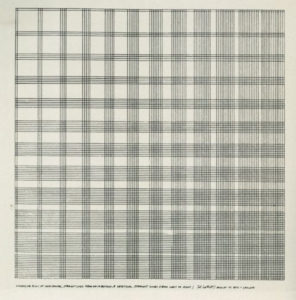
While trolling around on Pinterest for inspiration, I came across this image. I found it attractive, and classic at the same time. Foolish me, I took note of the image, associated it with other Bauhaus artists that inspire me and got to work thinking about how I could translate this into a woven piece suitable for one of my traveling handlooms. For the next two weeks. I could not make that image come into my feed again.

Little did I know what I had stumbled upon. This was a work of one of the big artists in my era – Sol LeWitt, he was based in New York City , my childhood cultural mecca during the 1960’s and 1970’s. Mom brought us children to the city at least monthly for cultural events, music, art, etc. I grew up thinking everyone went to the Met, MoMA, Carnegie Hall and Radio City Music Hall on a regular basis. It’s what you do when school’s out or on a weekend; take a train, walk the city, come home excited but exhausted.

Turns out Mr. LeWitt and I might have crossed paths as Wikipedia says of him that:

He had an entry-level job as a night receptionist and clerk he took in 1960 at the Museum of Modern Art (MoMA) in New York.

Paragraphs on Conceptual Art LeWitt asserted that Conceptual Art was neither mathematical nor intellectual but intuitive, given that the complexity inherent to transforming an idea into a work of art was fraught with contingencies.[43] LeWitt’s art is not about the singular hand of the artist; it is the idea behind each work that surpass the work itself.

Also come to find out he was also influenced by Josef Albers, a Bauhaus alumni:

Sol LeWitt: Wall Drawing

Seven Basic Colours and all their Combinations in a Square Within a Square

Sol LeWitt dedicated his wall drawing to Josef Albers, whose colour theory and practice was a significant influence on his own development.

Even if LeWitt and Albers are separated by a fundamentally different understanding of their work, what is valid for both artists is their avoidance of any emphatic idea of authorship, their surmounting of any hierarchic model of composition and the way they, in general, objectify the work concept in which a single piece is always part of a long term serial study.

I saw this piece, and instantly set about figuring how a warp like this could be created. I drew a simple draft.
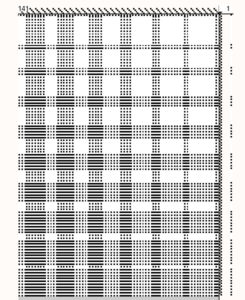
Note, my draft is backwards as the orientation of the work was not most critical in my mind, but the mechanics behind the pattern was. Sol LeWitt increased the black lines by 1 in every block and began his work with a minimum of two blocks. The grid used, was very similar to the one he used for his cubes. Which explains the two black lines around the outside.

From there I decided to build on this pattern principle, I wanted a draft with 200 threads, 10 blocks of 20 threads each and I was home free! Next step was to wind this warp, each set of blocks would require a different number of threads in black and white.
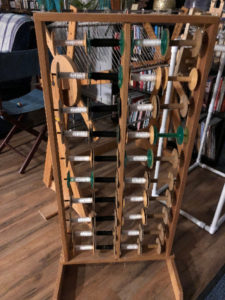
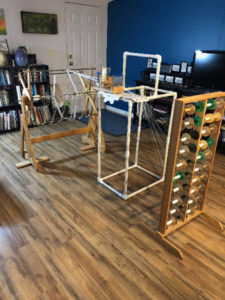
I fashioned my own sectional warping system from a reel that was donated to me by a weaving friend. I used a velvet cantra frame to hold the AVL tension box, and a LeClerc spool rack for the 30 bobbins needed.

Yes, I am an engineer and I think of these types of things often.

I then transferred the warp from the reel to the Ashford Katie loom I was going to weave it on.

I threaded the 8 shafts in a straight threading keeping my options open for structure changes.

The reed in the loom is a 10 dpi read and I sleyed it at two threads per dent. Warp was composed of 10/2 cotton in black and white. One of the first things that I noticed, if the sleying/threading was not correct, all of the black threads would not rise to the top at the same time. This was a clue to go back and double check my work. I found the warp quick to proof in this way.

My first sample was woven in a plain weave with a sett of 20 ends per inch,  half the threads up on each throw of the shuttle. It was easy to start with the white on the left and know which lever to throw with each pass, until you began to add the black. Then I needed to check what the last throw was to determine the next. In my zeal to finish the sample, Ihad abandoned the draft, and resorted to looking and counting. In some ways it was slow going, the piece took about 4 hours to weave only because I made mistakes and had to undo and redo my work. What did I gain from this approach, more of a reliance on what my eyes saw in the cloth versus what the draft said to do. Some of the first steps in design on the loom.
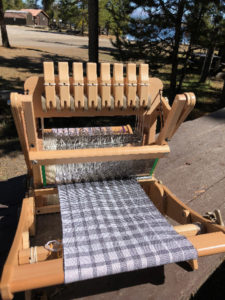
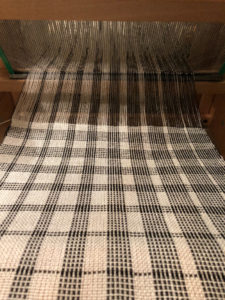
From the photo of the loom you can see I wove this piece outside while camping.

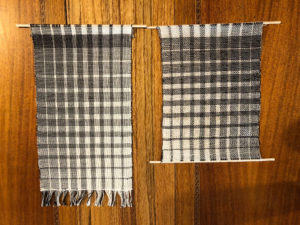
What troubled me about the piece was that it was not square, each block was taller than long, the sett was quite loose for the thread. The loom is only 12 inches wide, lowering the sett was not a practical solution for this loom.
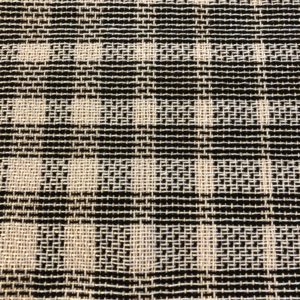
For the second sample I chose to switch to a twill structure which allowed the threads to collapse down on each other a bit more. I measured the block and I was very close to square, I felt it was close enough to continue.
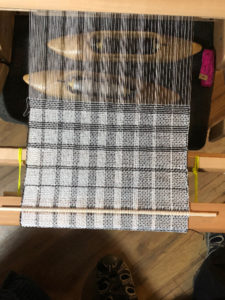
During this weaving I made note that if I was not careful with the levers, and picked a 2&7 combination instead of 2&5, I began to see a log cabin or shadow weave variation appear in the warp. Twice, I needed to unweave large sections of the warp to remove this undesirable optical effect.

Here are the two finished samples side by side:
There was much more I want to weave and try on this warp. But time is short, and I will have to leave it to some of my students to complete.

I am pleased that Sol LeWitt’s work translated so well into weaving. It provides a great study for practicing design principles while on the loom.

I can now see the difference the structure will make in both the range of values, and the size of the pixel.


Click here to purchase draft package of the 50 Shades of Grey Challenge. Package includes computerized draft for weaving software .wif file, and non-computerized draft in PDF format, as well as a PDF with pictures detailing the project.