 Let us begin our travel through time together.
I have a passion for weaving, and the history that surrounds the art form. Yes, I did call it art, because for me that is what I am making, Fine Art.
This website is designed primarily to share information that I have gathered about weaving in my weaving career. It is intended to be a compendium of information about equipment, design, structures, projects as well as lessons I have learned along the way.
My passion involves studying weaving as it was done between 1600 – 1865 in both Europe and the United States. I will admit I am not a purist, everything that I produce is not an attempt to produce a museum quality reproduction of a fabric that I studied. I like to work like most modern musicians, study the classics, and then develop my own design using materials available to me.
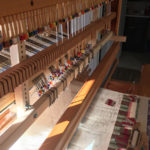
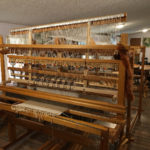
The loom you see here is Queen Esmeralda, she sits in my living room, and I began weaving pictures on her in 2016. She is the size of a 150 Ford pickup truck, and may be the most complex loom that you will find in the state of Montana. As you look her over you will discover there are no computers or power cords. She is a hand loom in the truest sense of the word.
How I hope you will use this site:
In the Design tab I will discuss how I design my weaving projects.
In the History tab will be information and links to stories about looms, weaver and their histories.
The Looms tab, you will find information about looms both new and old.
Open the Techniques tab, and you will see how a design evolves and what processes are used to move it forward.
The Resources tab contains a searchable database with links to textbooks, articles and projects that you can use. What make this database special is that it will show you where to acquire the materials, either through purchase or a local library. This is where most of my research will be made available for others to use. You can use words to describe the structure, the loom or the weaver and search for materials that contain that reference.
From the Weaving Ideas tab you will learn where do weave get their ideas? How do they change from first glimpse to final project?
Weaving Instruction tab is where to find the teachers and classes that will help you to be a better weaver.
In the Drafts tab, is a visual library of weaving drafts arranged by number of shafts needed to weave them.
The About Me tab is where you will find my artist statement and contact information.
Current Projects:
Disclaimers (the fine print):
When I discuss equipment, and how it can be used I am not attempting to be the ultimate historical resource, there are many in the academic community that are better at this pursuit than I am. My intent to give the viewer an idea of the type of equipment and its basic construction. I may make use of images in the public domain in an effort to place images in a context that the viewer can relate to.
Regarding copyright, it is not my intent to reproduce any printed or digital copyrighted material other than to explain to a viewer how best to acquire these materials. I will use links where possible to digital works to give credit to their proper
Save
Save
Save
Save

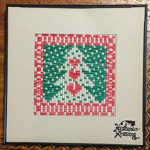
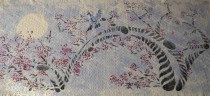
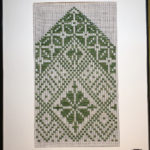 I wanted a piece that would be green and have a Celtic feel. What better to convey this than a Shamrock?