Here is the Question: I took a two hour one on one class from you about 2 1/2 years ago. My wife and I moved from Helena to Oregon. I have a loom Ashford table 24 inch shaft. I have the eight shafts threaded and order one through eight, 1- through eight, 1- through eight etc. I should have according to the instruction book that came with the loom threaded them one through 8, 7-2, 1-8, 7-2 etc. I am using a lifting pattern which produces a 12. What other lifting patterns can I use given I’ve already threaded the way I have and I have three more towels to complete? Thanks. If this is unclear or too much to answer please let me know.
Straight Threading
Answer: If I have understood your question well, the illustration that you see entitled straight threading is what you have described as your current threading on your loom. This is the most basic of possible threadings for an eight shaft loom. And I am pleased to report there are a lot of designs that will work for you and your desire to make some great towels. I will share some of those in a moment.
I would also like to demonstrate the threading you described from the first towel project in the Ashford 8 Shaft projects book. Here the threading that is called for is a “point” threading the lines form a sawtooth or triangular shape. Looking at the difference between the two shapes in a draft (which is what these pictures are) the difference in the threading introduces a point of symmetry in the loom. Every time the threading changes direction it is possible to weave a design that is symmetrical about that point.
Point Threading
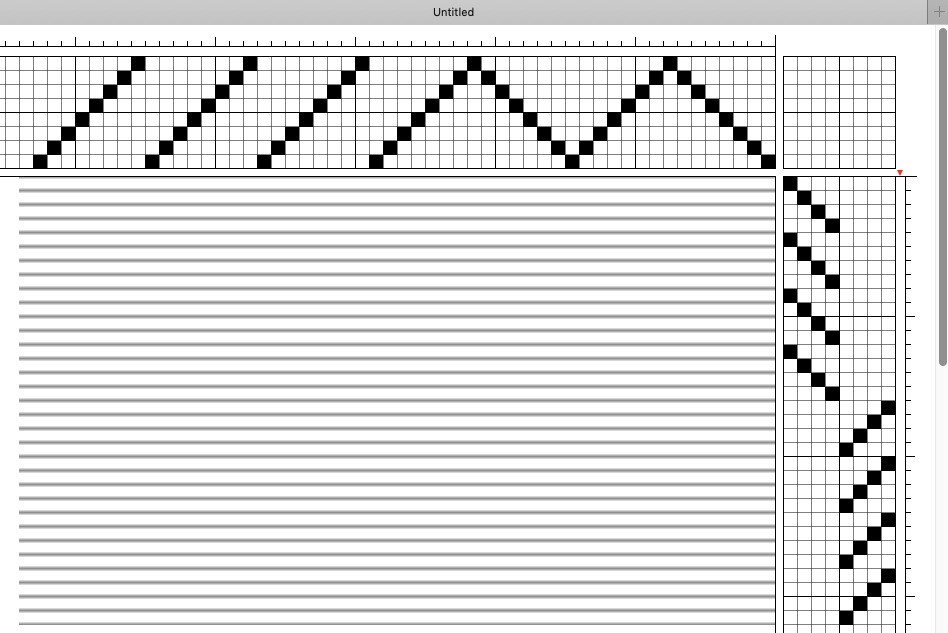
Fundamentally, a straight threading can be used for a number of structures and patterns. They will be controlled by changes in the tie-up – the connection between the thread shaft and the lever on a floor-loom. On a table loom this change is easier because all you will change is the lift-plan (the order in which you press levers to lift the shafts).
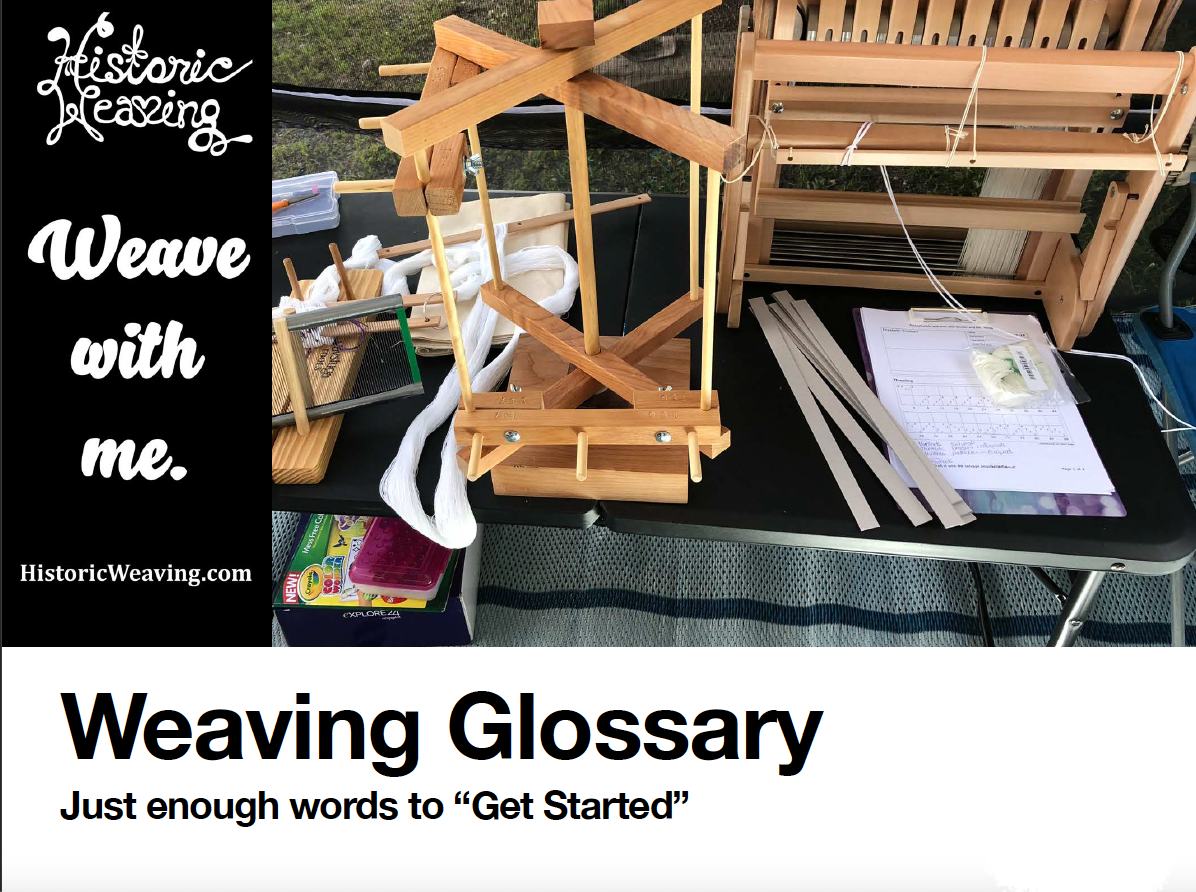
In the first example, I have a 8 shaft twill that will be treadled by lifting each shaft in order to match the threading. It will have long floats and it will be weft faced (the blue thread will be dominant) This may not result in a useable towel depending on the thread in your loom. But it is a good exercise for sampling.
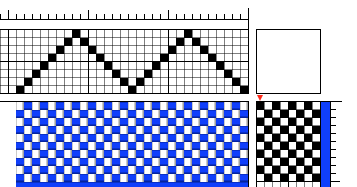
Treadling in the second example on the point threading, I will see the mirror image of the threading in the white line. If I change the direction of the treadling at the point I will make an X, the meeting of two triangles. This displays the impact of the point of reflection. Changing the order in which I lift the shafts, changes the design and makes a point of symmetry.
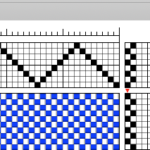
If I wanted a plain weave fabric I would use the following plan: Lift half of the threads on the first weft shot (1,3,5,7), and lift half of the threads on the second shot (2,4,6,8). This is structure 1, and Twill is the second structure. There are a great variety of twills you can generate on a straight threading. Rather than me list them, I would like to give you the opportunity to experiment. Here is a draft showing twill blocks that can be alternated with plain weave.
Plain Weave
Plain weave with lift plan
Twill blocks with plain weave
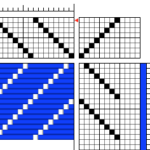
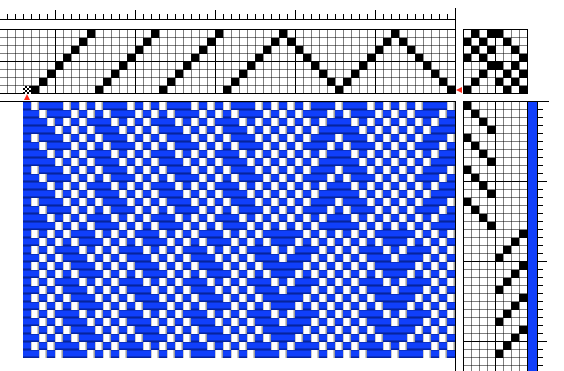
This draft may seem complicated at first but let me explain how it is organized. I have illustrated both types of threading you described. A straight threading and a point threading.
Looking at the draft you will see that there are no triangles on the left side of the threading (straight threading) that is because there are no points of symmetry.
On the right side there are neat little chevrons in the cloth. These occur at the place when the threading turns (a point of symmetry).
Let me also explain that upper right hand corner of the draft. The tie-up. In my example, I have divided the draft into four sections, (areas or blocks). When I do this I can weave different structures at the same time. Its like having two 4 shaft looms working together. In this case I set up the lower left corner to weave a 3-1 twill (over 3 under 1) on shafts one through 4 and a plain weave with threads that are on shafts 5 through 8. In the upper half of the tie up I set the loom up for a plain weave block on shafts 1-4 and a 3-1 twill (with the twill line in the opposite direction)on shafts 5-8. In English, at any given time one half of the threads will be weaving plain weave and one half will be weaving twill.
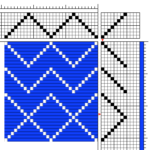
Let’s look at the treadling, I began by weaving the first four treadles in sequence:
Shafts being lifted:
1,5,7
2,6,8
3,5,7
4,6,8
This creates a twill line to the down to the right on straight threading and a chevron on the point threading.
The treadling of treadles 5-8 will weave the inverse (opposite) chevron on a point twill in the space where the plain weave was.
While there are many more pattern opportunities available, I would like to invite you to begin to play with the draft. You can fill in any of the four sets of blocks of this 8 x 8 draft in any way you like. You may get more floating threads than are practical, but you can safely see what is happening on the loom.
To keep track of this I would make use of graph paper, or print this little image. To determine the shafts you will raise on the table loom, every shaft that is marked in black you will raise, you count the shafts from the bottom to the top like the threads, and the treadles are numbered 1 -8 from left to right. Let me know what you have come up with. It is ok to play with colors, and structure, but I would recommend starting with a high contrast, so you can see the interactions of the threads easily. This process is called sampling.
Blank Tie up in Draft