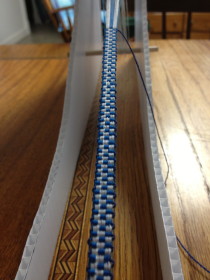
It has a been a few days, and I can finally take a breather from weaving and file a report on my progress. My current configuration is successful. I can handle up to 100 threads, I wove a test length of 5 1/2 yards with no tension difficulties. No broken threads, no frustration and no errors. 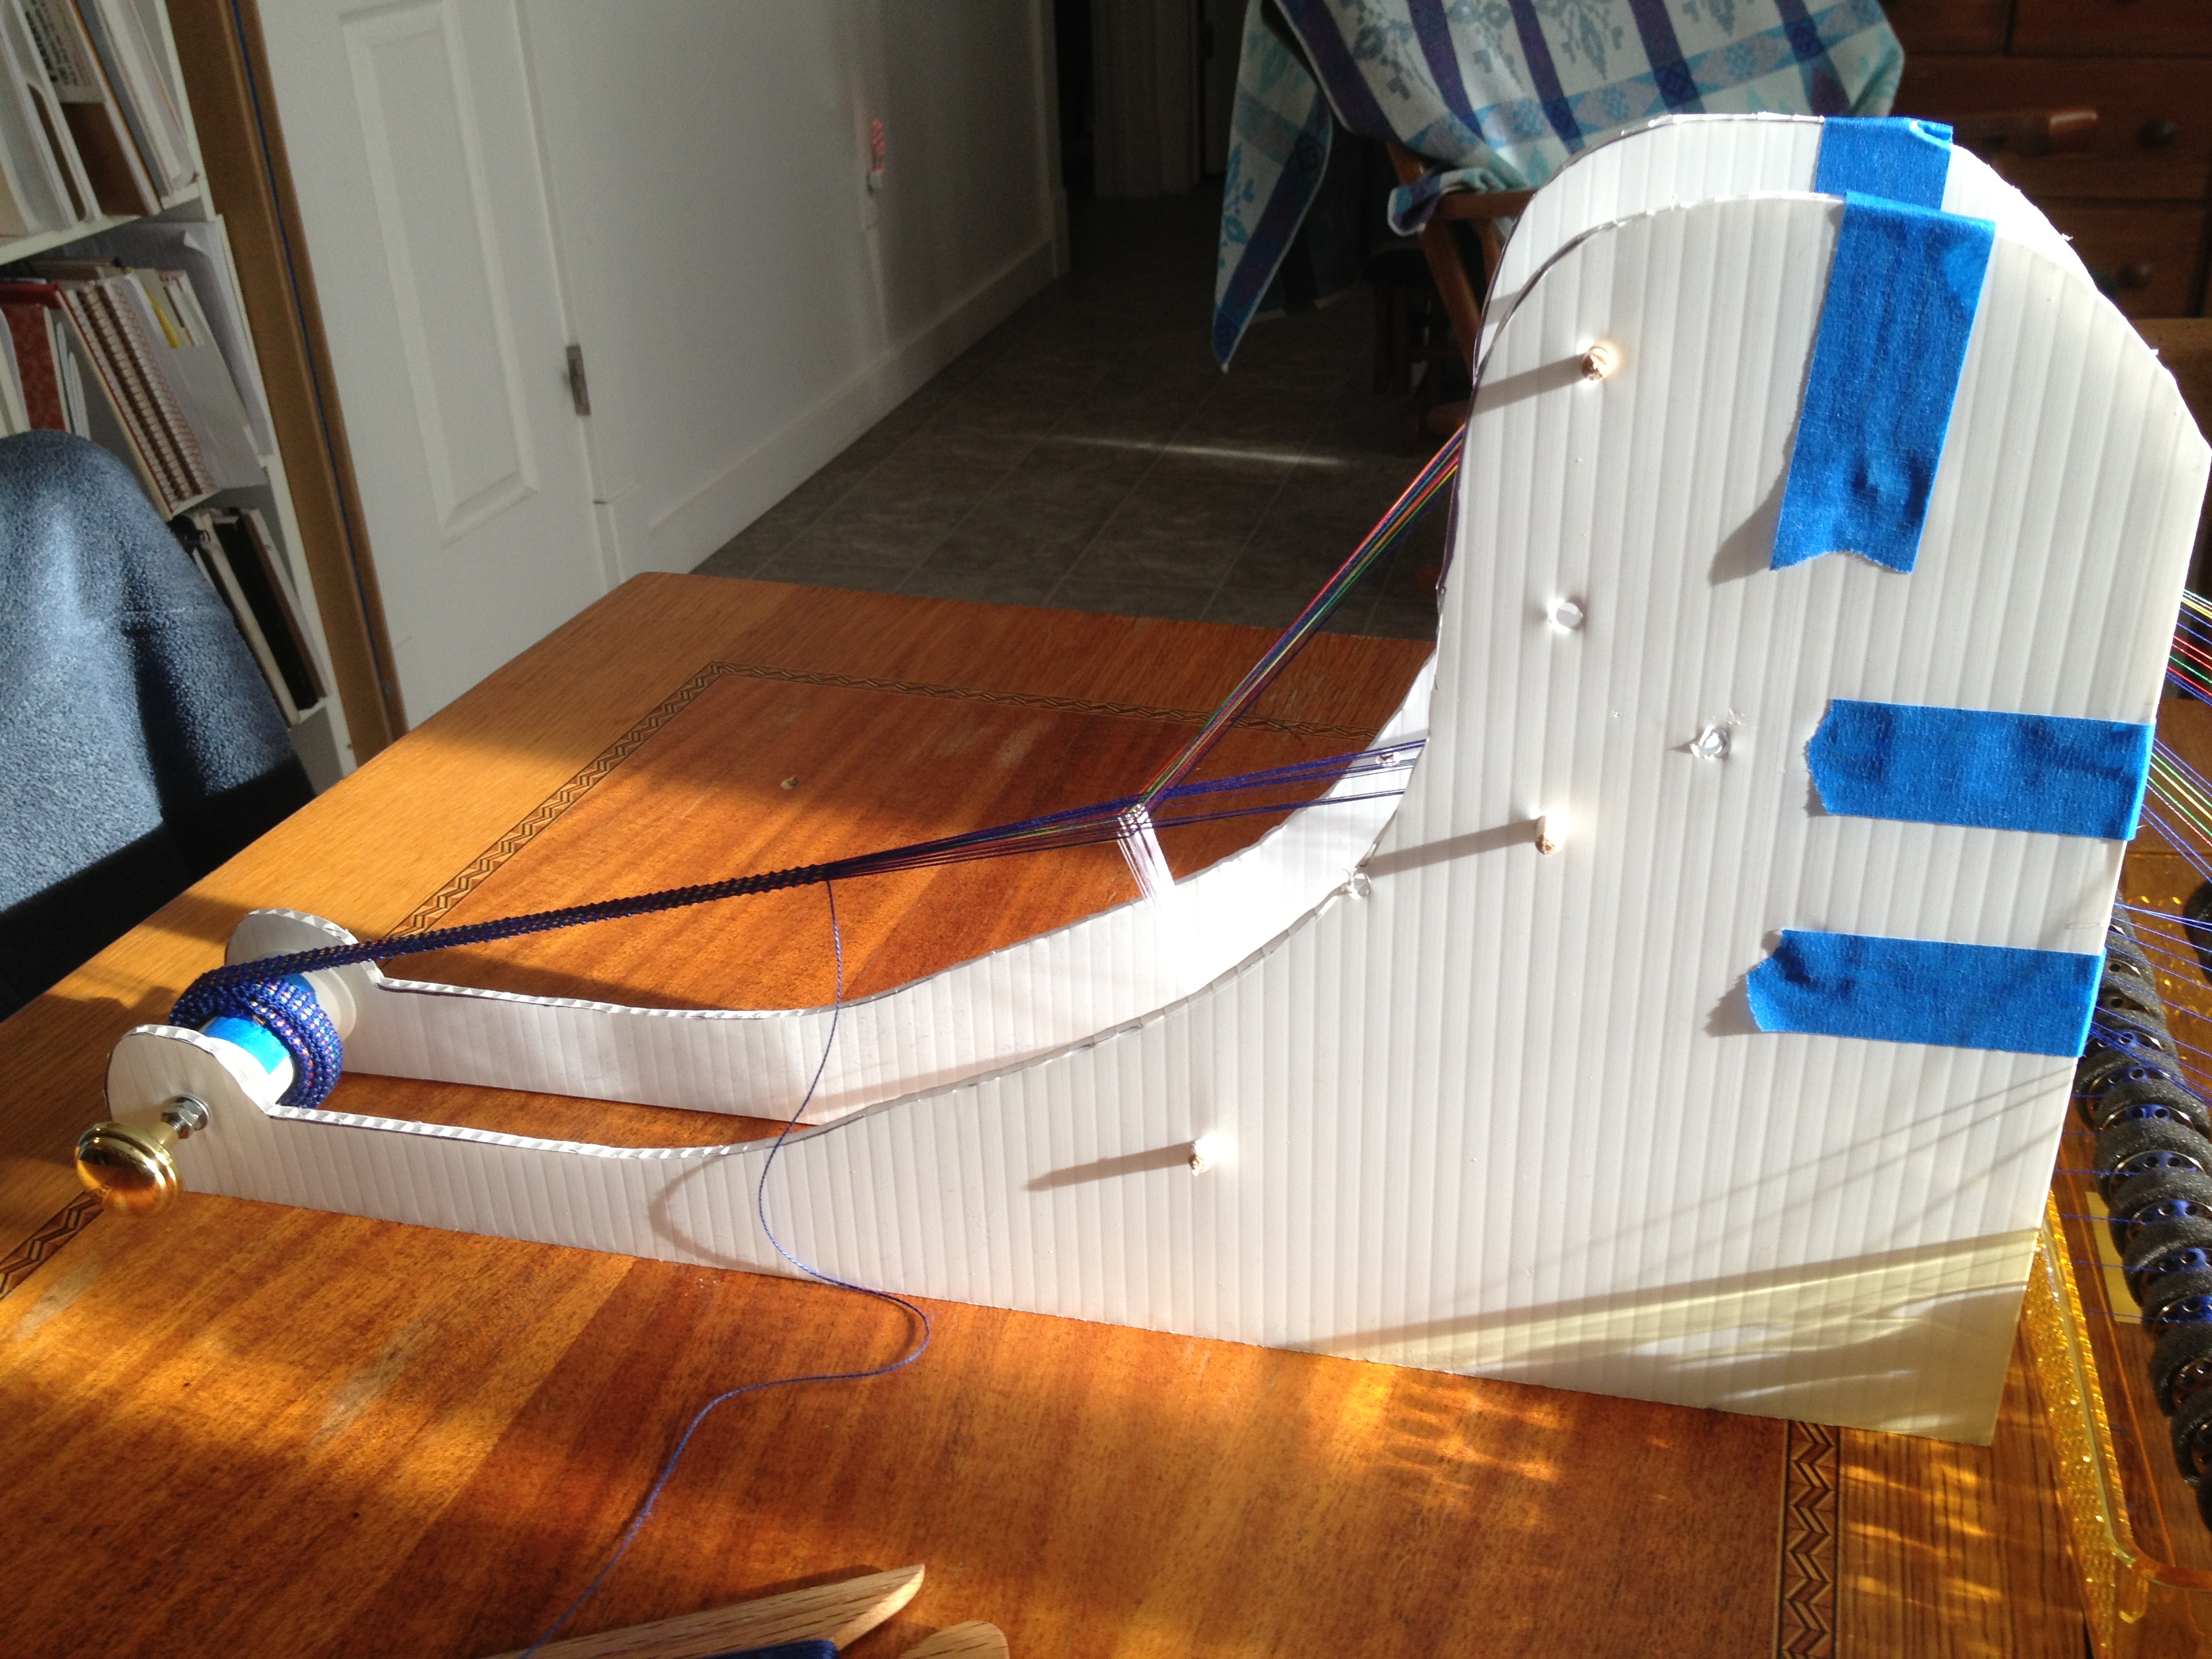
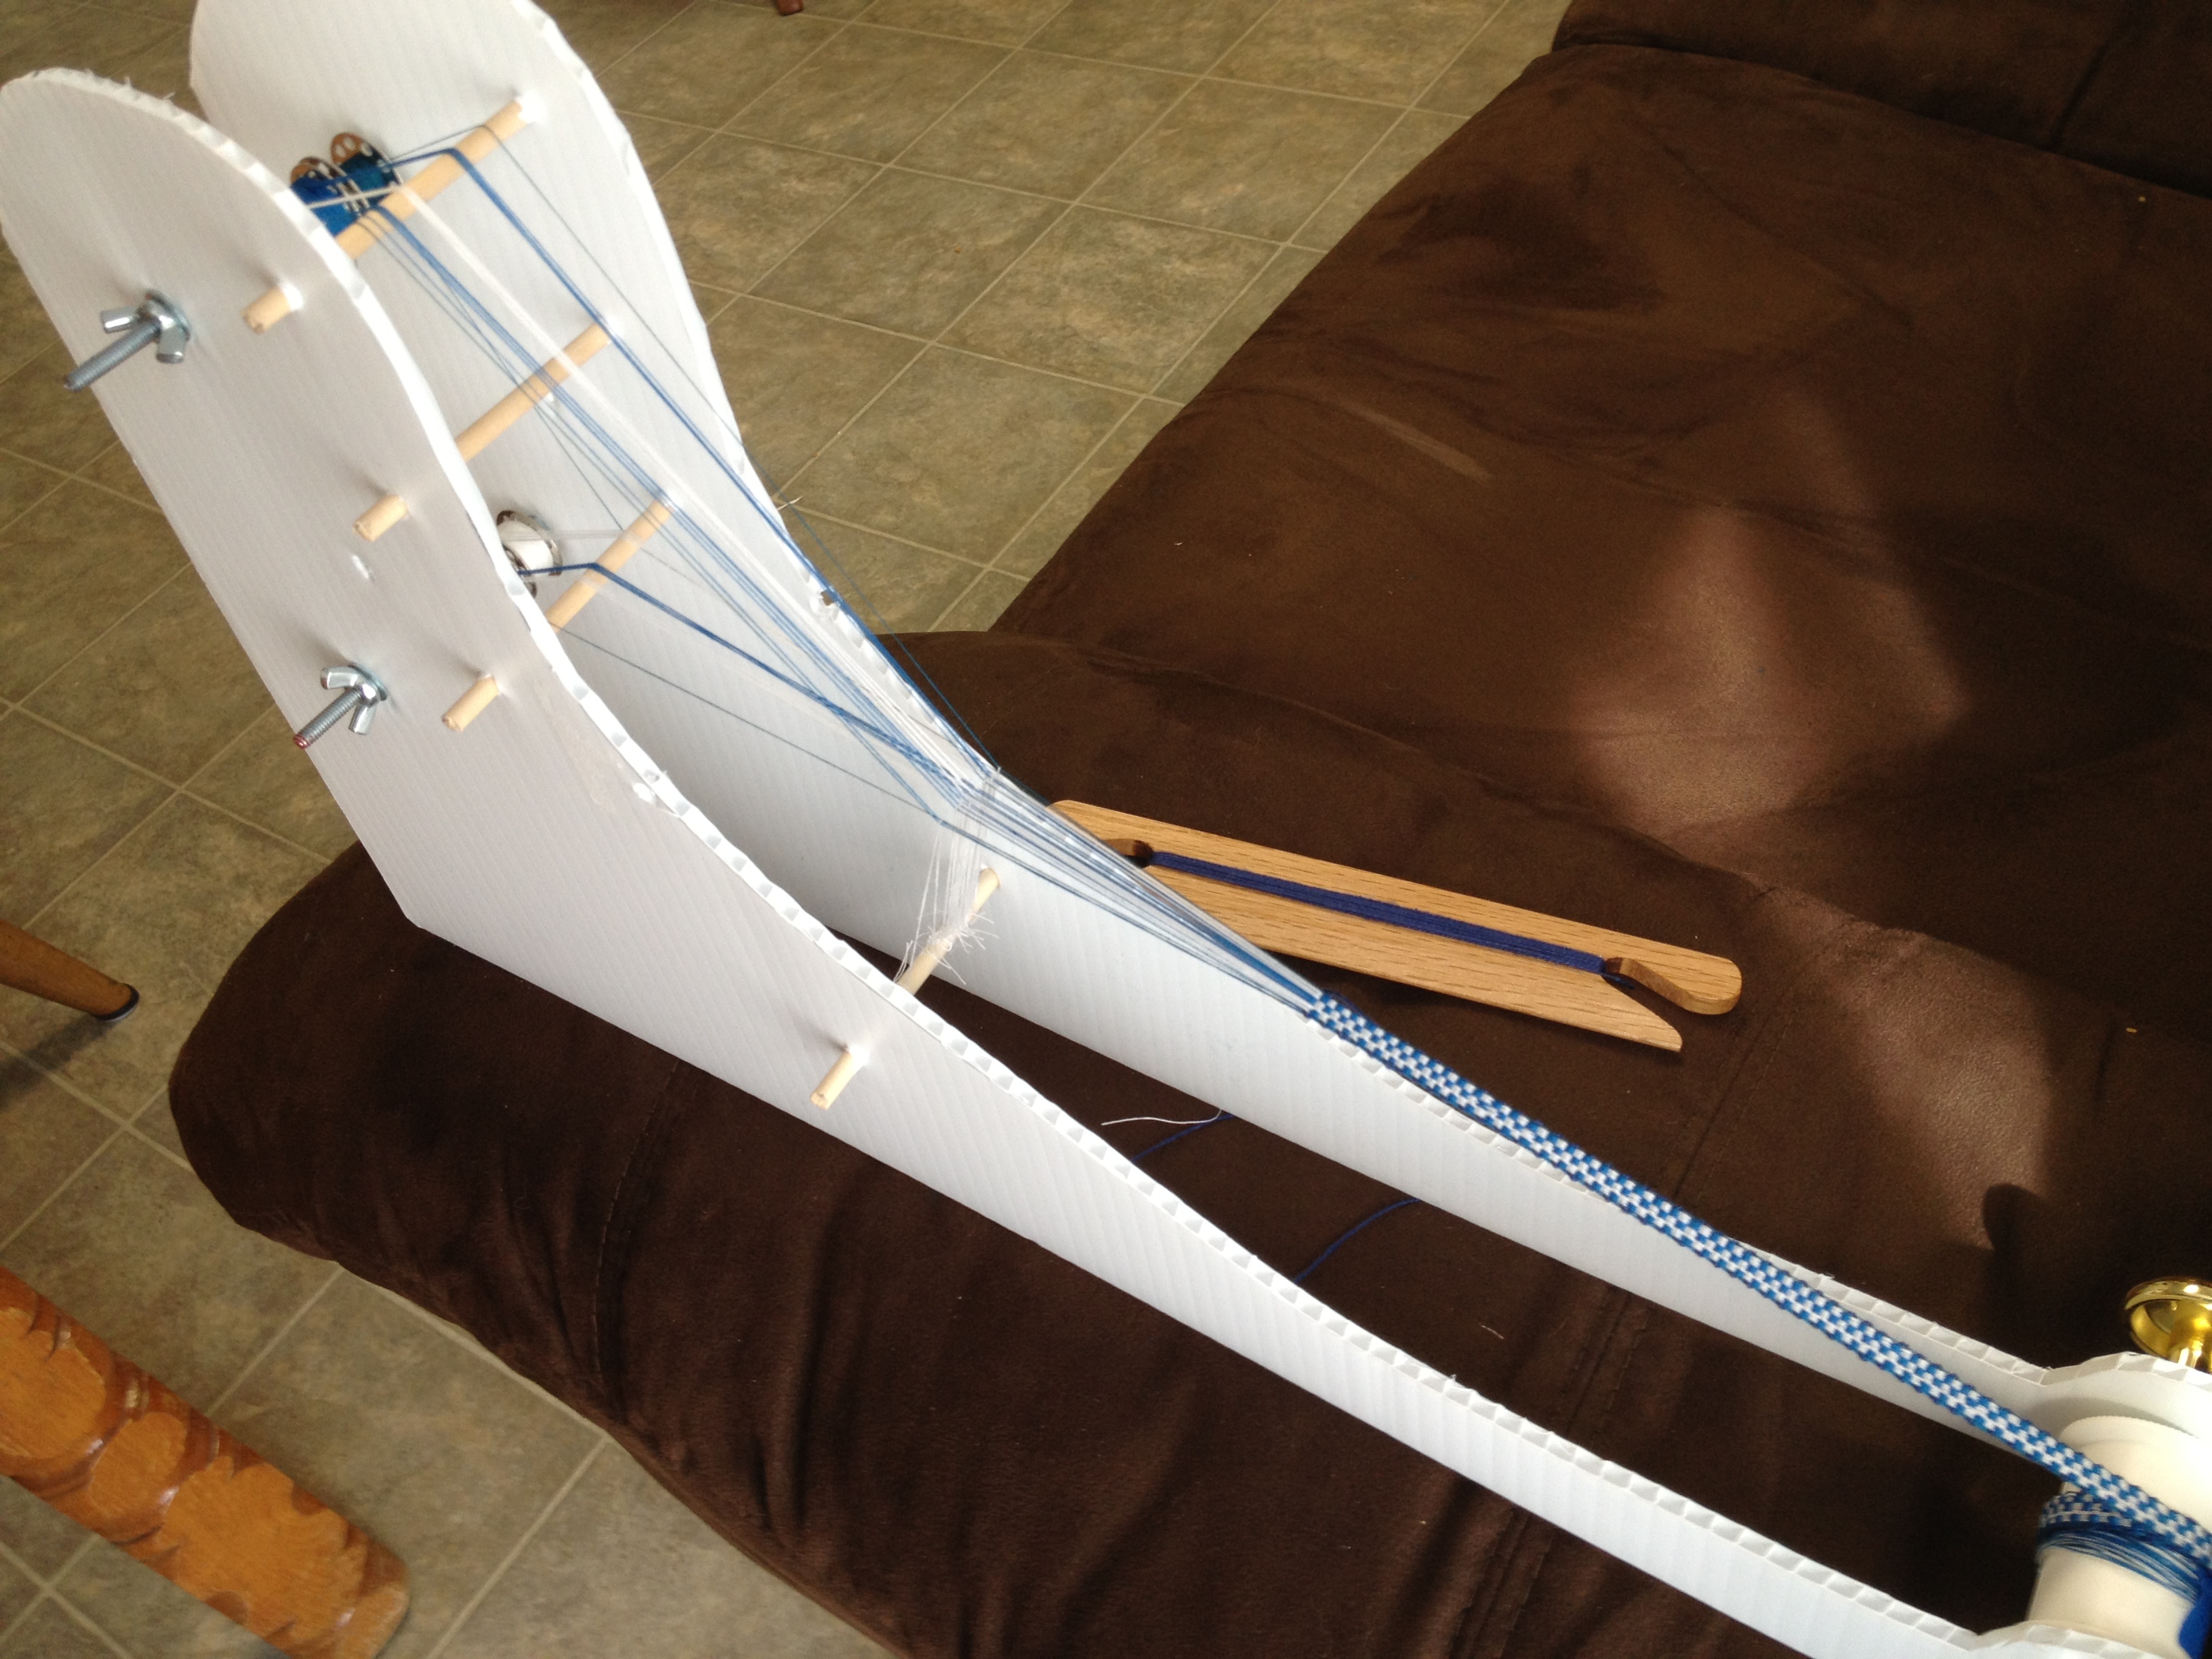
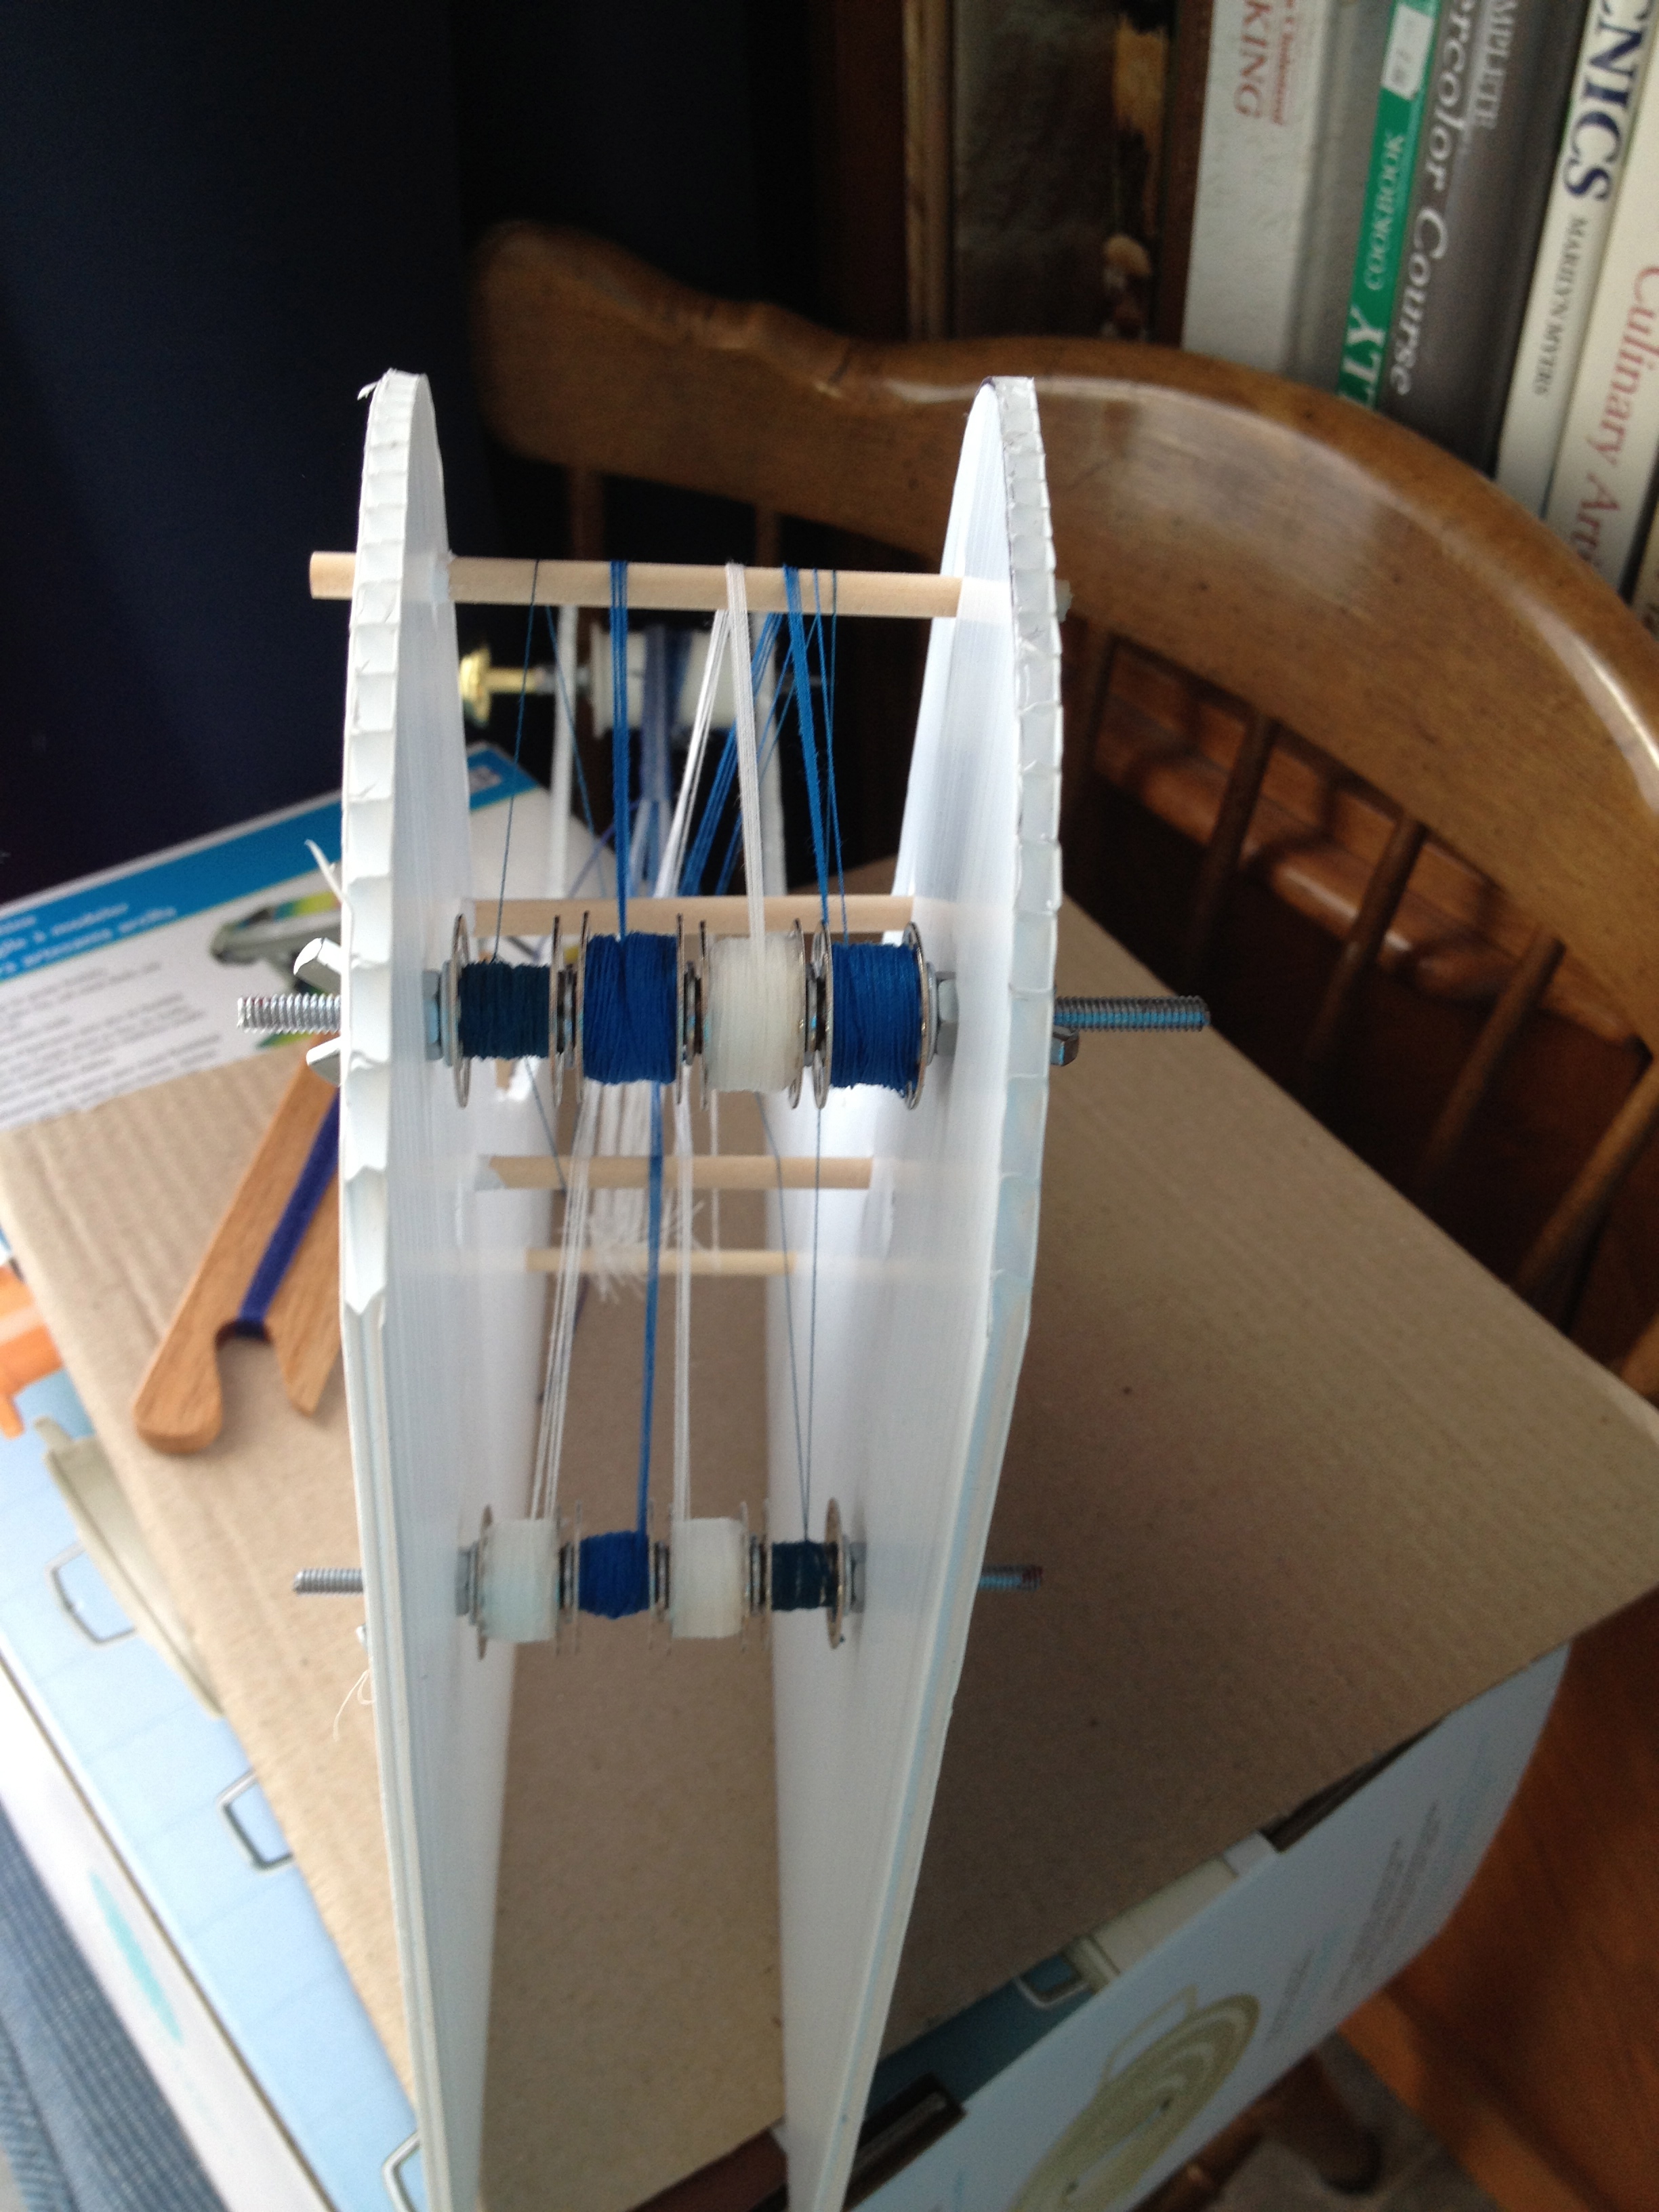
I modified my loom design to include a creel arrangement rather than use the bobbins to create a “sectional” beam. The sectional beam idea had developed tension problems the longer that 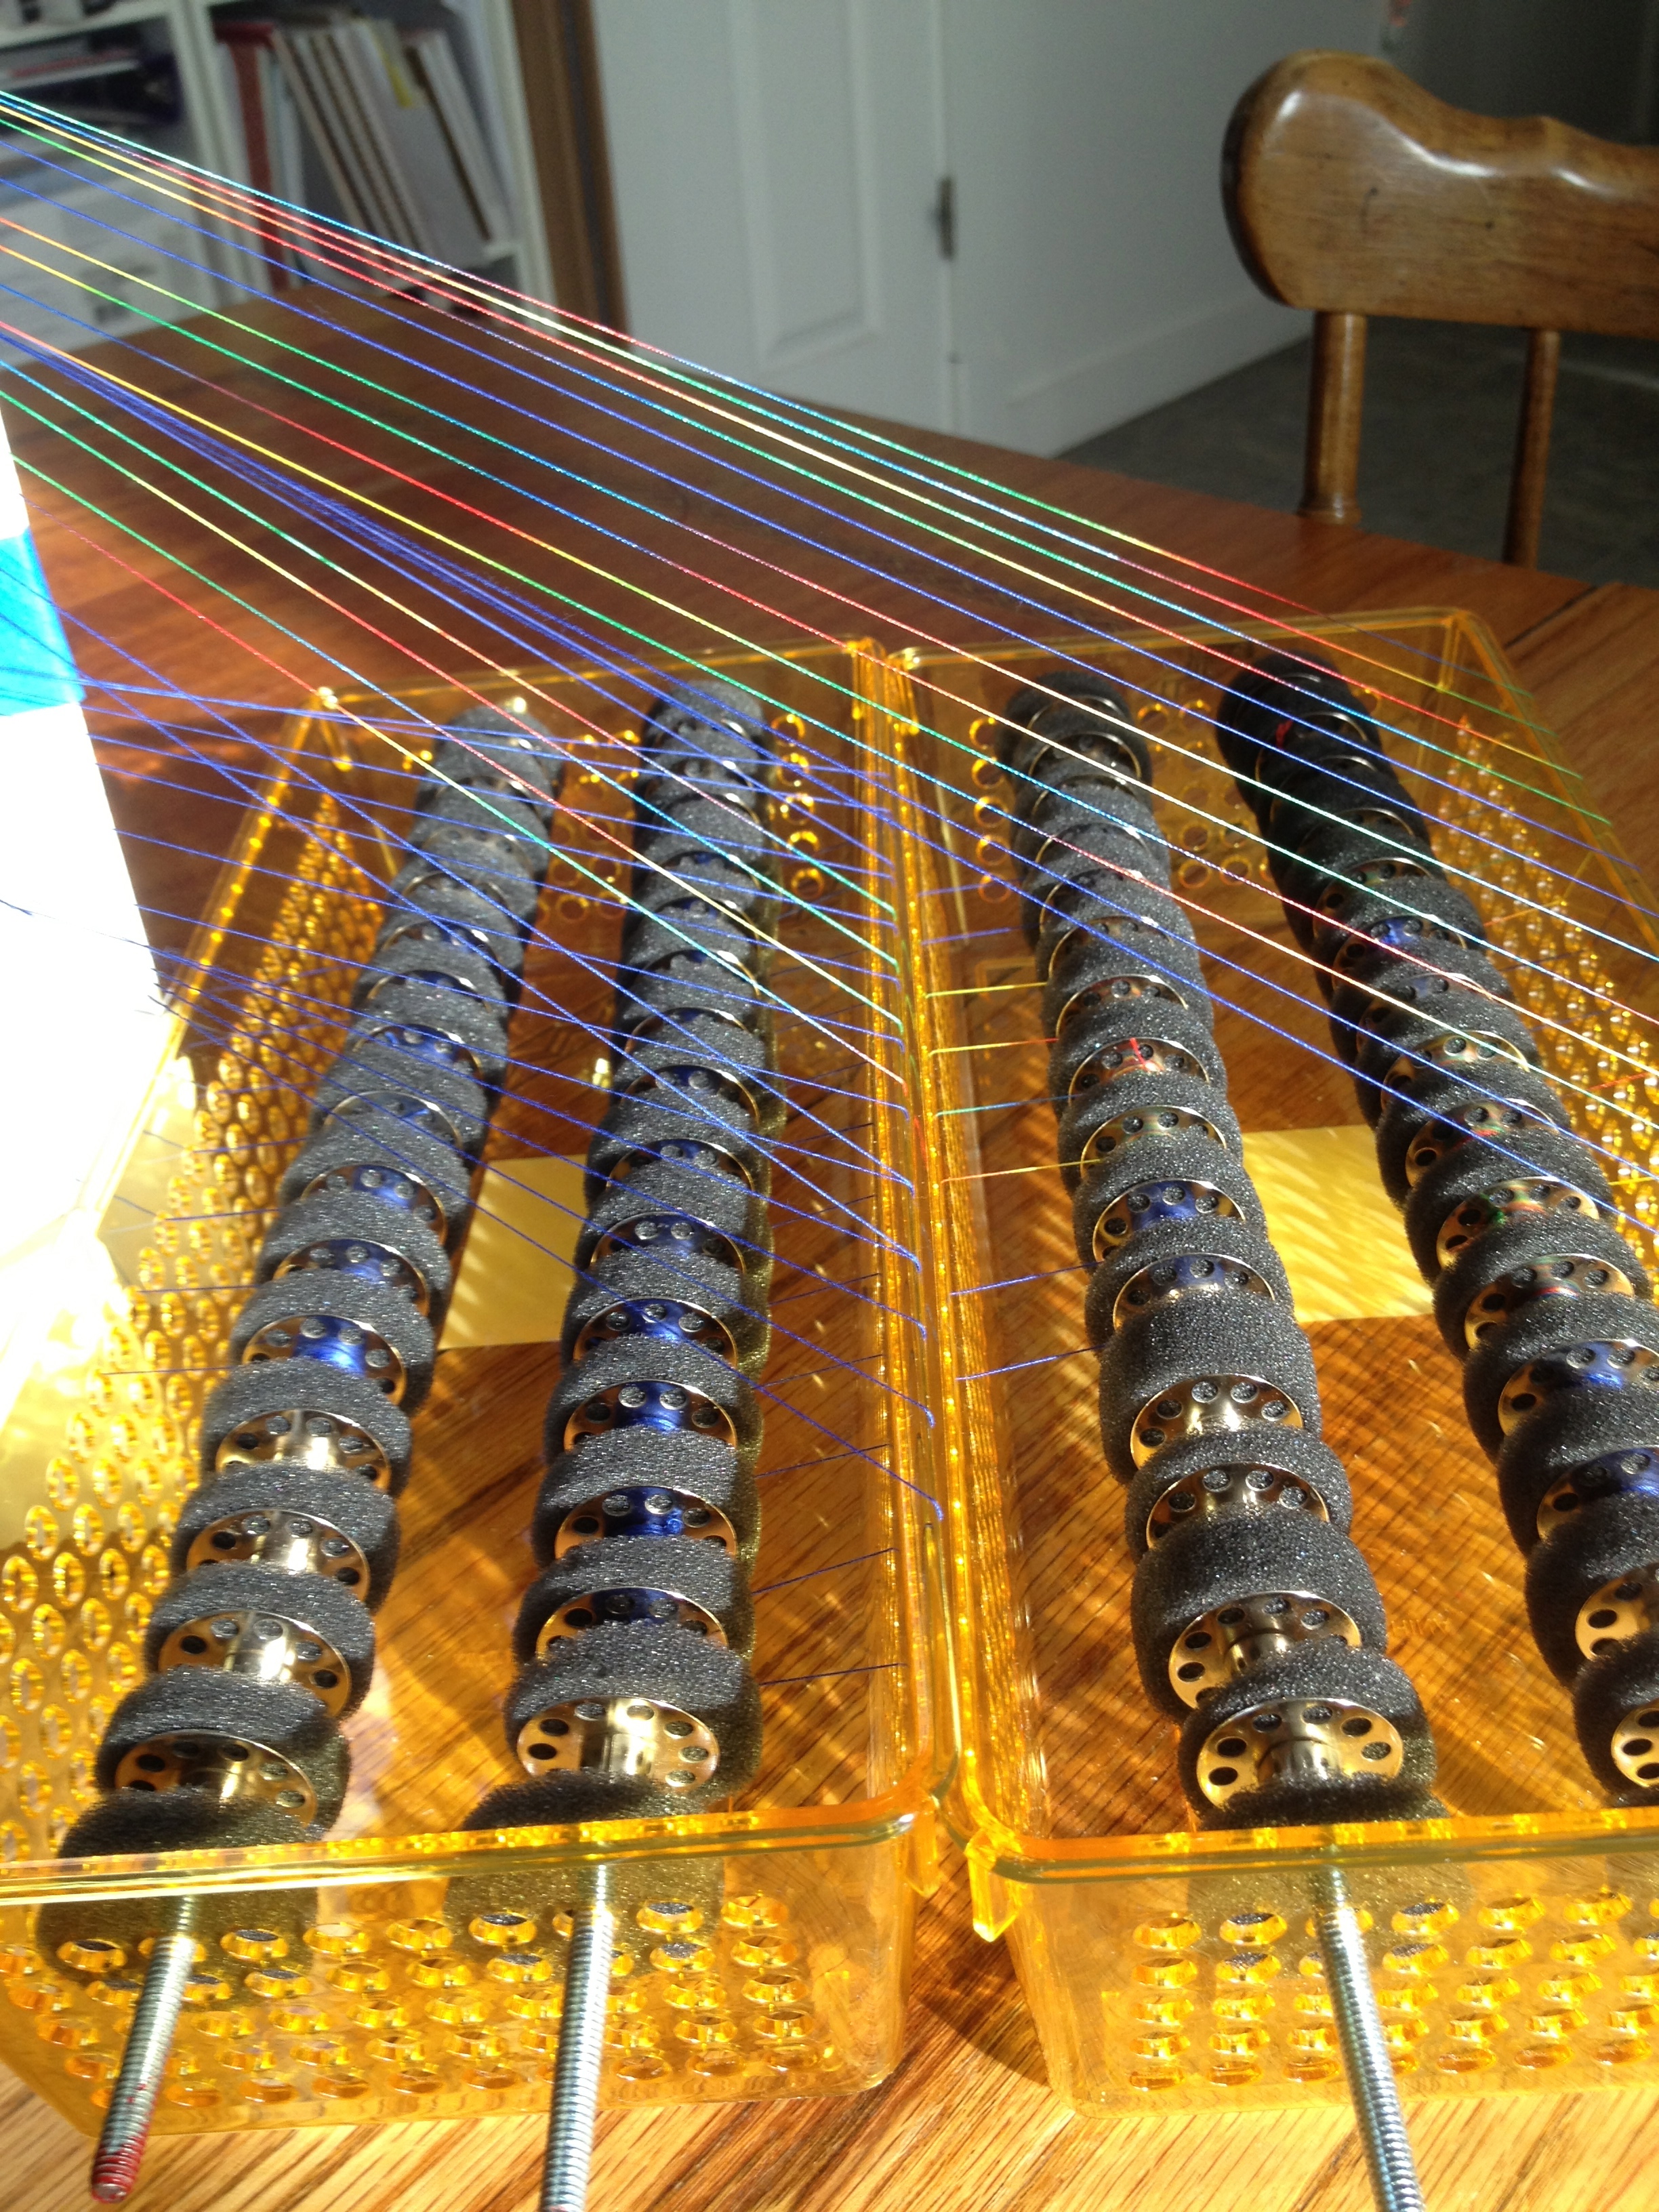 I wove on the loom. Using the creel option, I accomplished a few important things. The length the the material to be woven is controlled by the amount of thread on the bobbin – bobbins can be changed out as needed. The creel tensioning arrangement I designed permits fast assembly and easy rearrangement without tools. I used one creel box for unheddled threads and another for the heddled threads. Each creel box has a capacity of 30 threads. I also had the ability to adjust tension of each thread individually if necessary. The creel design simplified the loom design considerably.
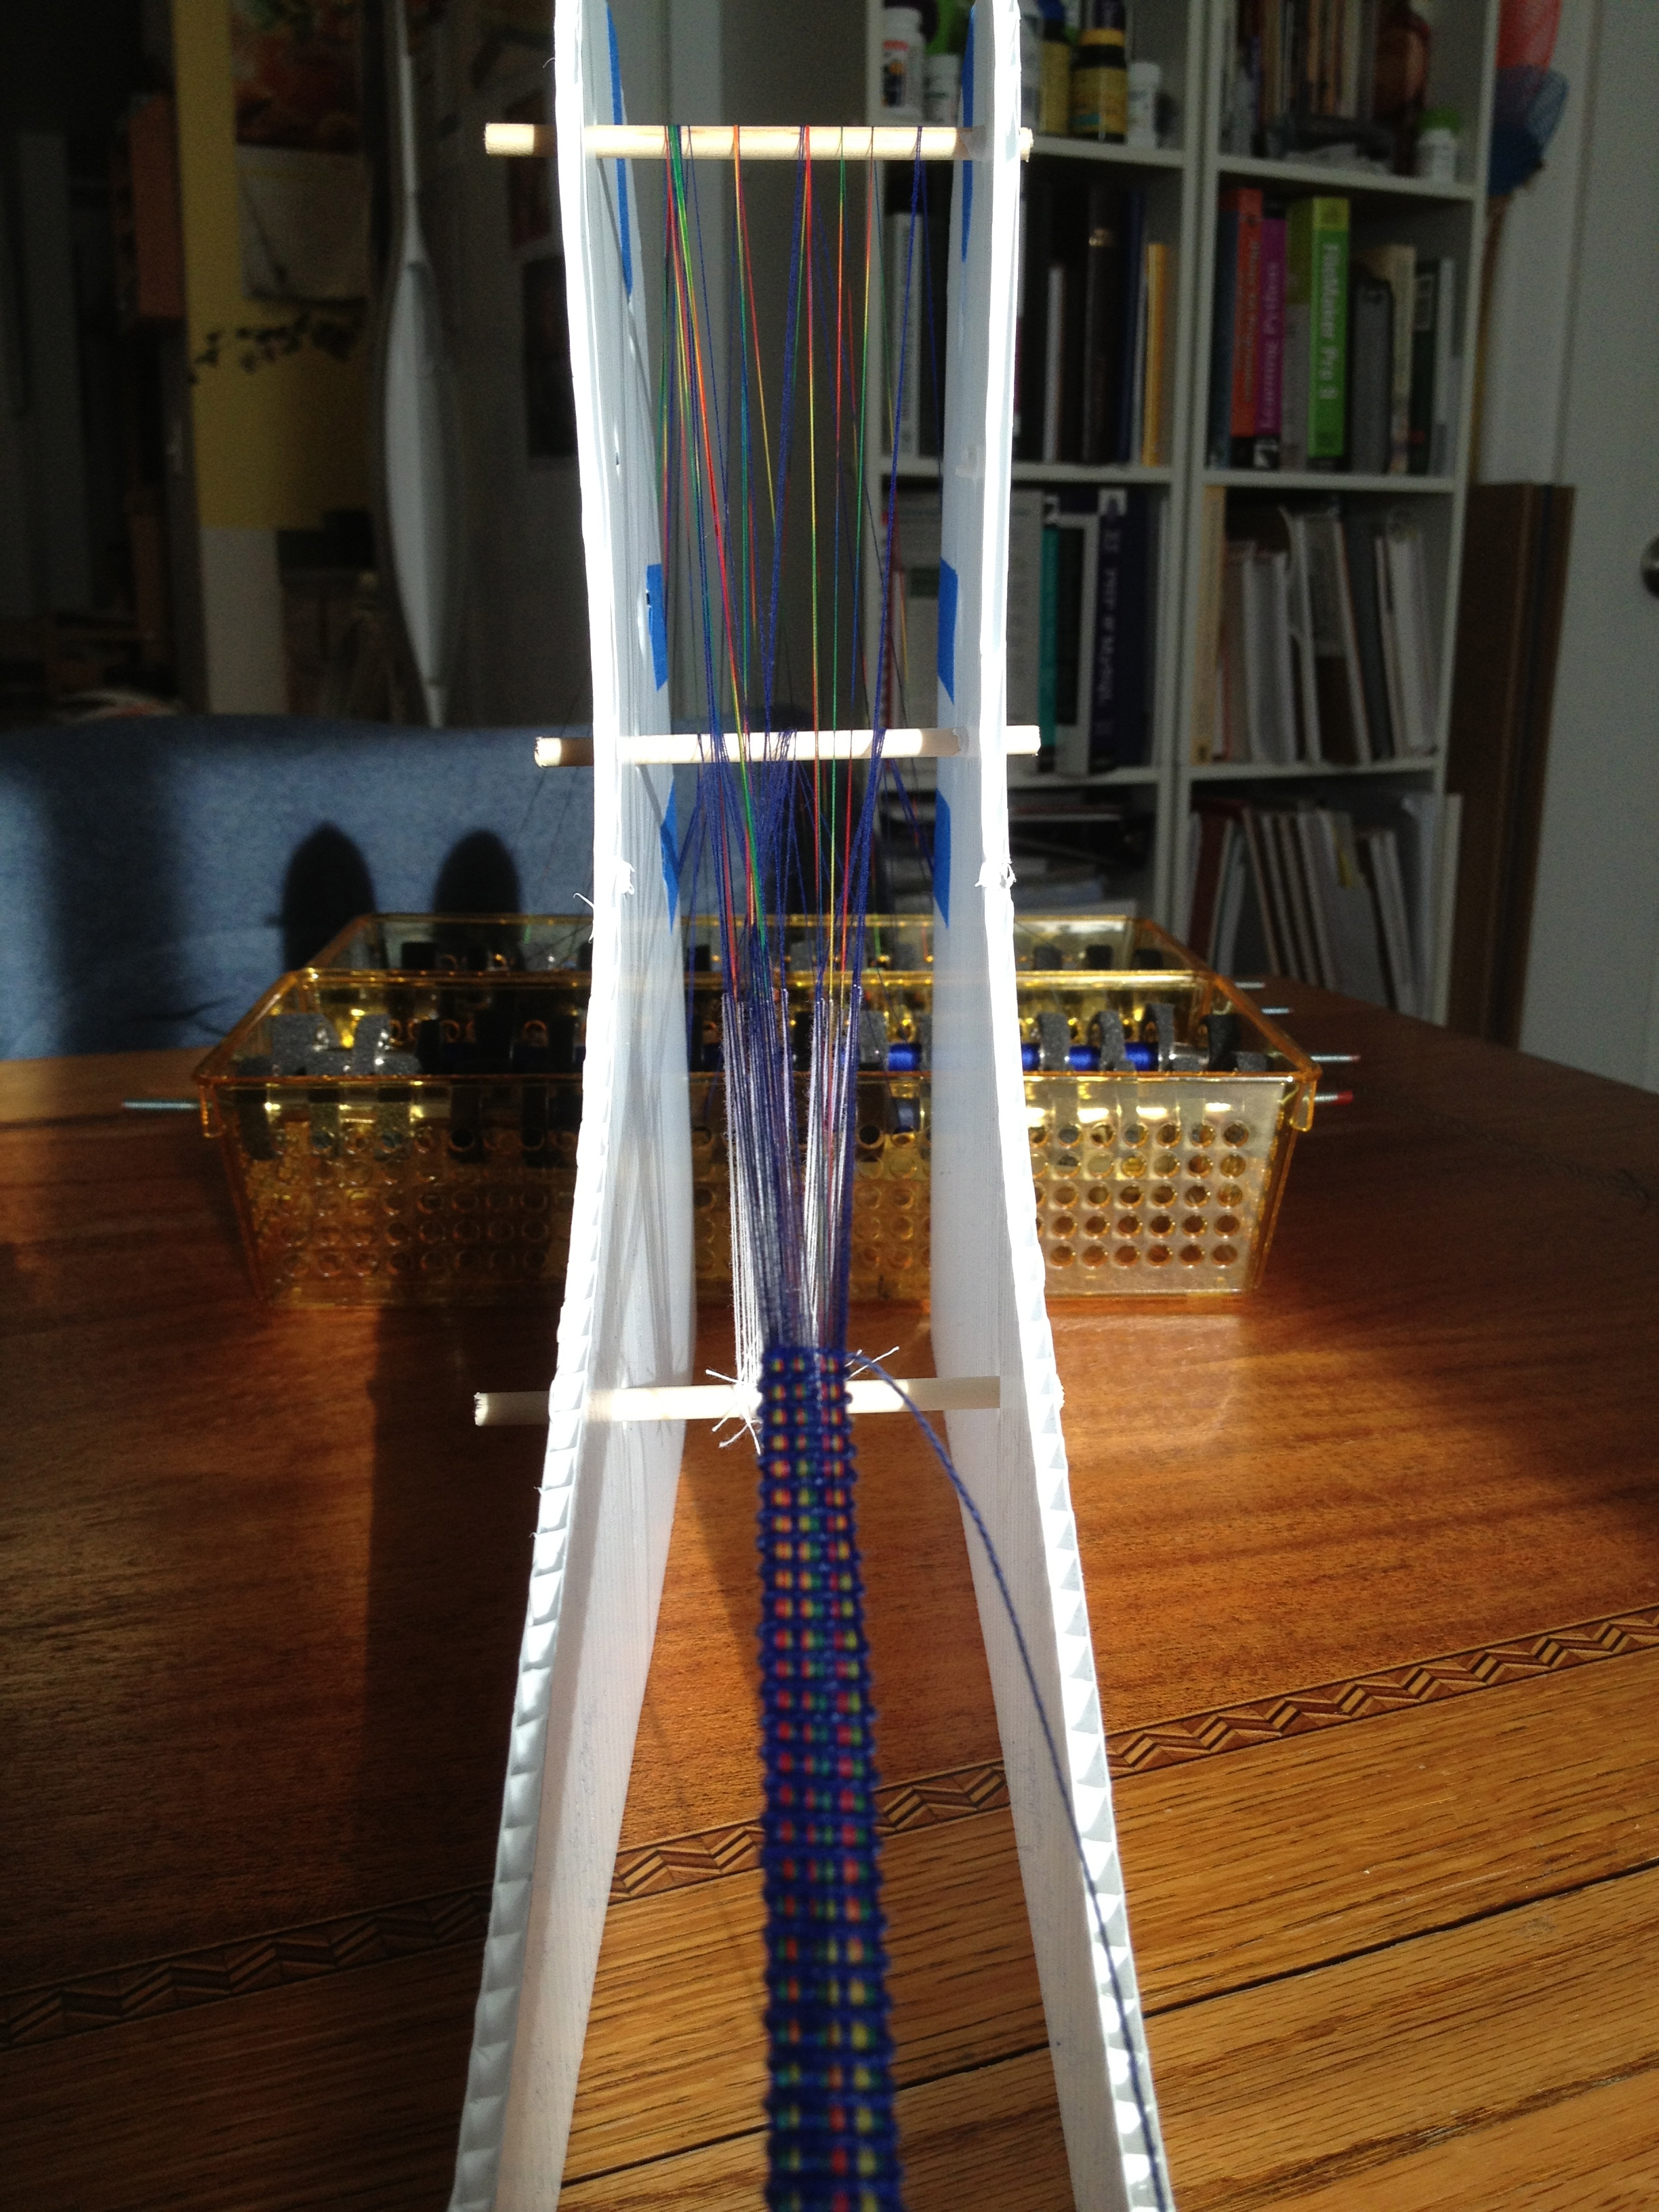
The loom is now principally a structure on which the creel threads are dressed for weaving there are no warp beams needed. I used the same coroplast structure as before and left the wooden dowels and the existing “cloth beam” in place.
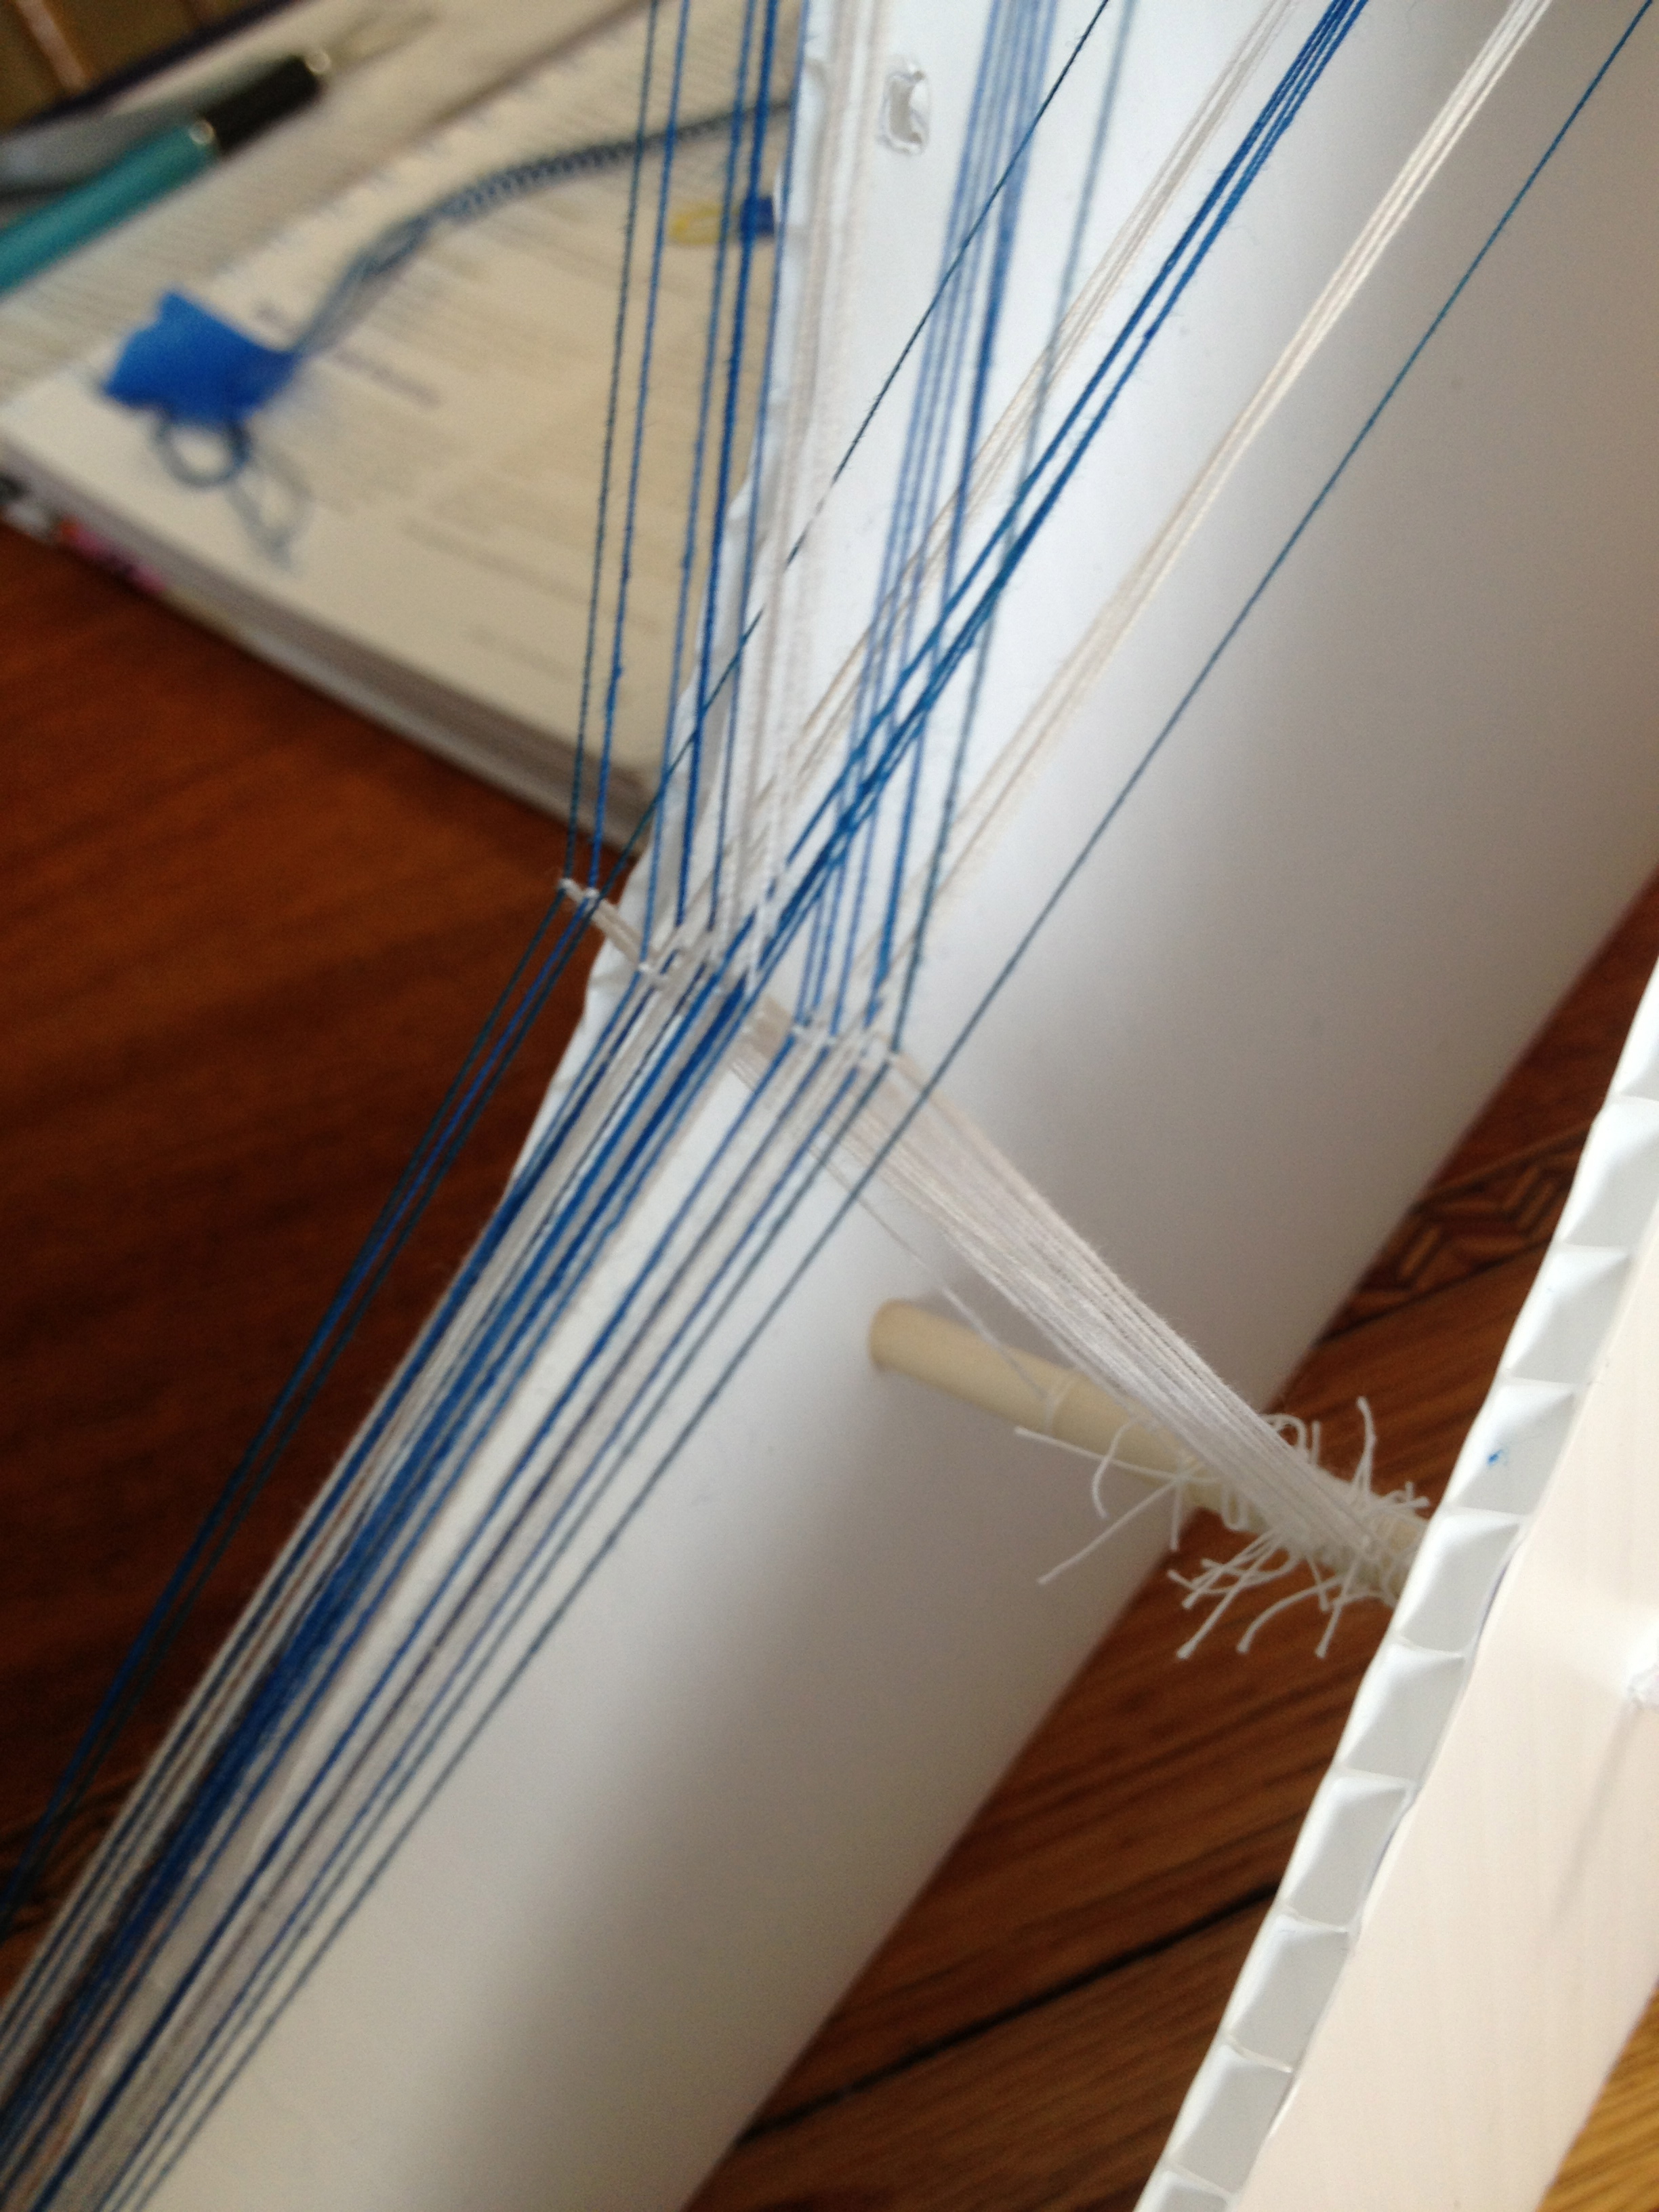
The blue tape, was used to cover the slots I had made in the loom in order to insert and remove the sectional beams during my earlier design tests. I used painter’s tape to ensure that the fine threads would not stray into the open slots while threading.
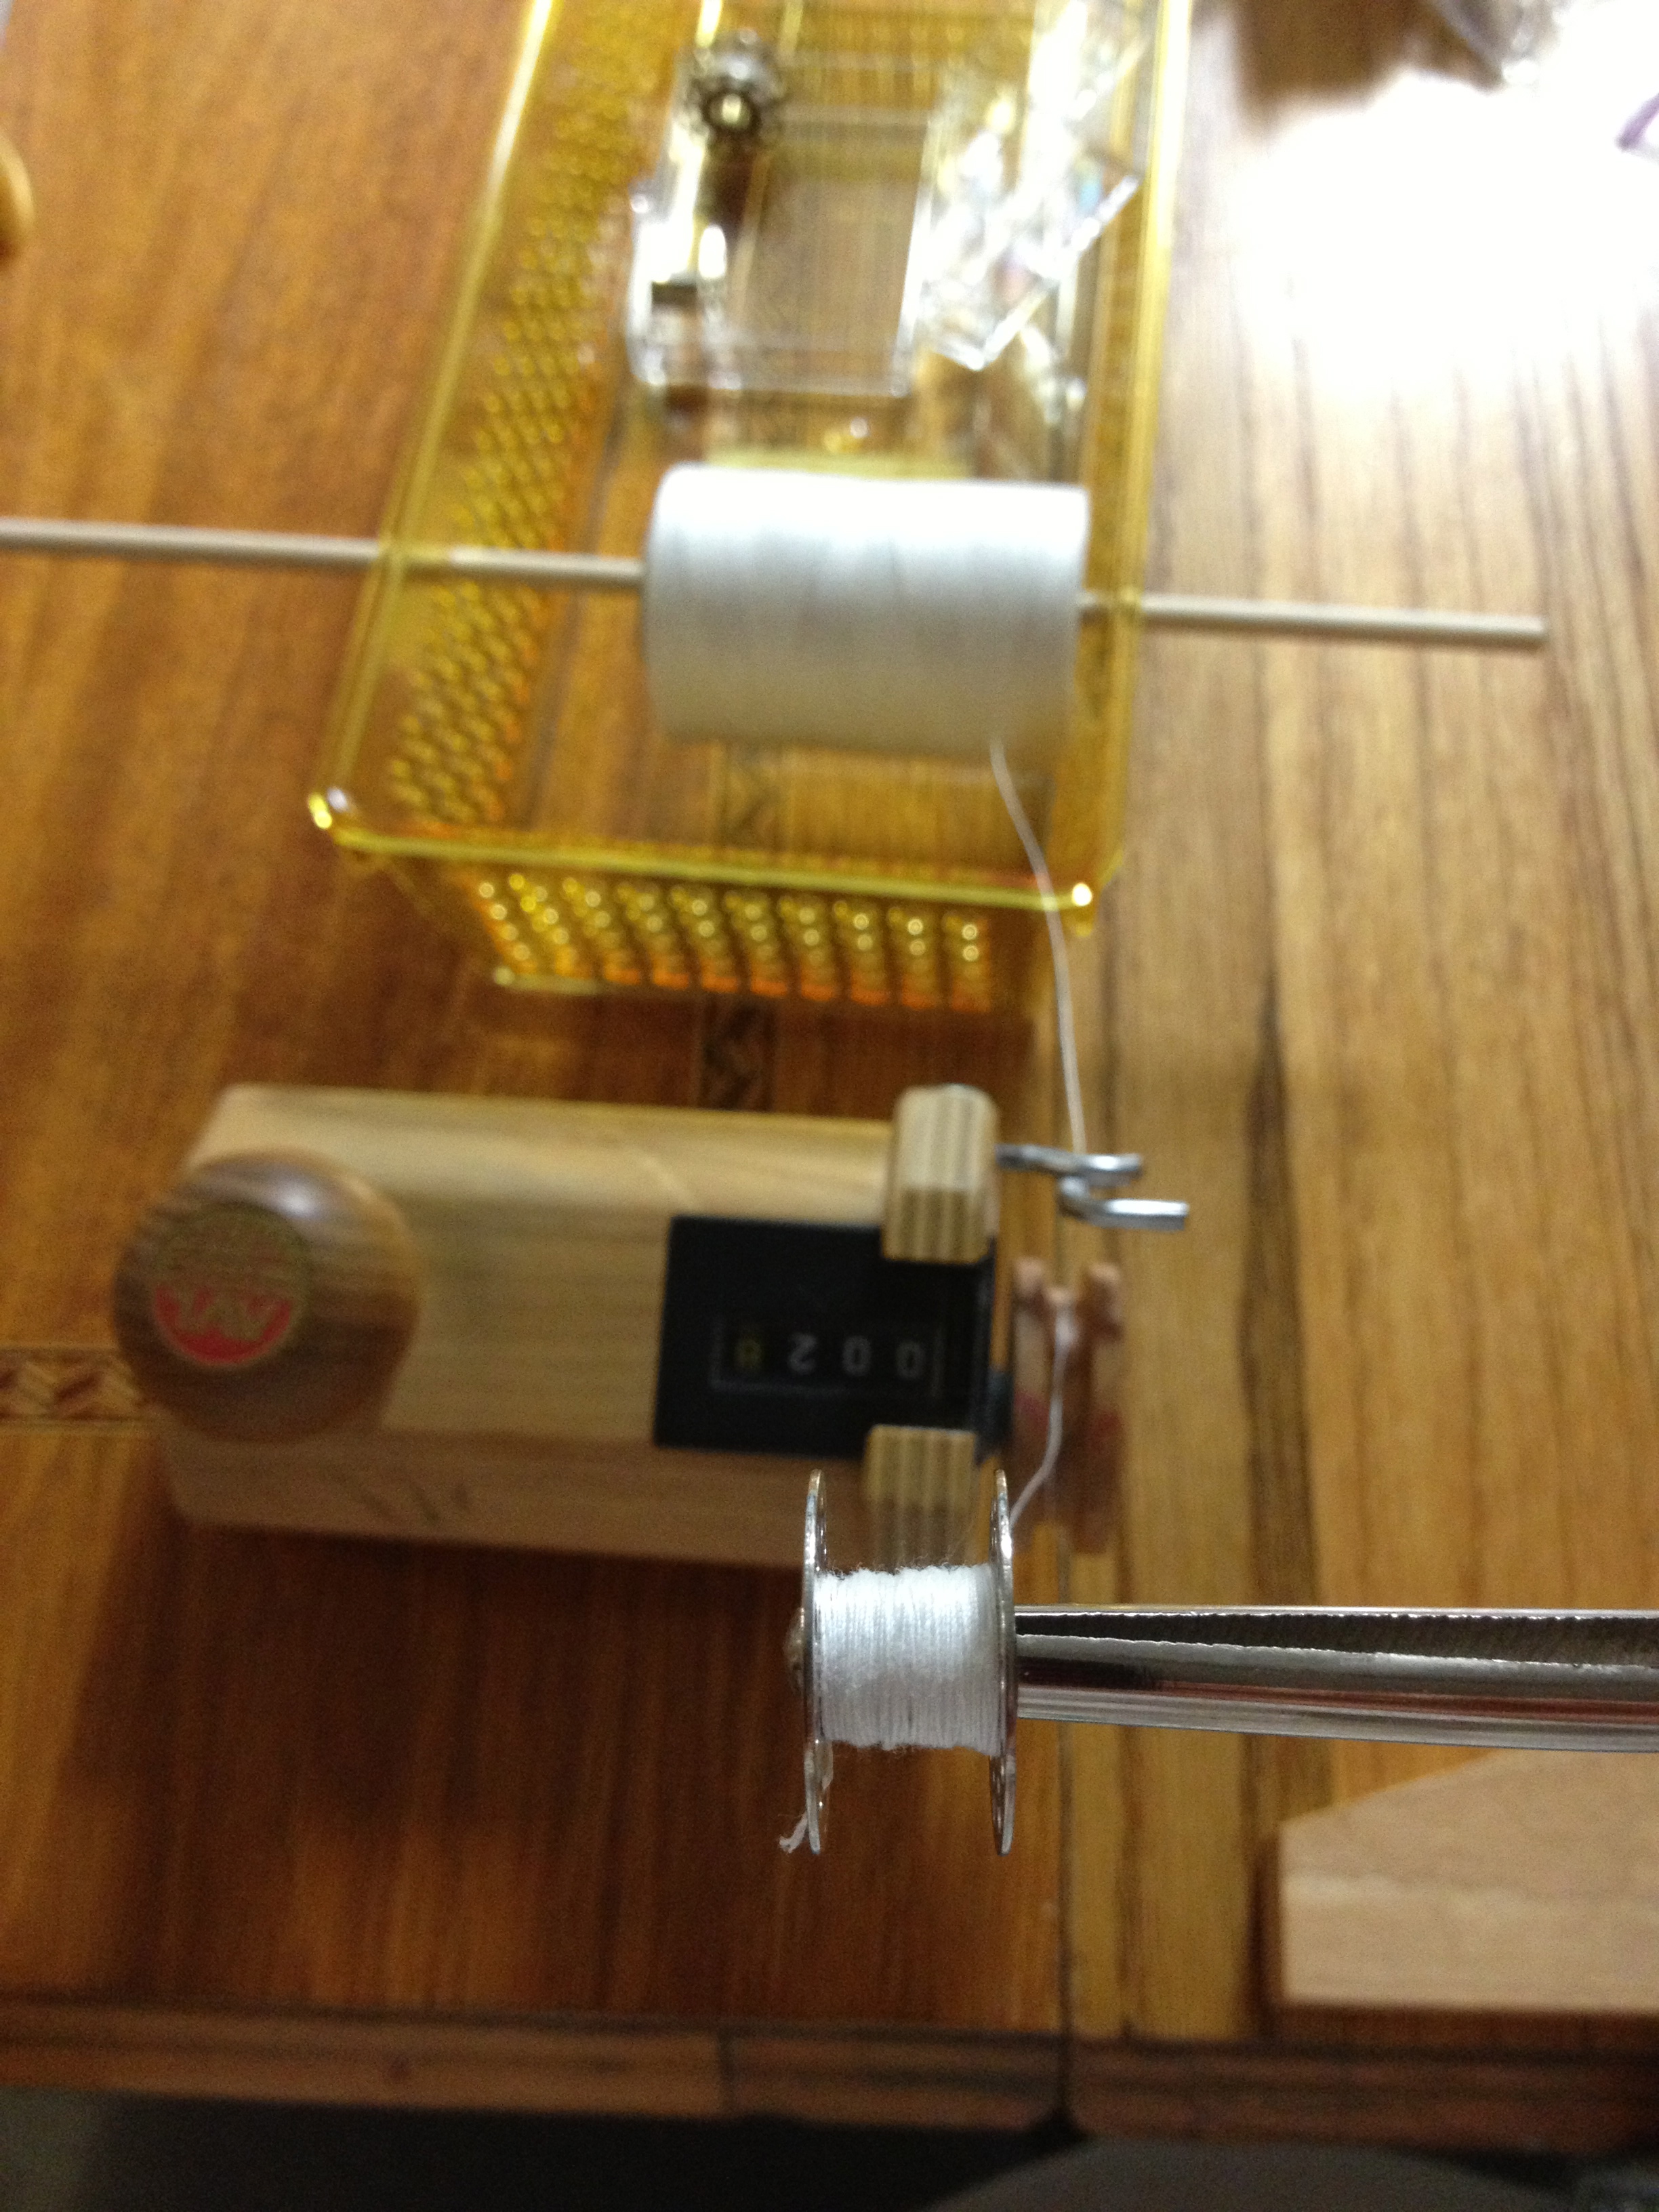
I also picked up a couple of tricks that made using this loom design even more inviting. Simplicity has a product called the SideWinder – a portable bobbin winder. I made use of this tool to wind my bobbins for this project. I also picked up a inexpensive yardage counter by Boye that made it convenient for me to measure the thread as it wound on to the bobbins. I placed the spools of thread on a spindle in the creel, threaded the thread through the yardage counter that was held to the work surface by suction cups, and continued the thread through the bobbin winder as specified in its instructions. Thirty nine bobbins with just the right amount of thread in less than 15 minutes. Awesome.
Threading the loom was a breeze. I lined up the bobbins matching the inkle draft, drew the thread through the holes on the sides of the creel next to the bobbin. I then threaded the top creel through the heddles and alternated it with a thread from the bottom creel. I was ready to weave in less than an hour.
The creel was made using a package of foam hair rollers cut into “washers” , 12″ pieces of all thread, and sewing machine bobbins. The case for the creel was picked up at a local dollar store. Its primary feature is that its perforations held the all thread rods and the length would support 15 bobbins. Please use the comment box and let me know if you are interested in obtaining plans for this loom.